List of Illustrations
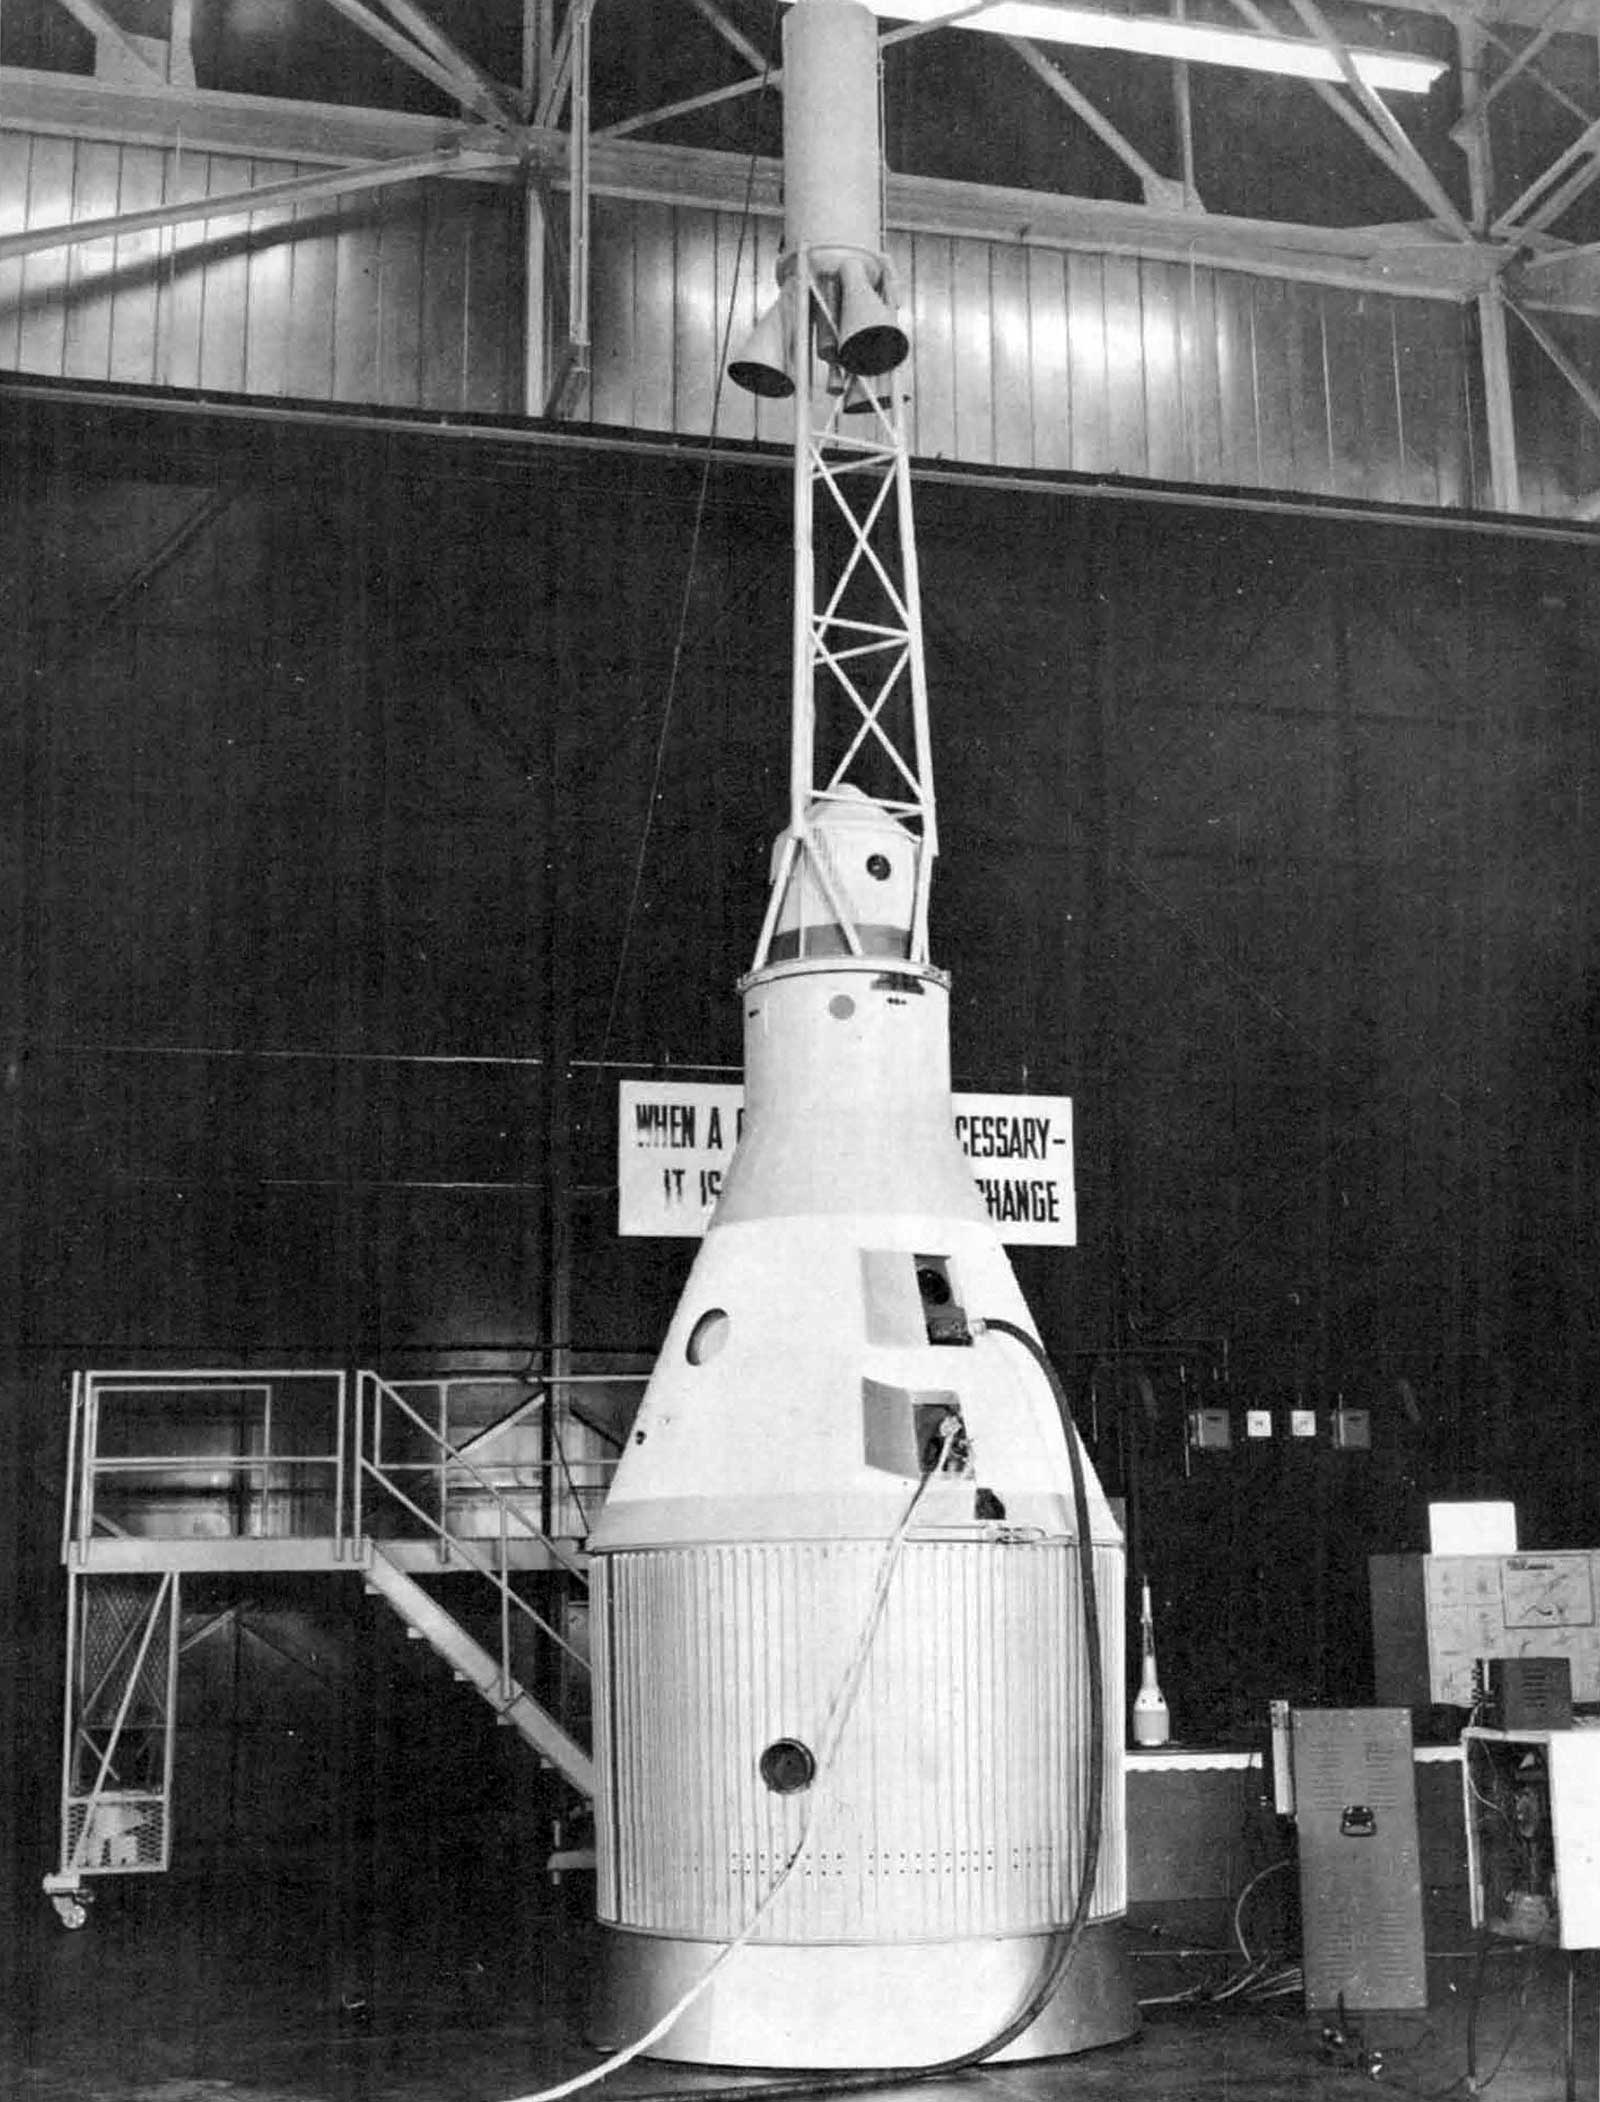
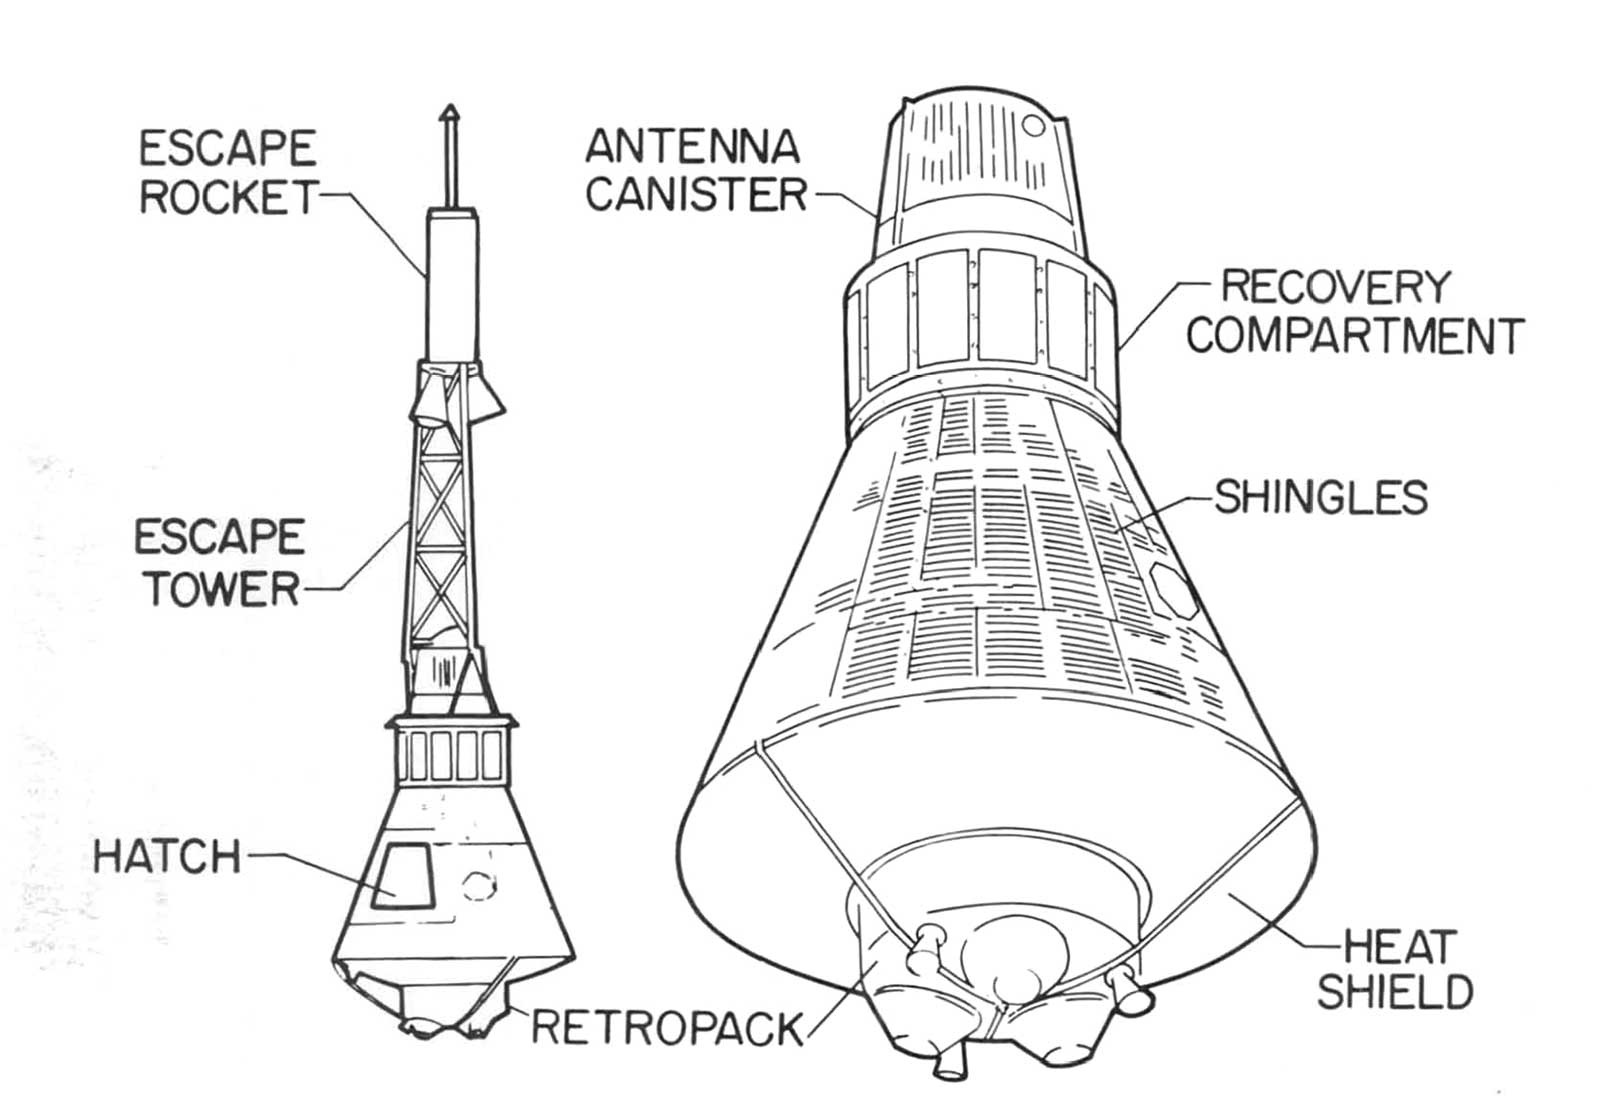
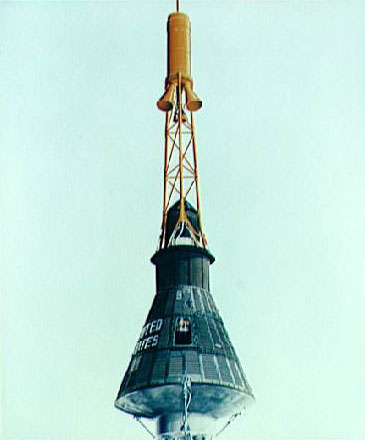 Frontispiece: Mercury spacecraft with escape tower
- Figure 1: Closeup view of Recruit Escape Rocket and full-scale spacecraft
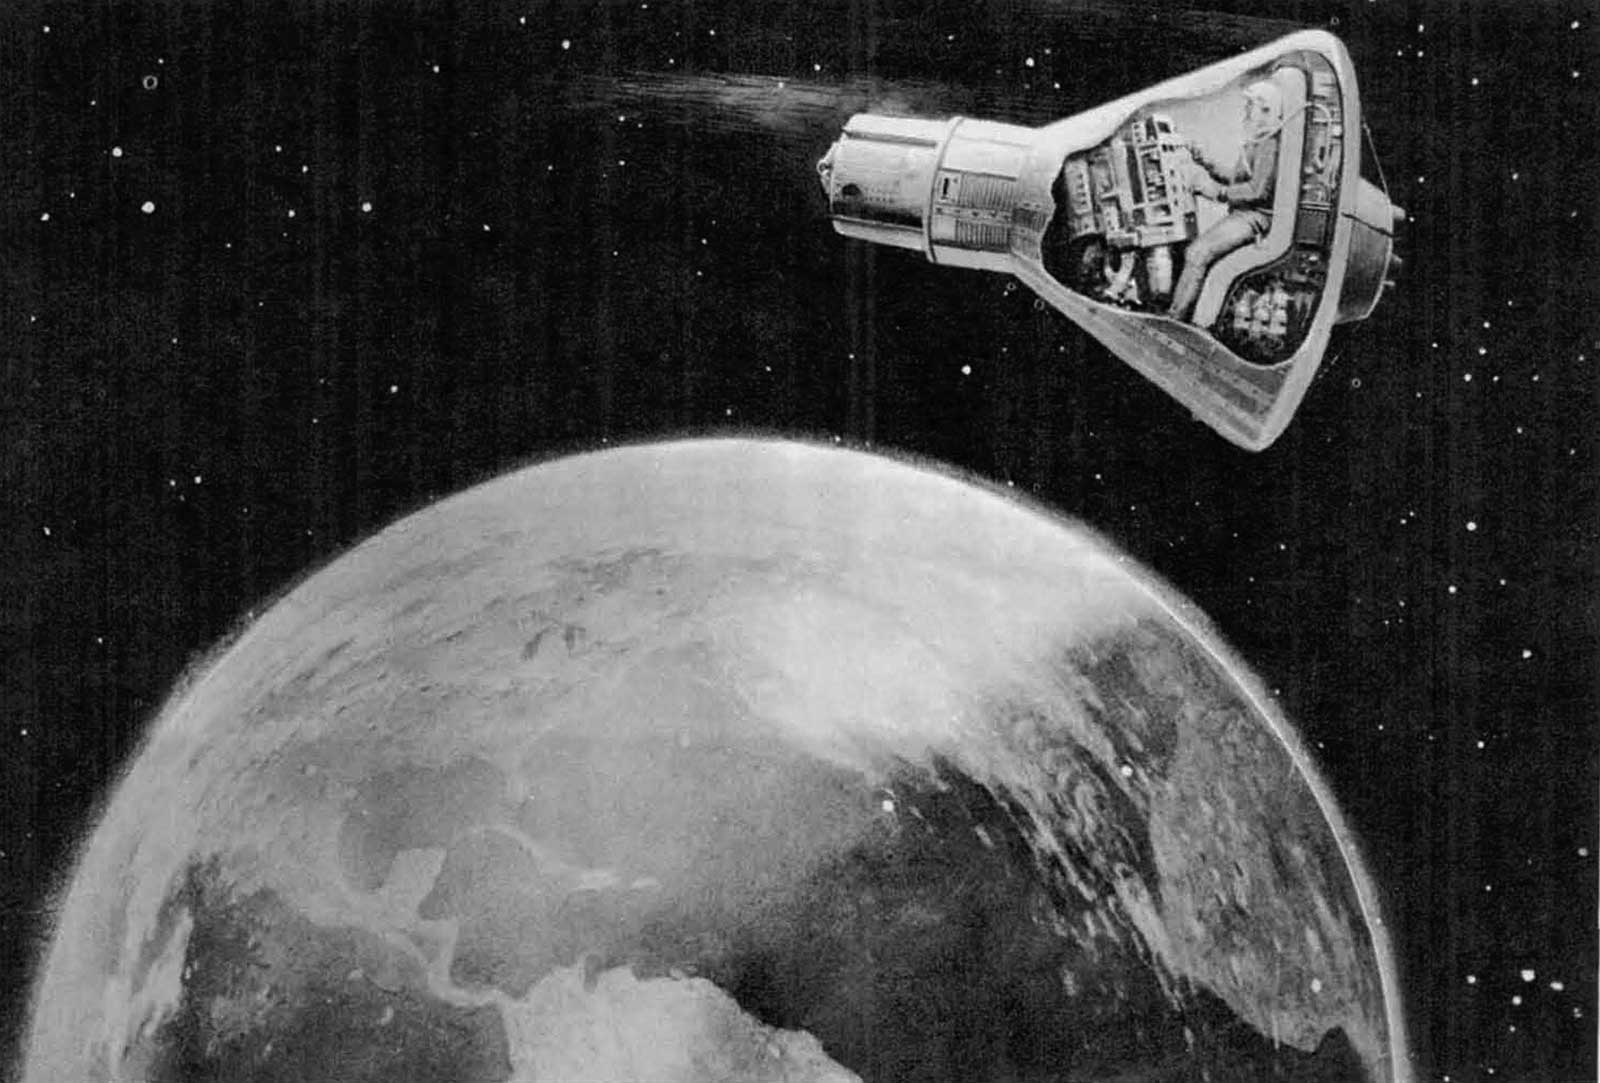
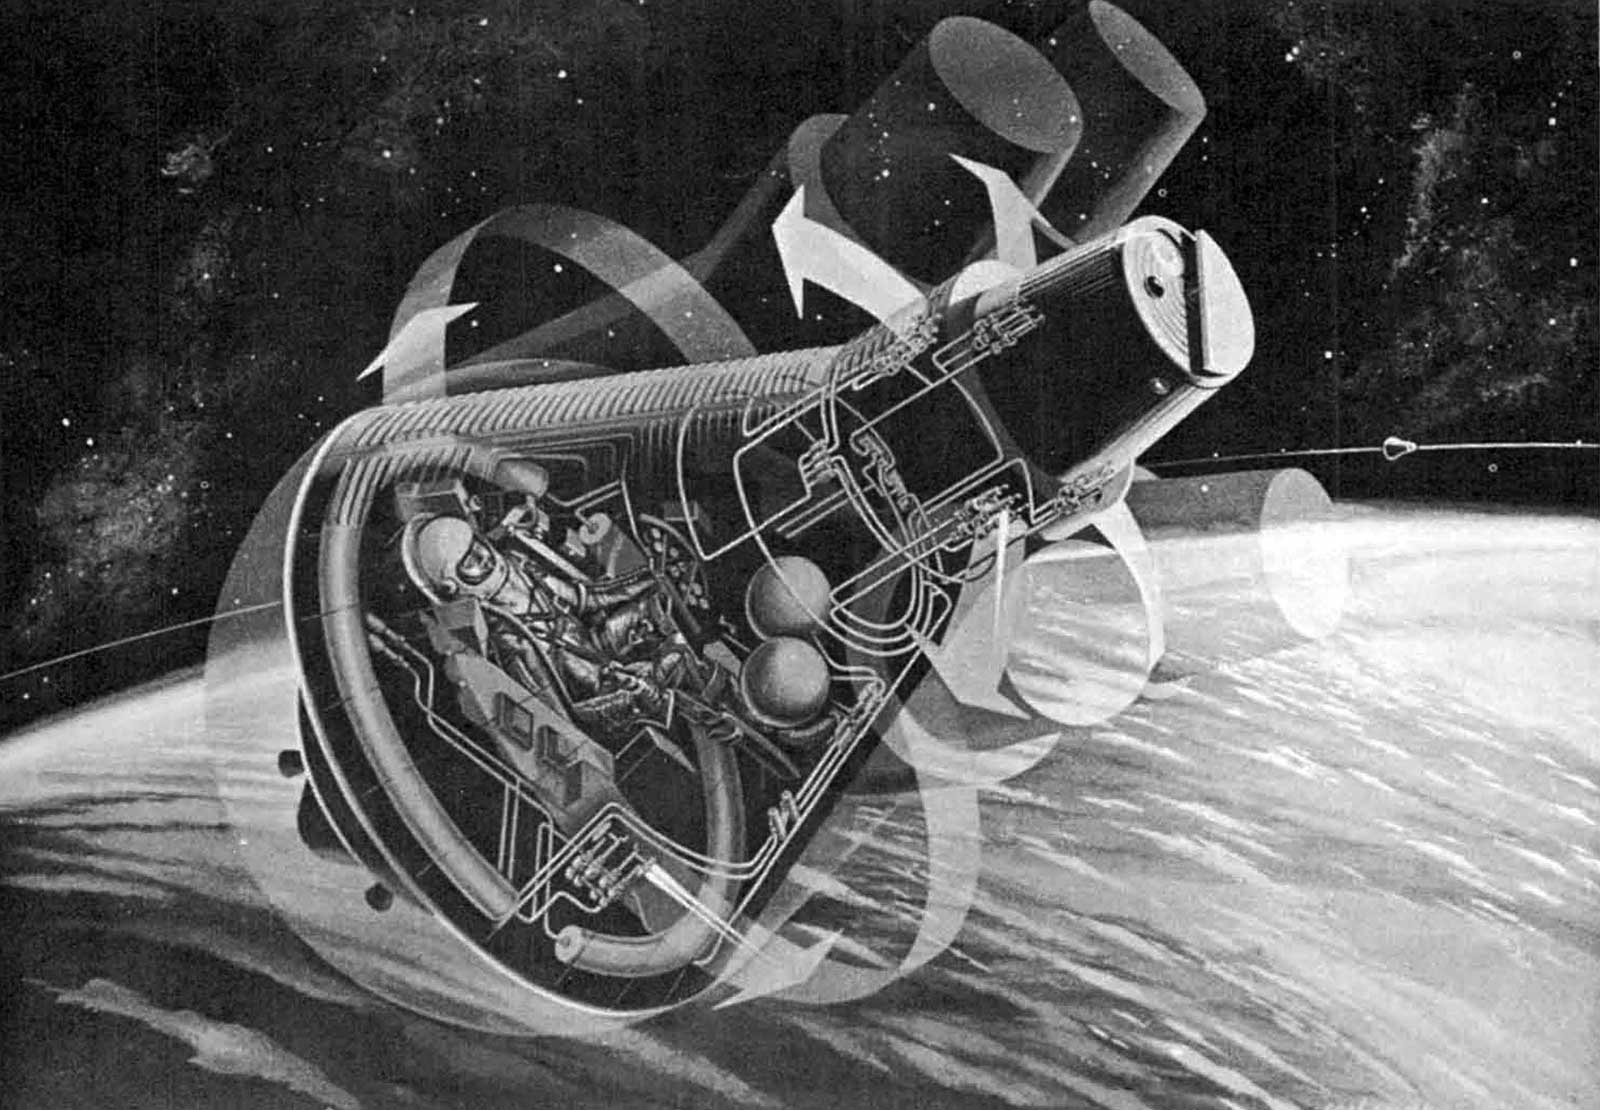
- Figure 2: Mercury spacecraft in orbit: Artist's conception
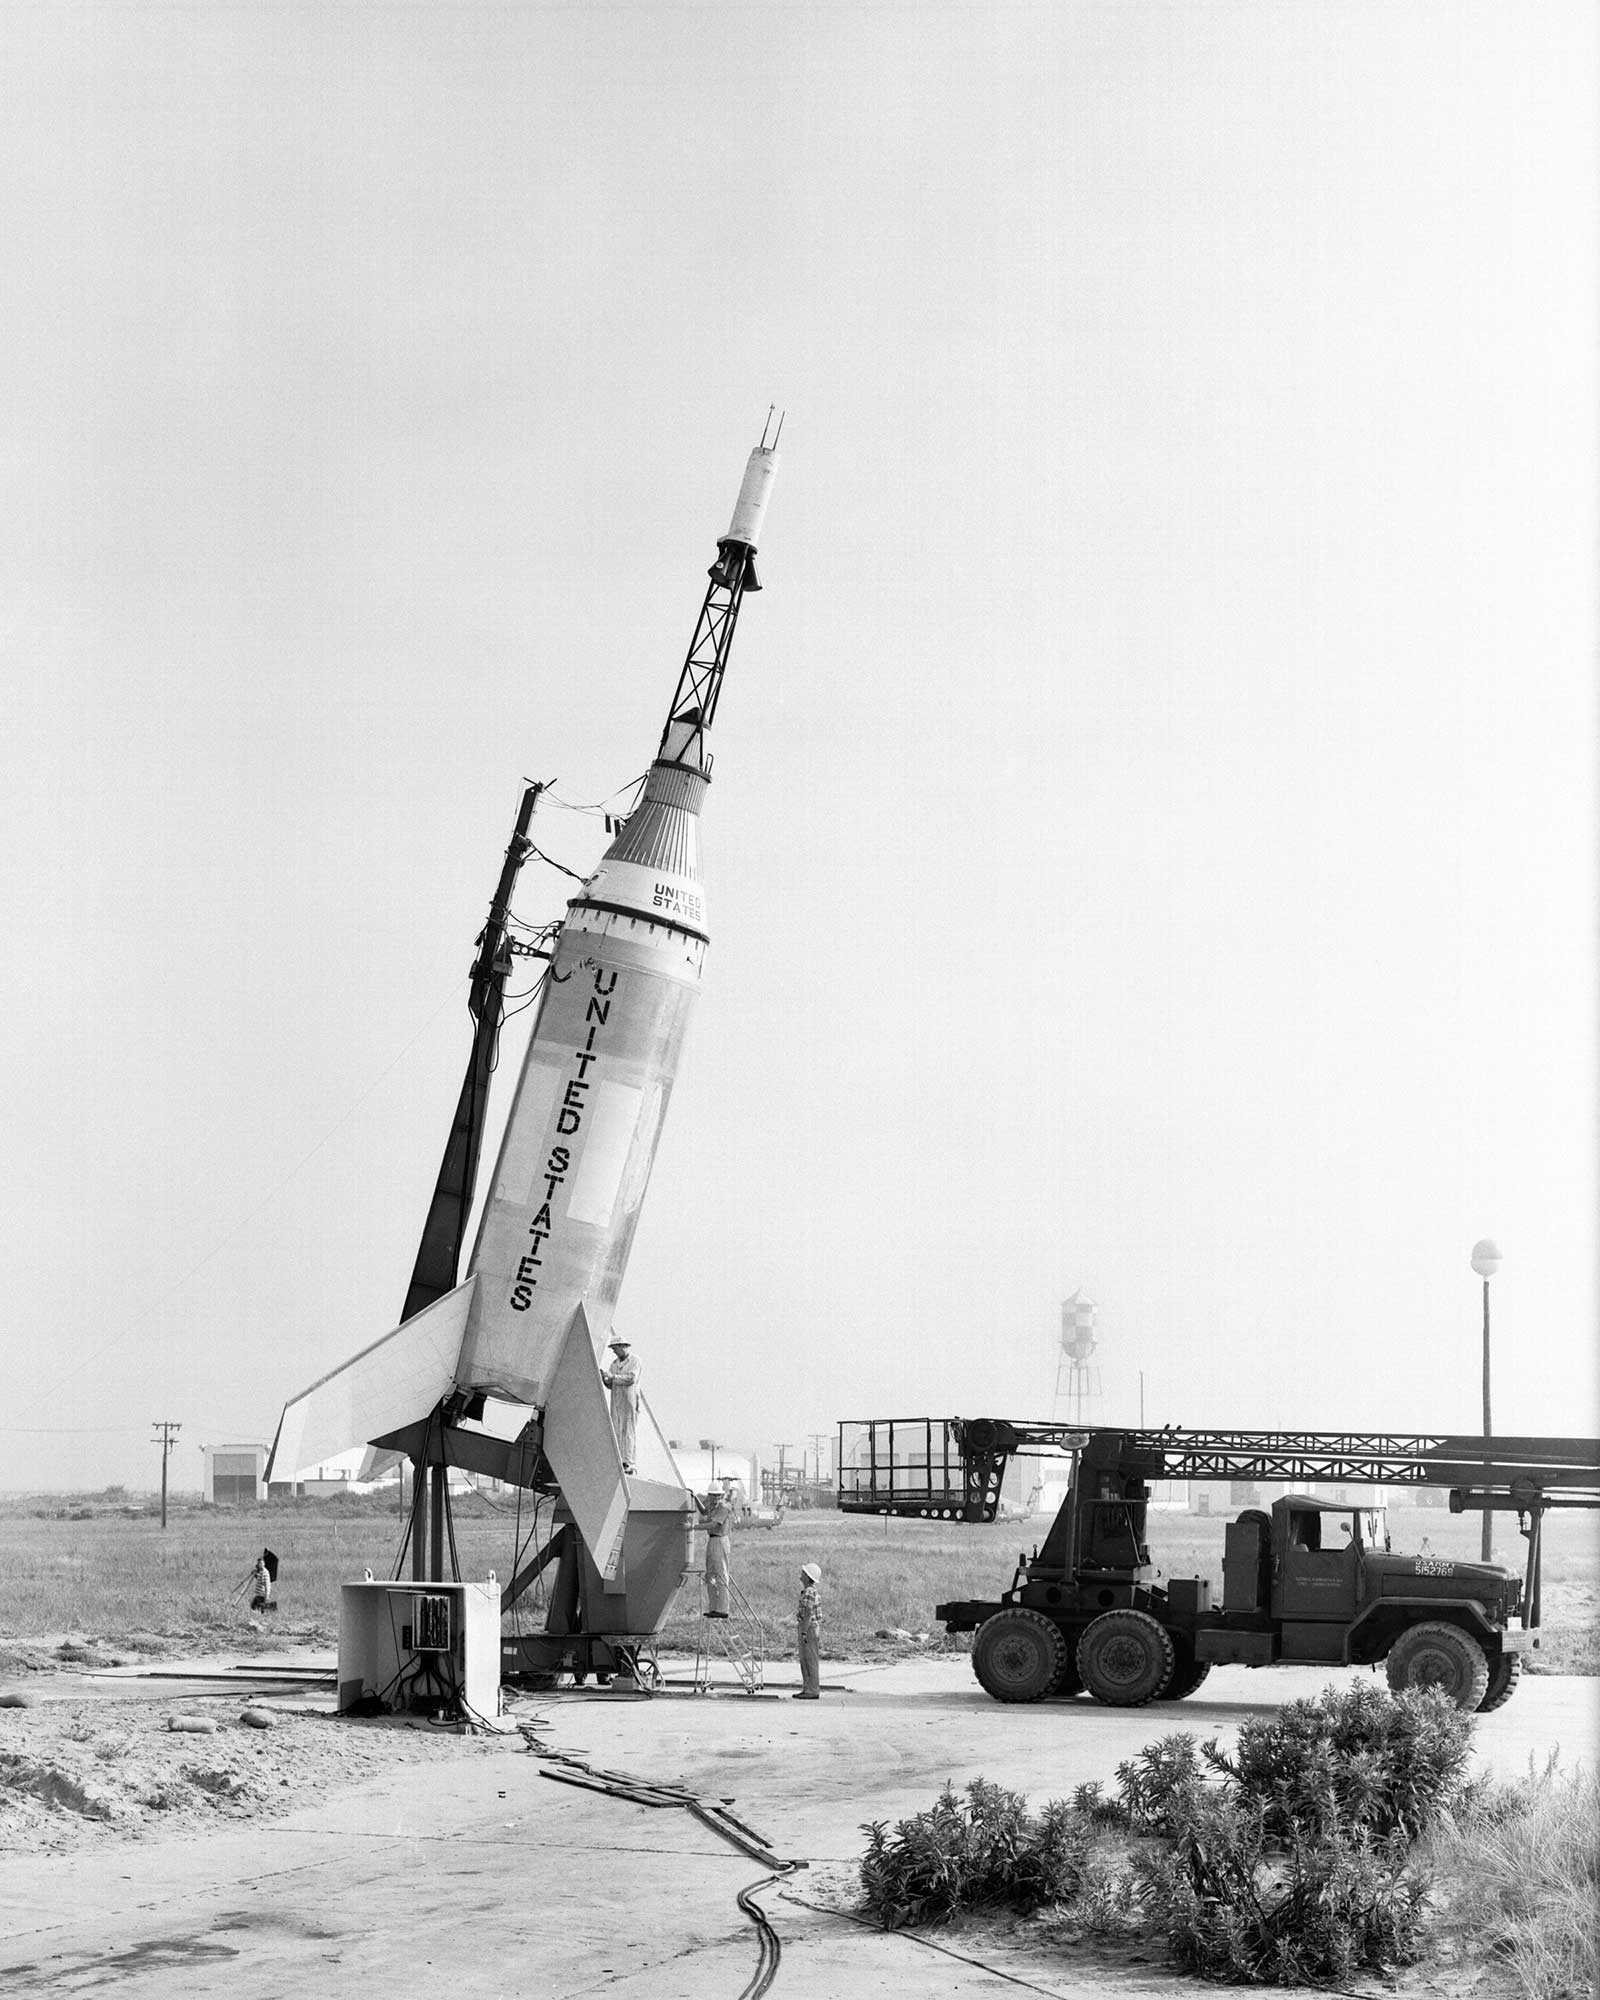
- Figure 3: Little Joe on launcher at Wallops during checkout
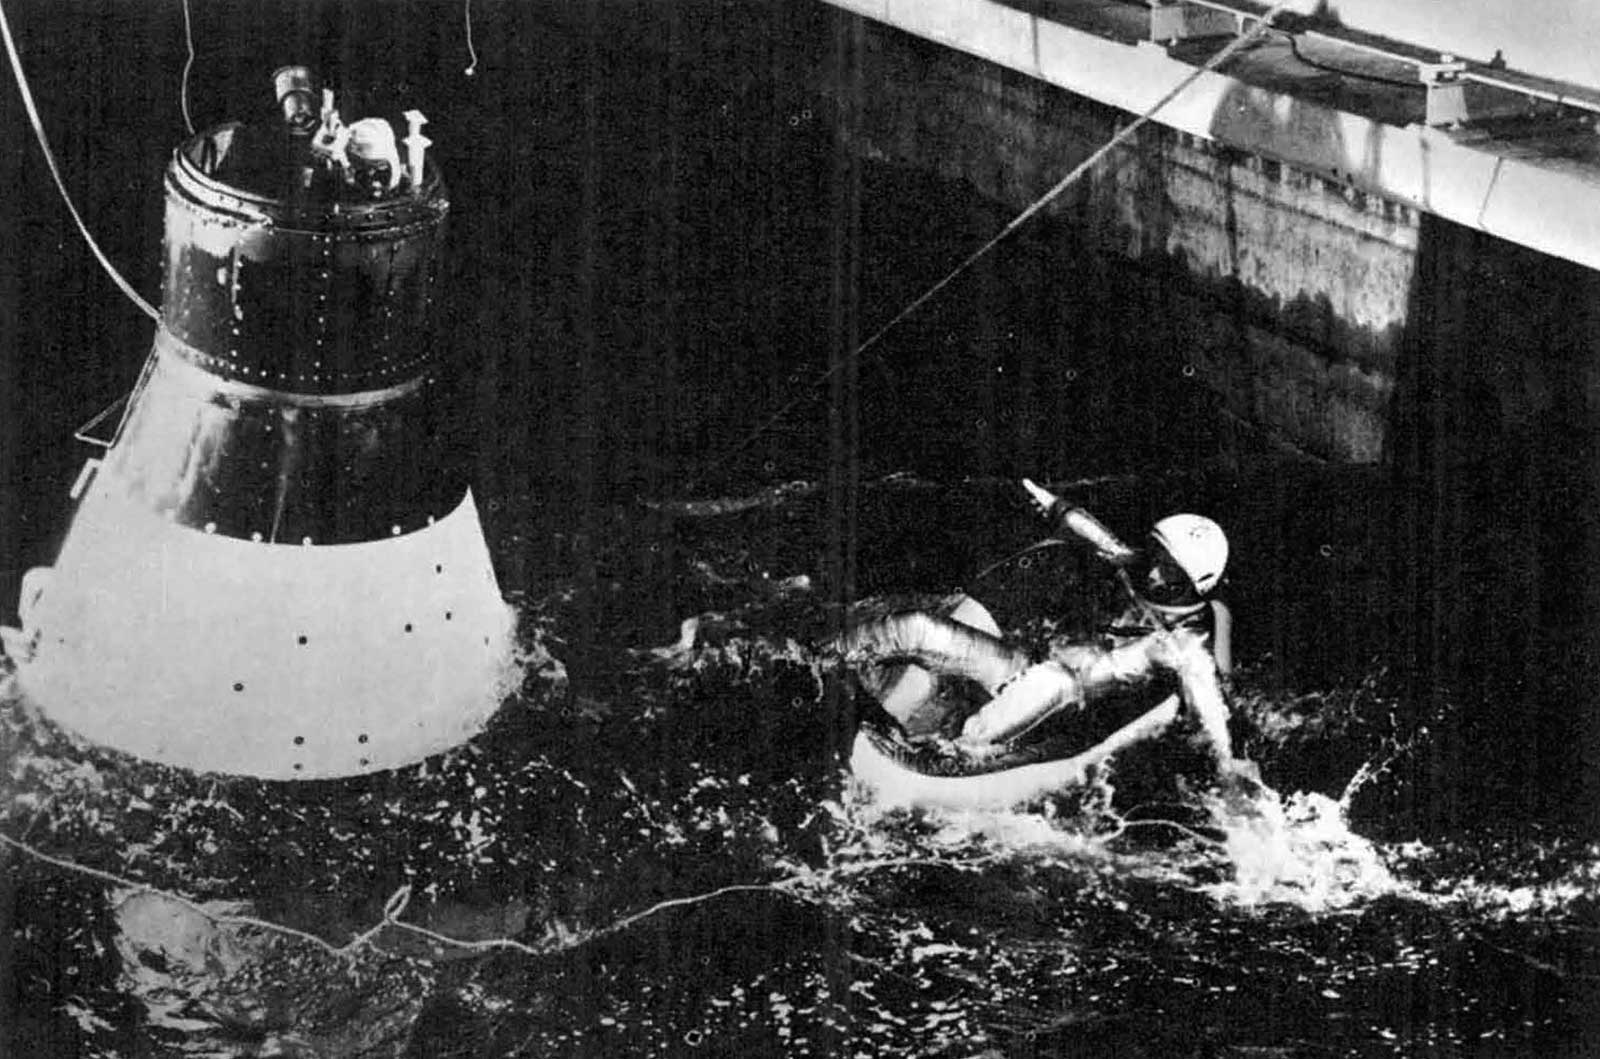
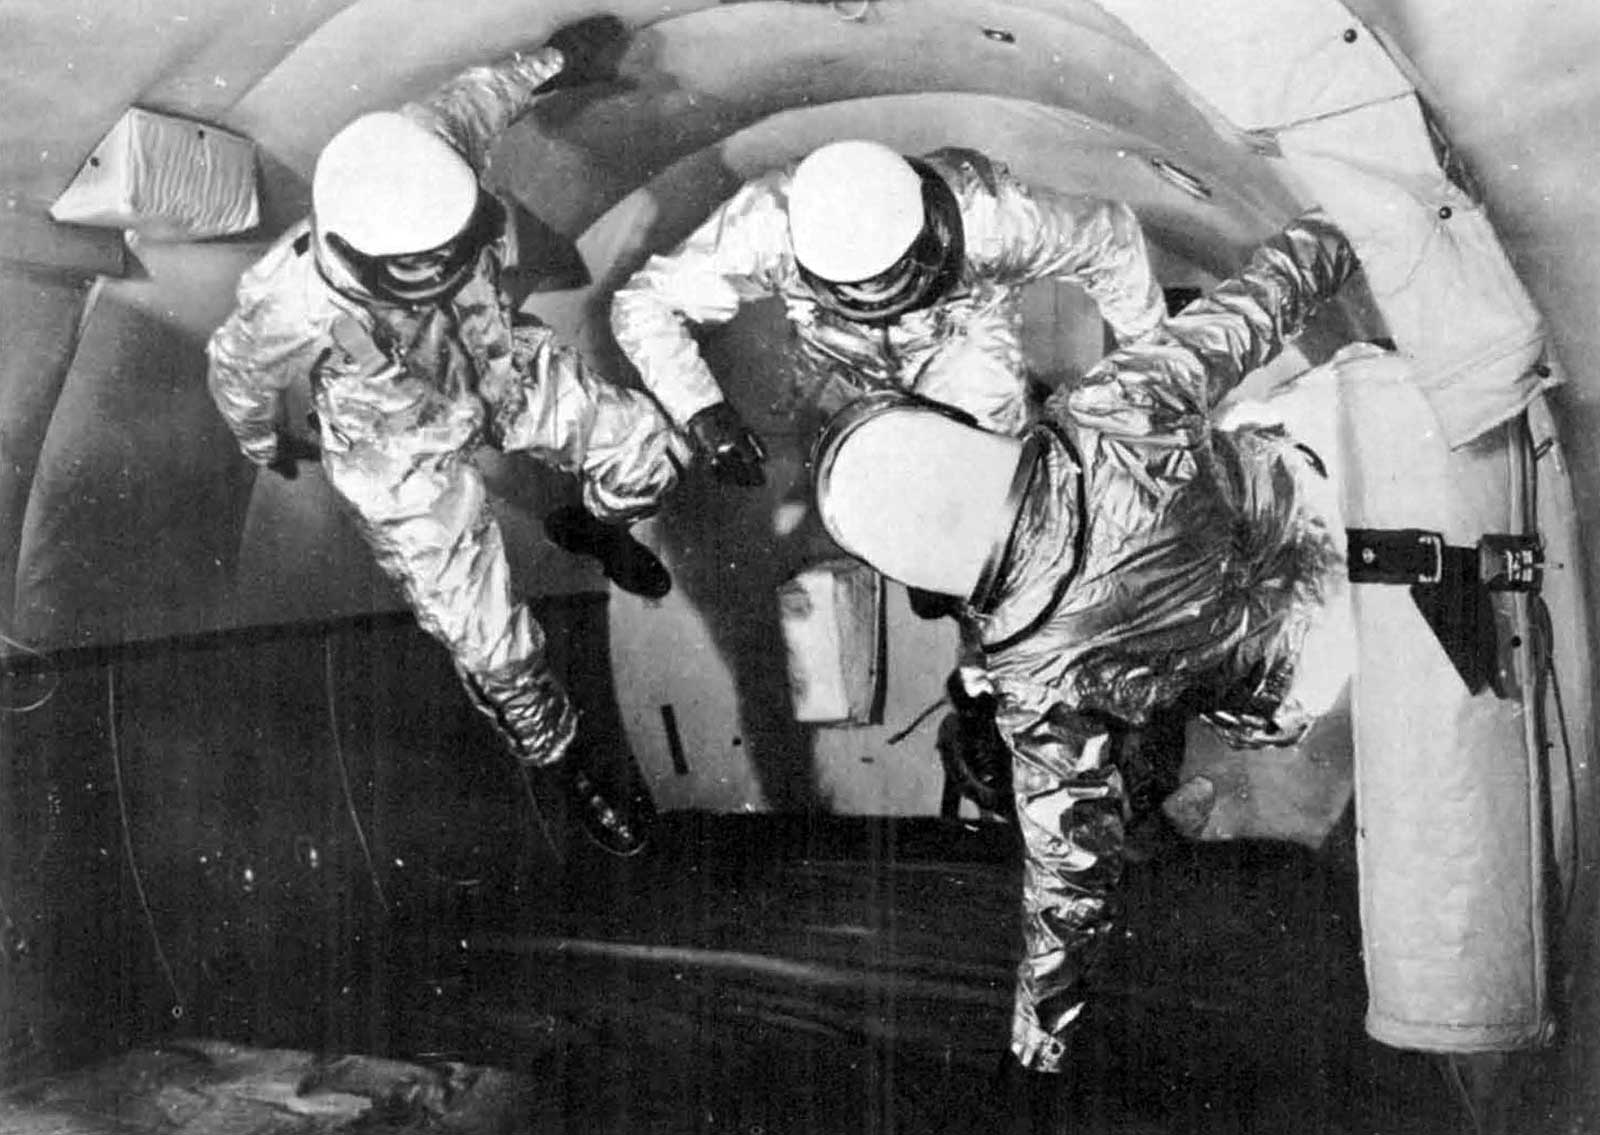
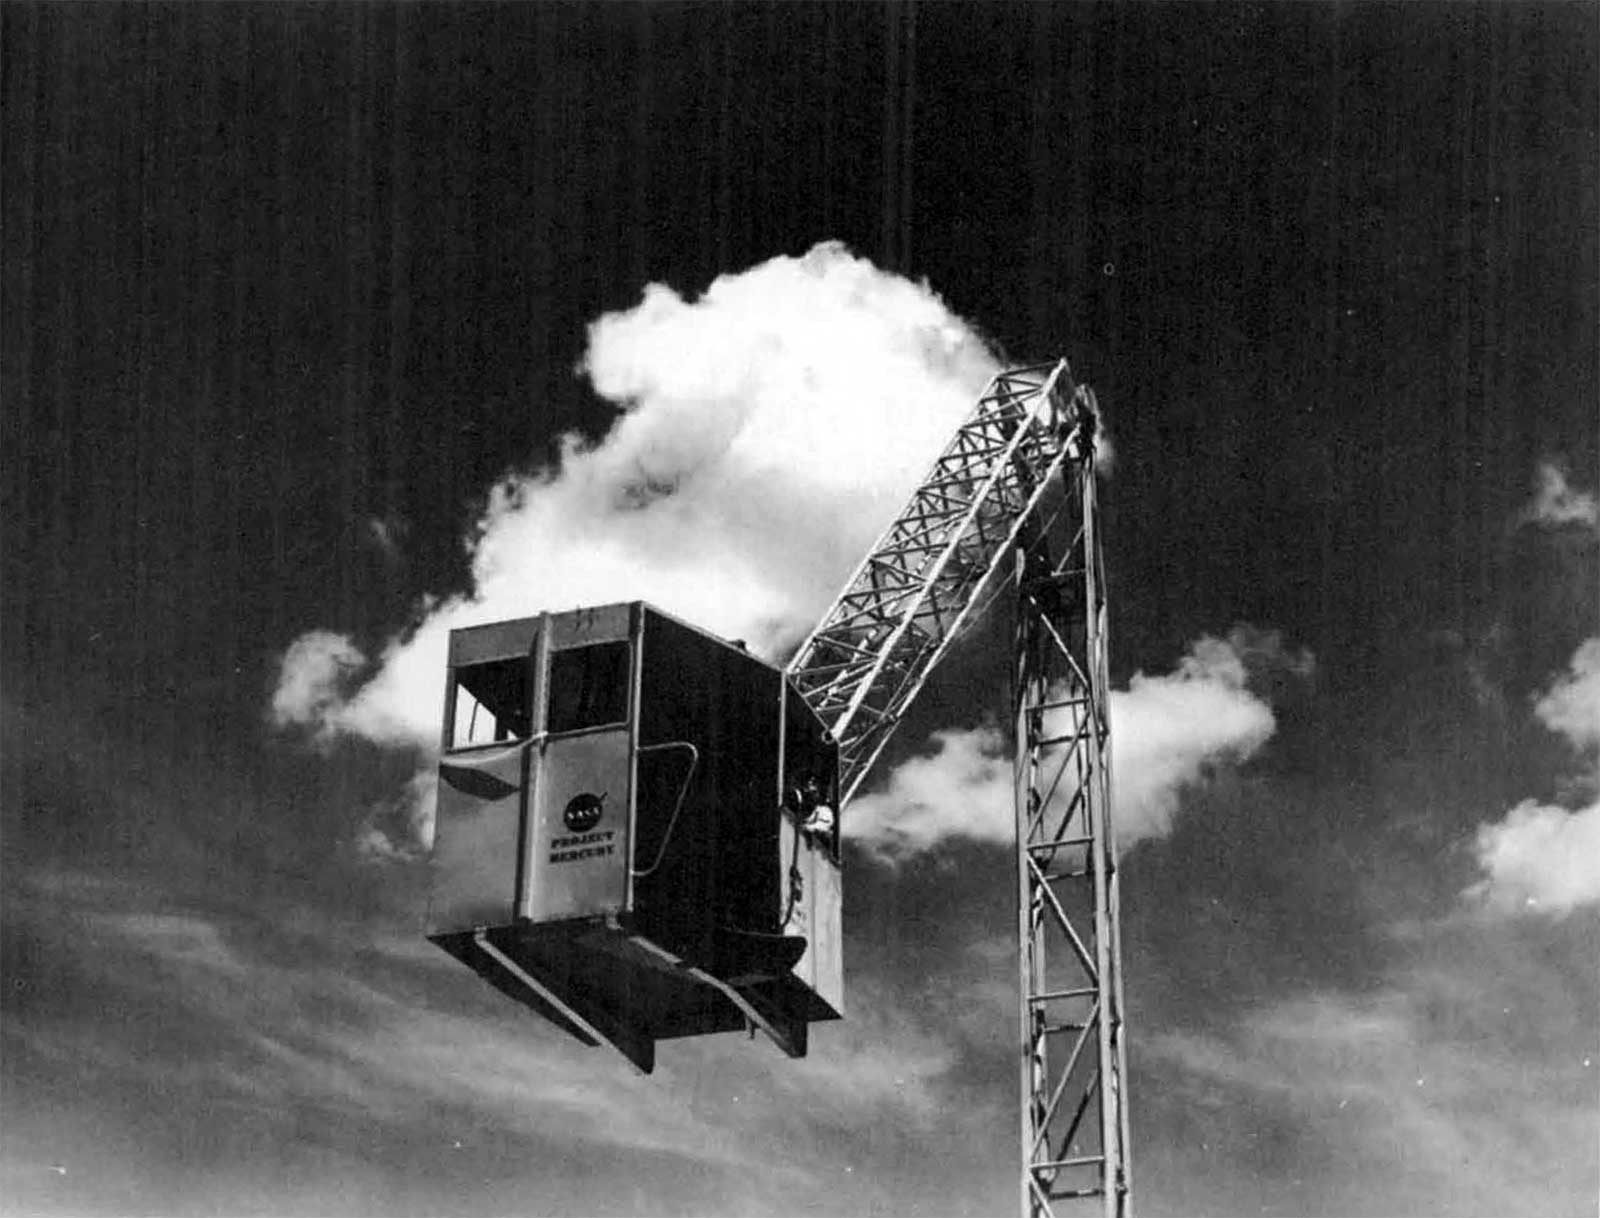
- Figure 4: Pilot egress trainer
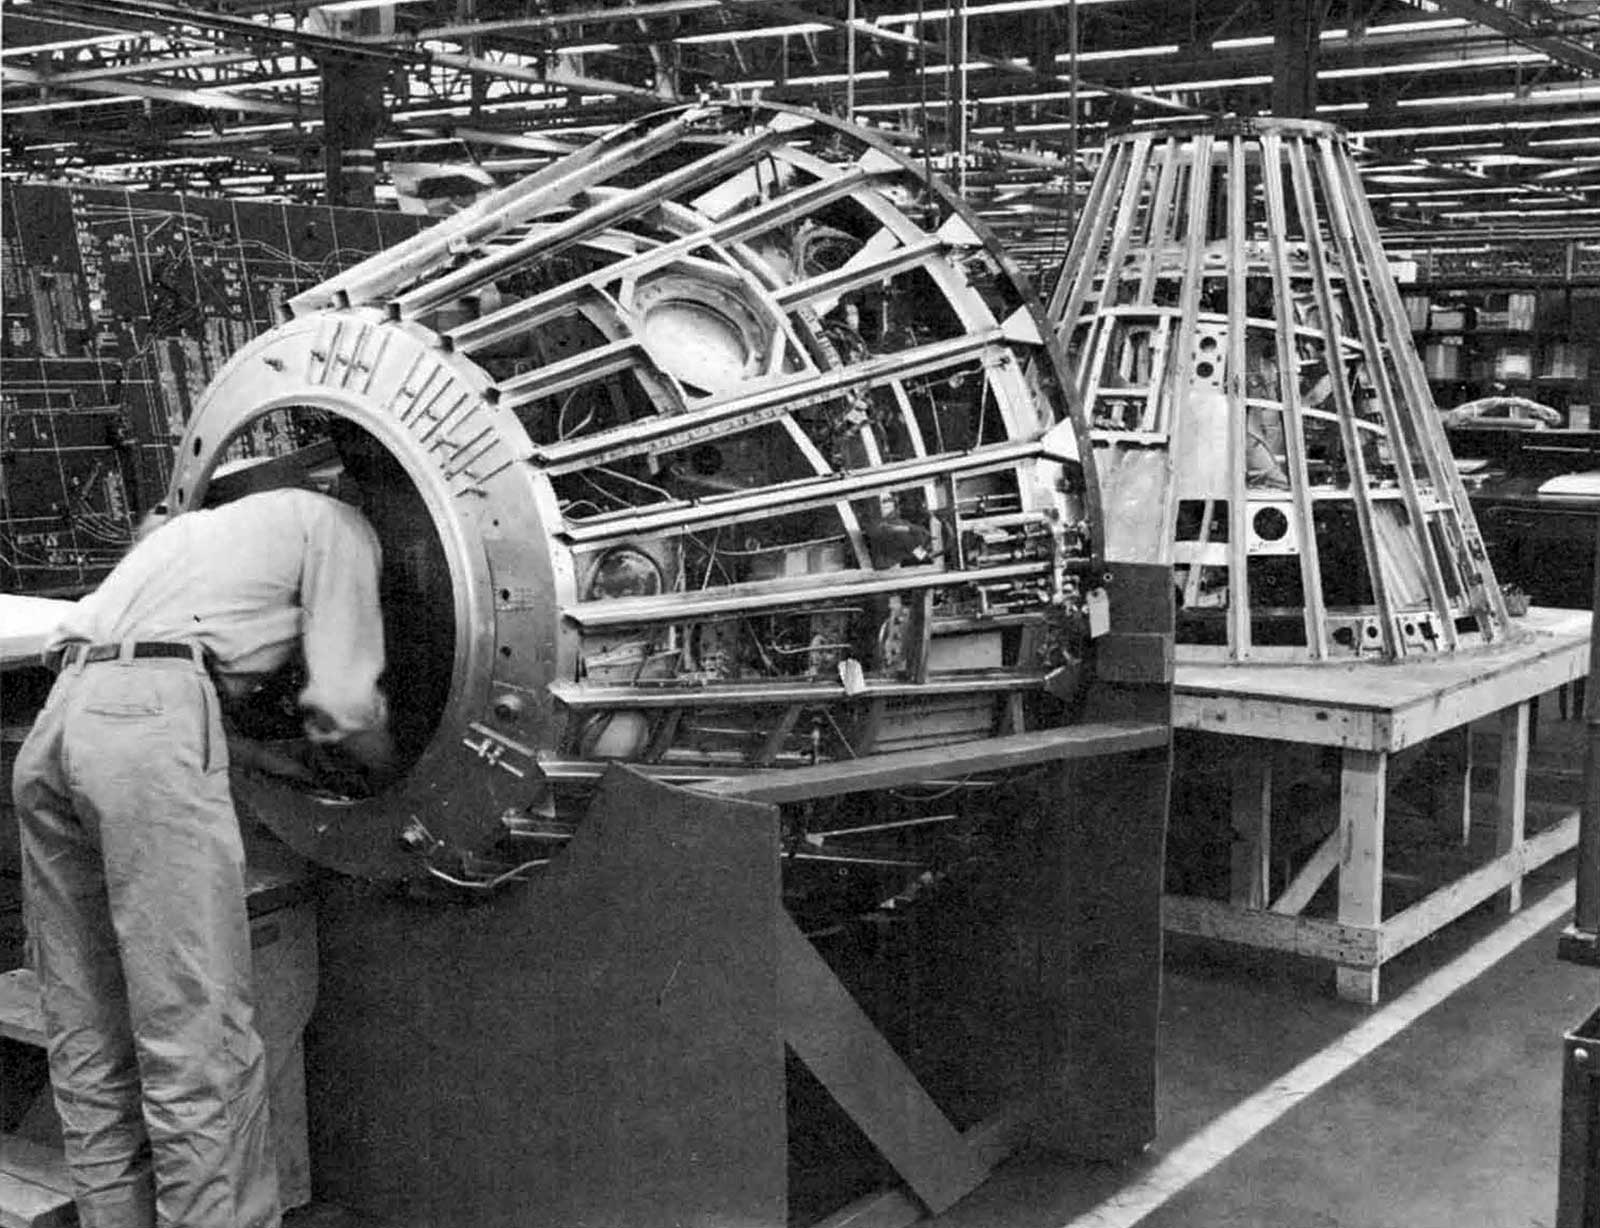
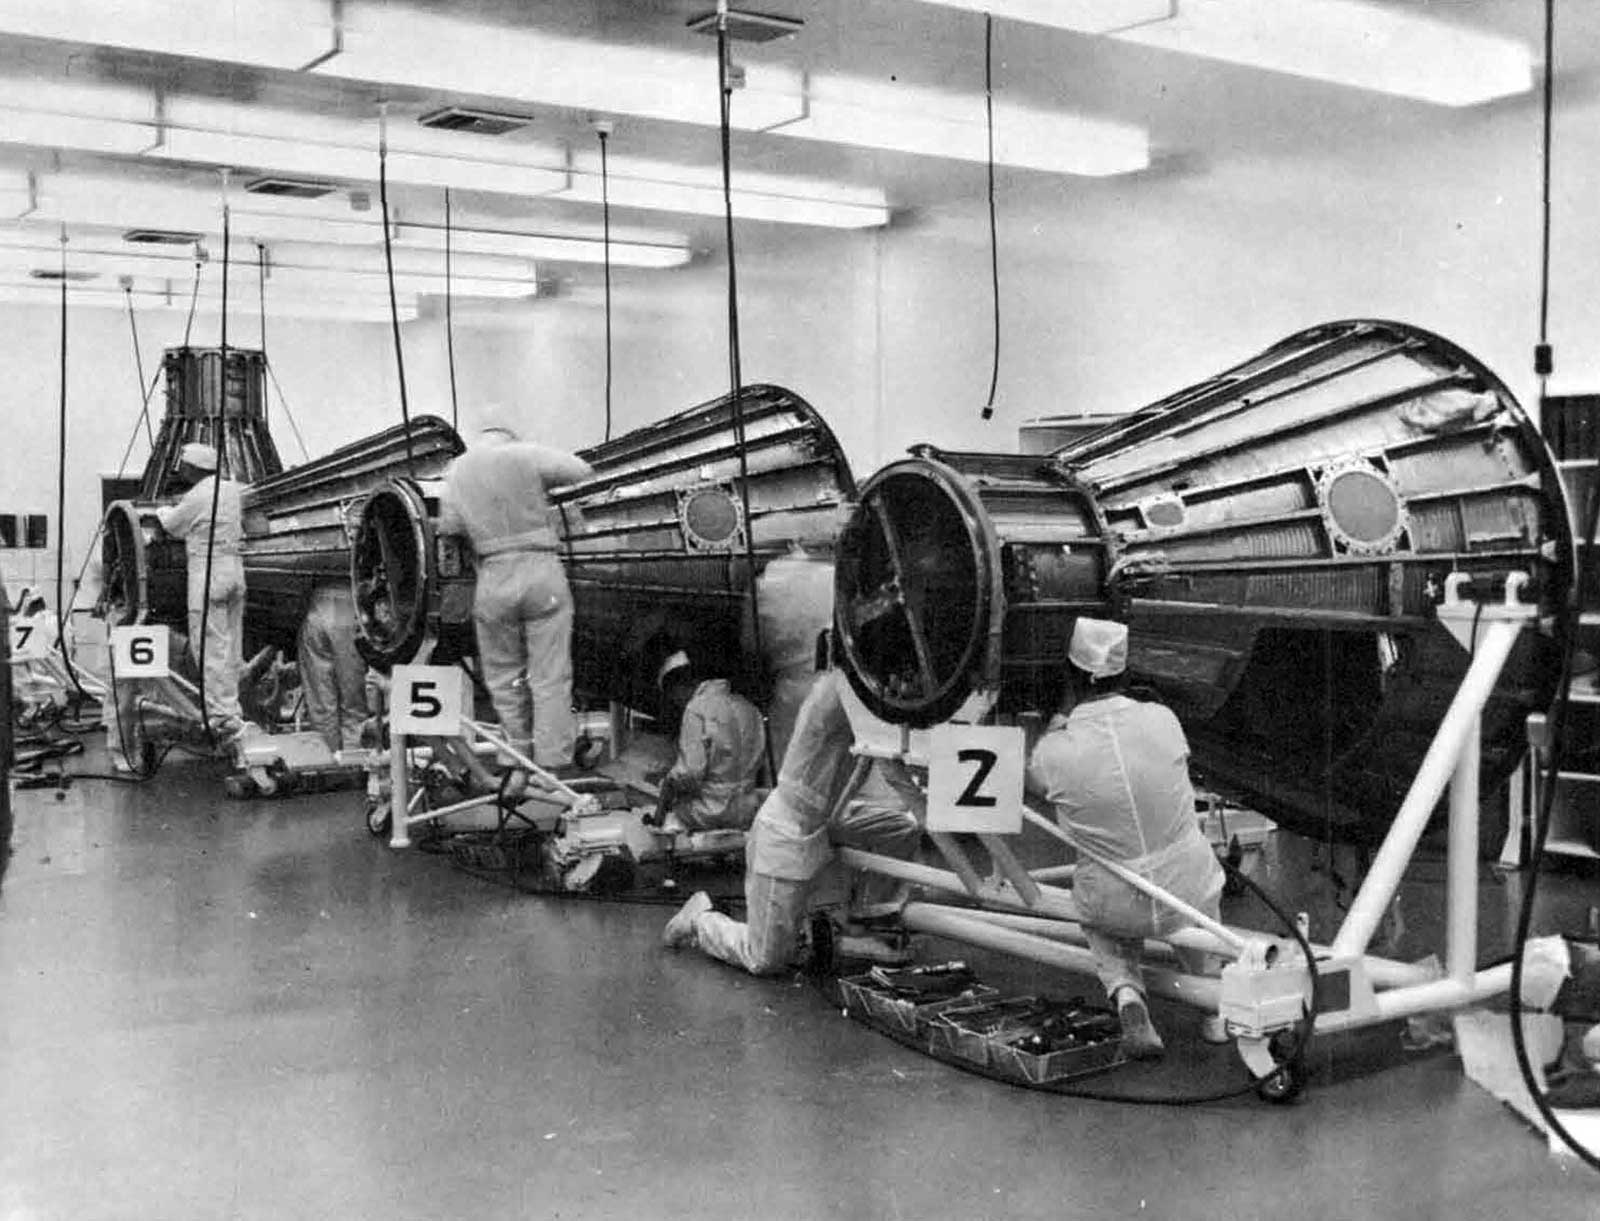
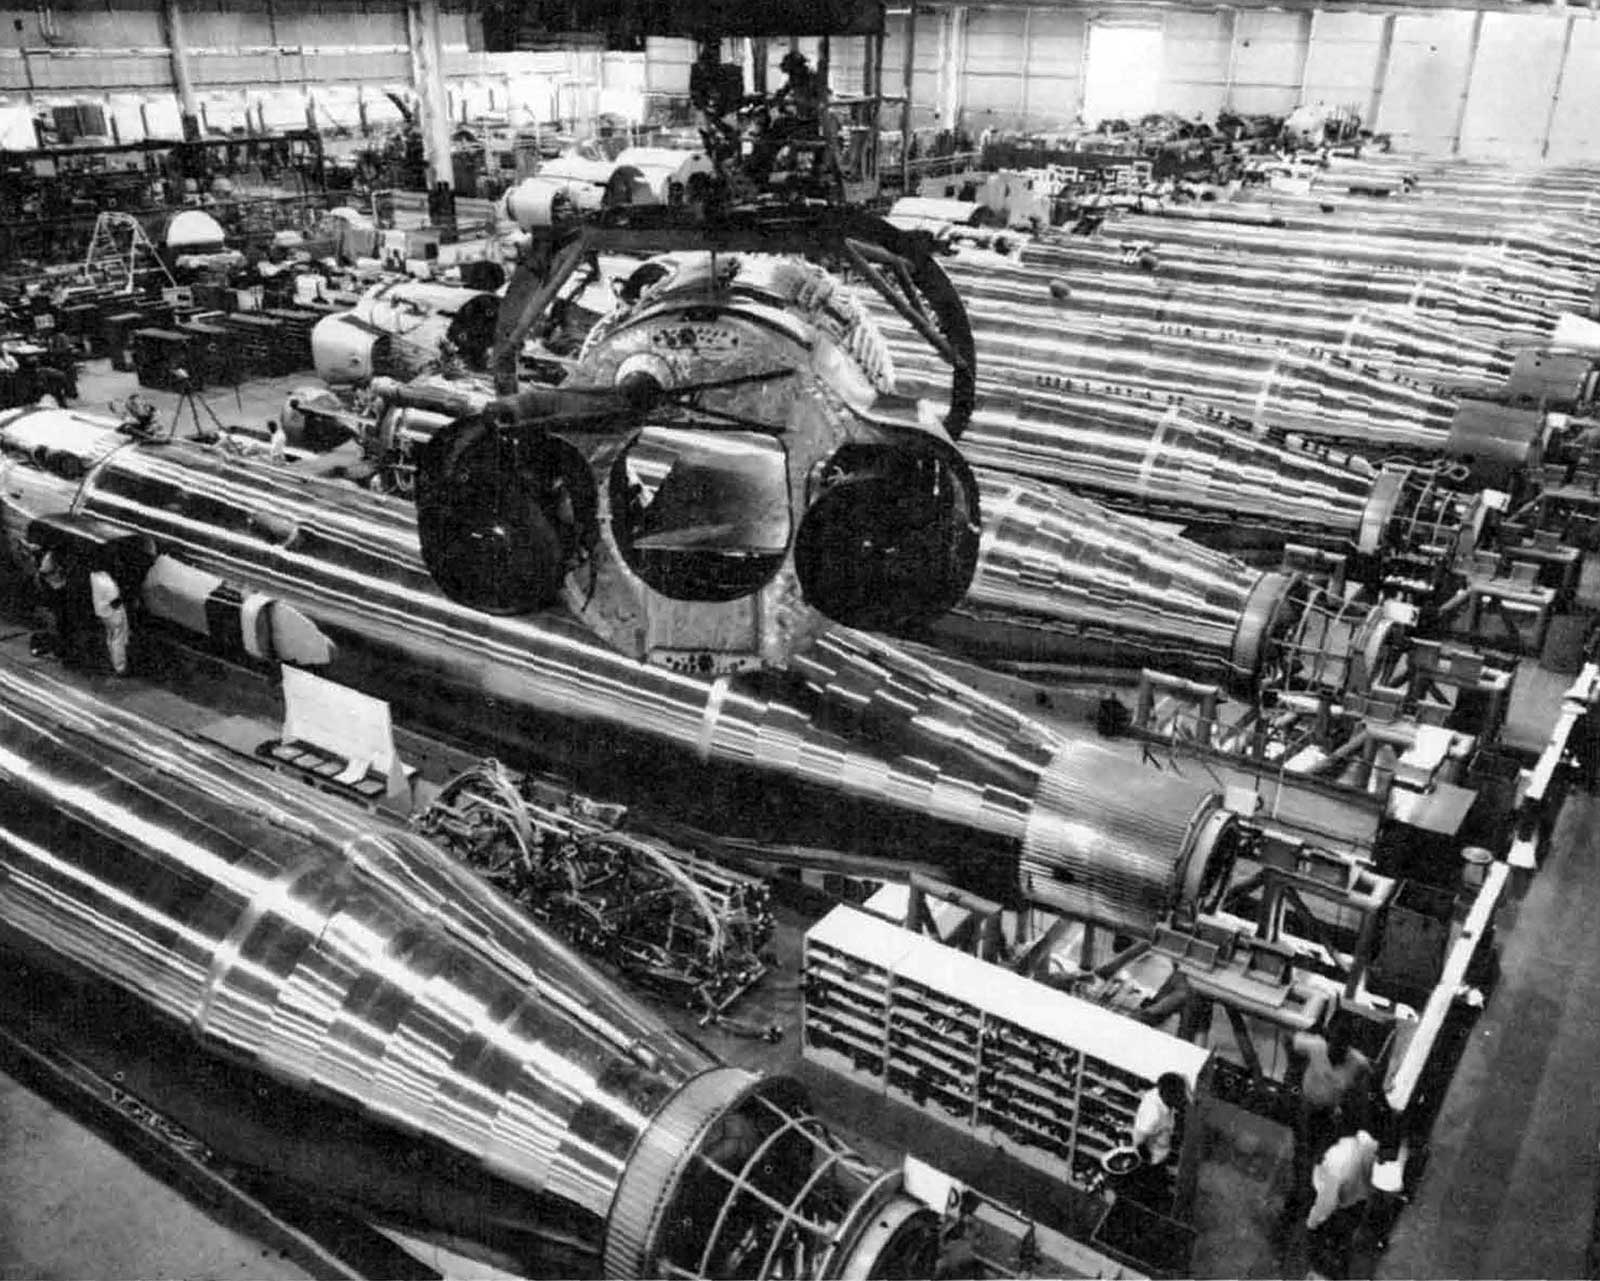
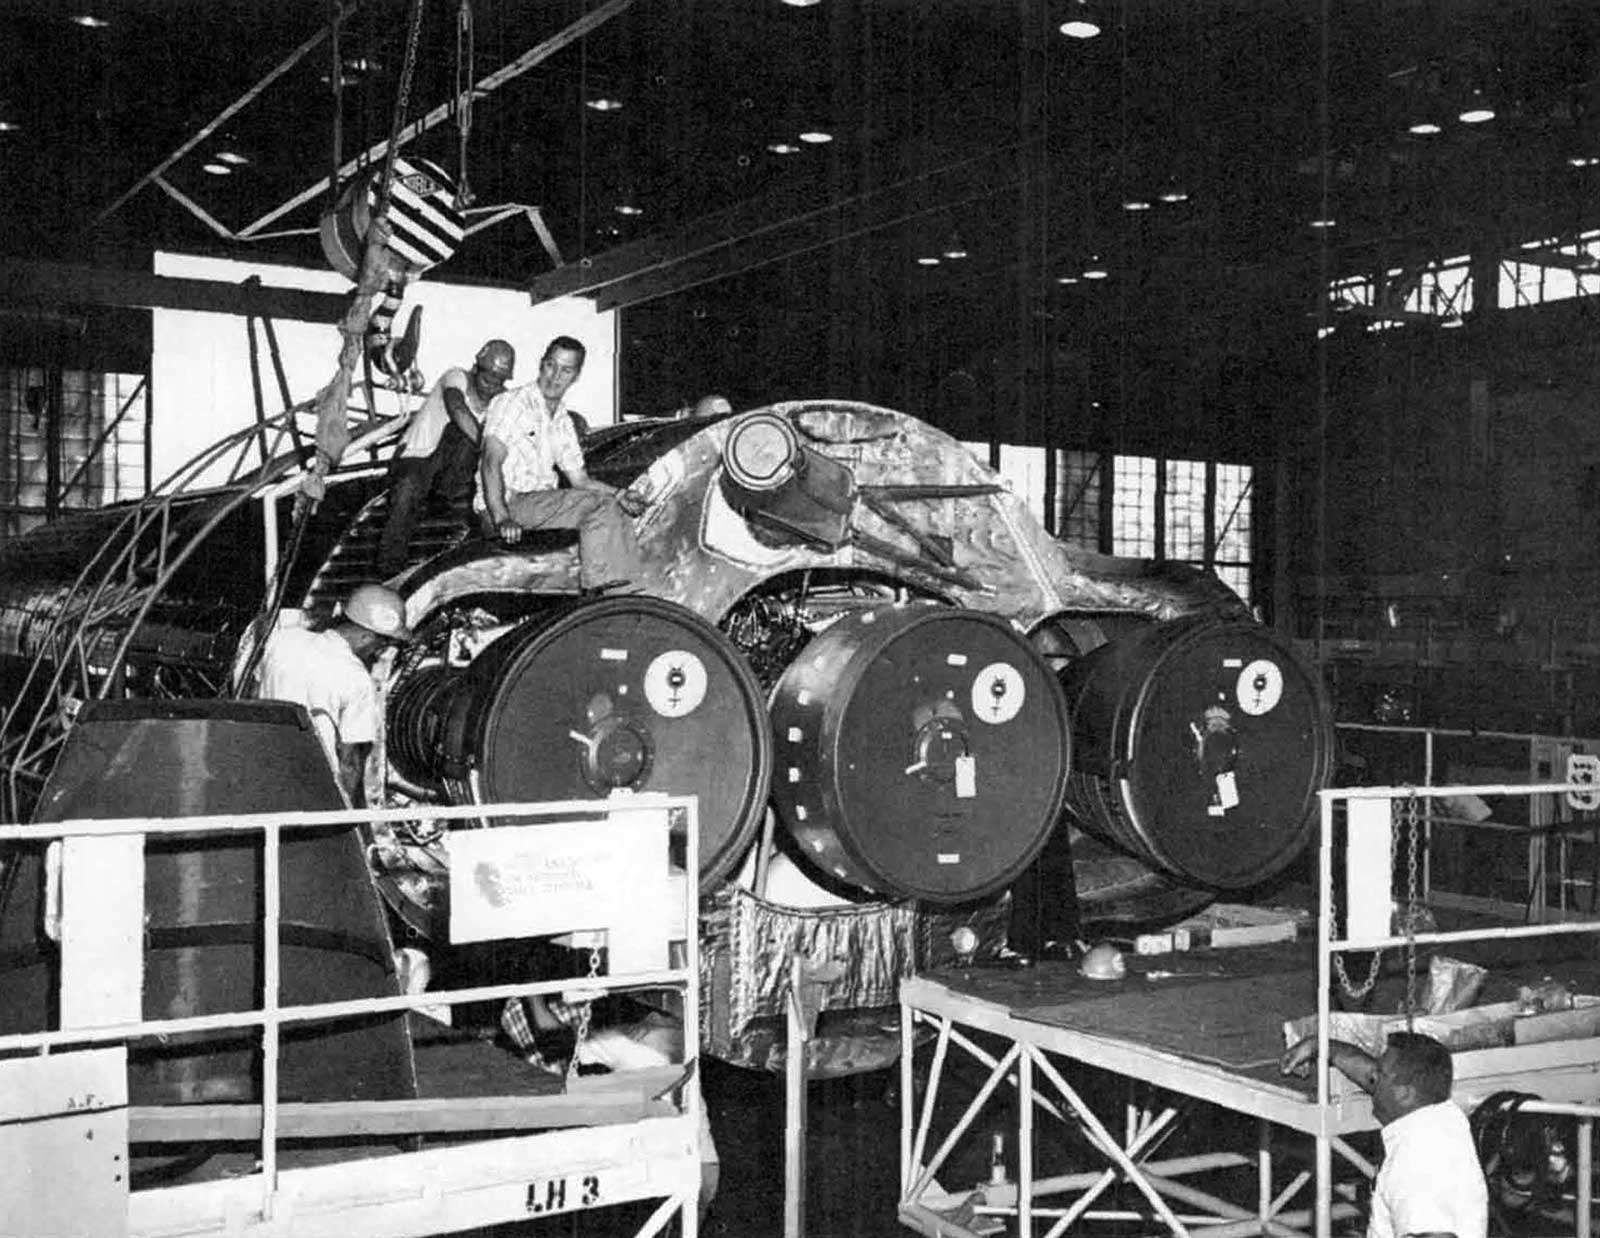
- Figure 5: Manufacture of Mercury spacecraft at McDonnell plant, St. Louis, Mo.
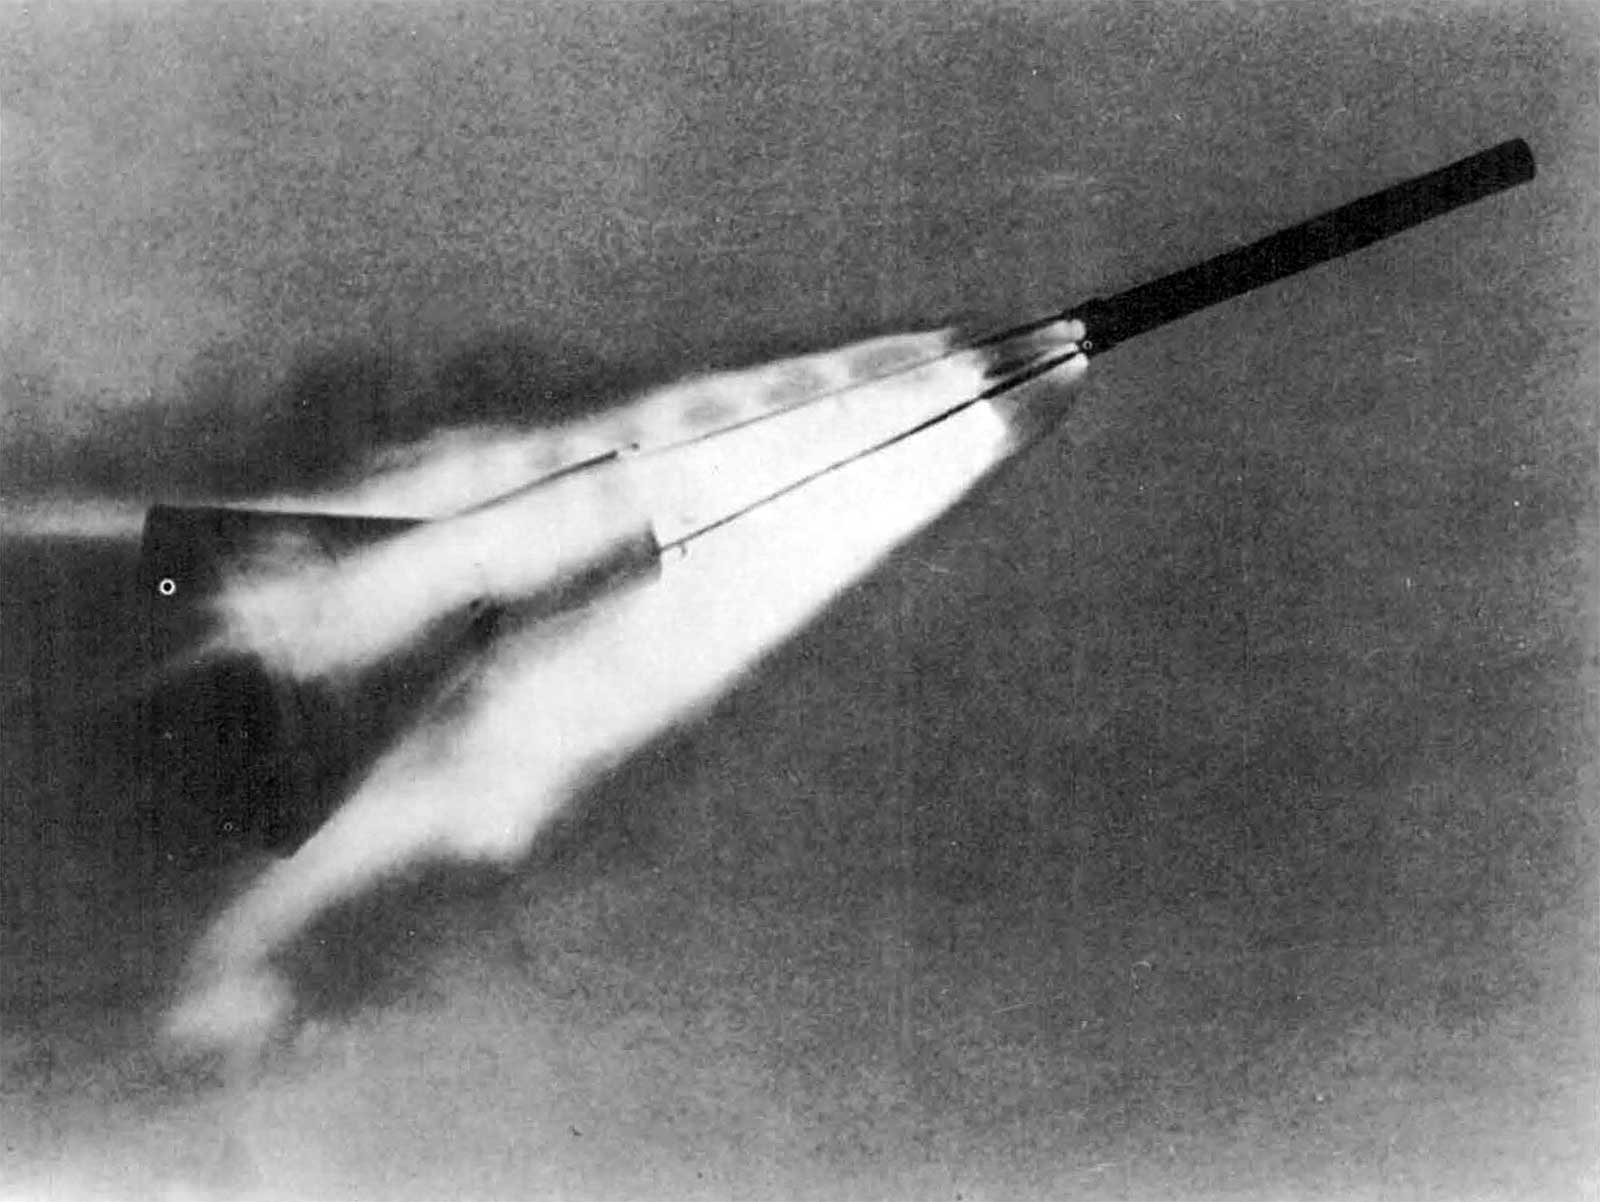
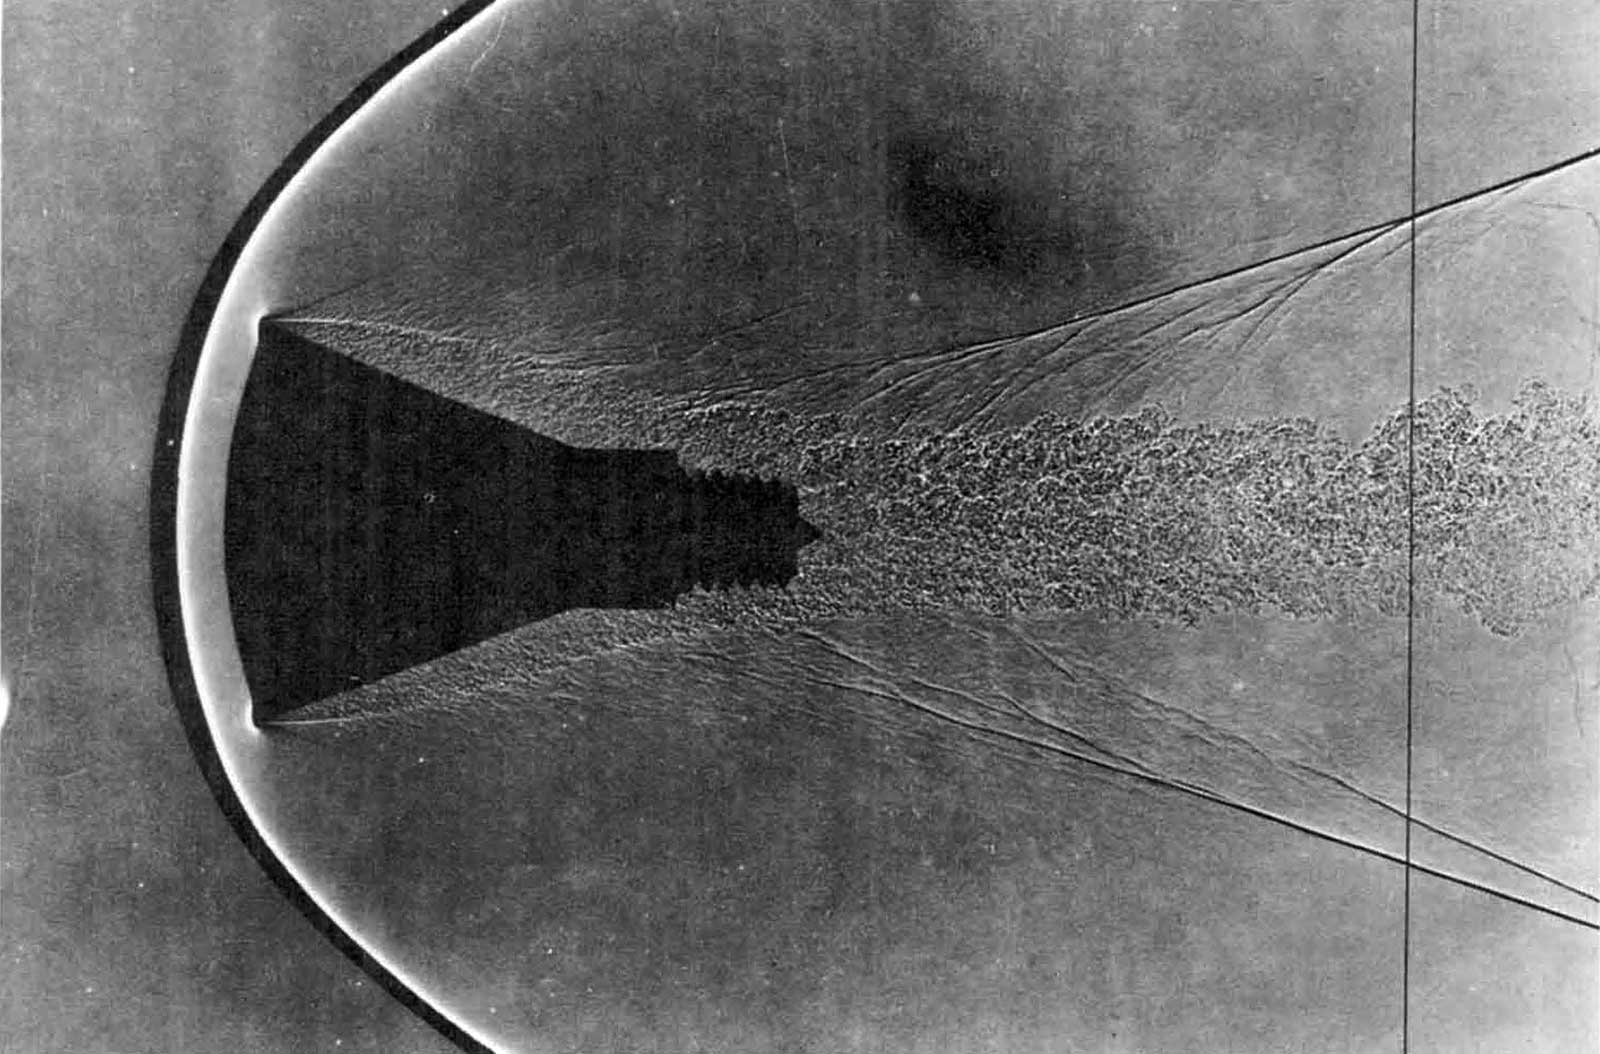
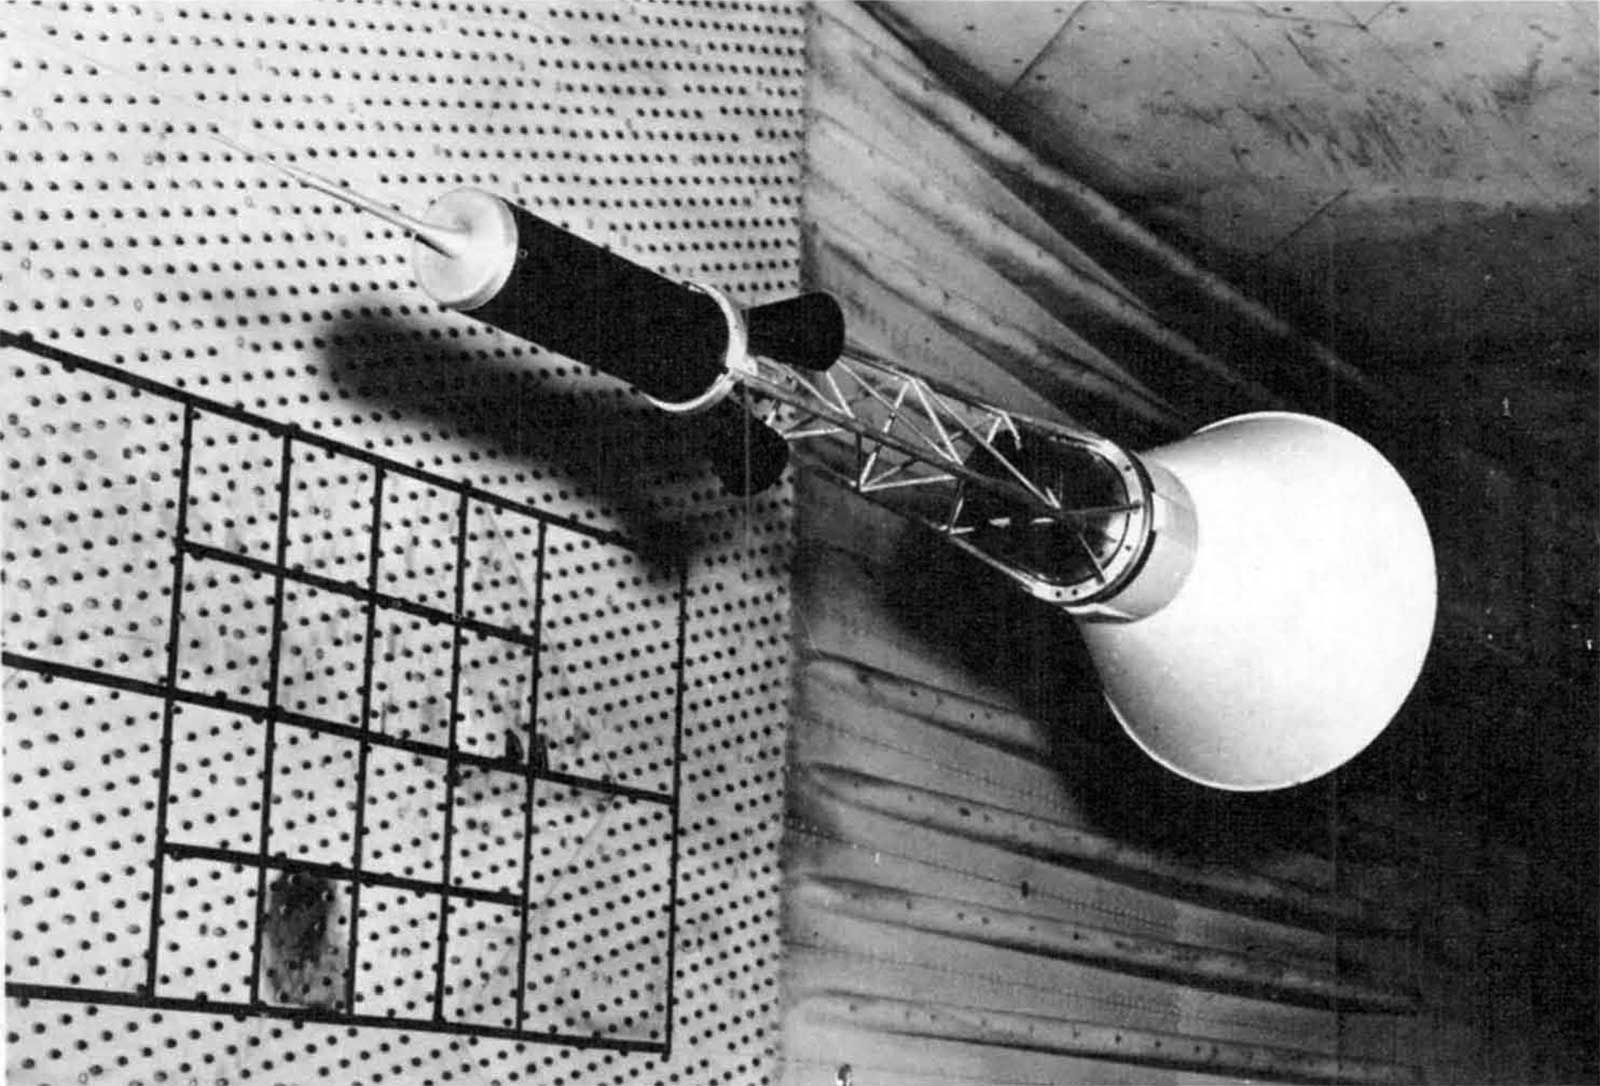
- Figure 6: Shadowgraph of spacecraft model in Ames Supersonic Free-Flight Pressurized Range
- Figure 7: Equipment installation in the parachute canister
- Figure 8: McDonnell mockup of Mercury spacecraft including Atlas adapter and escape system
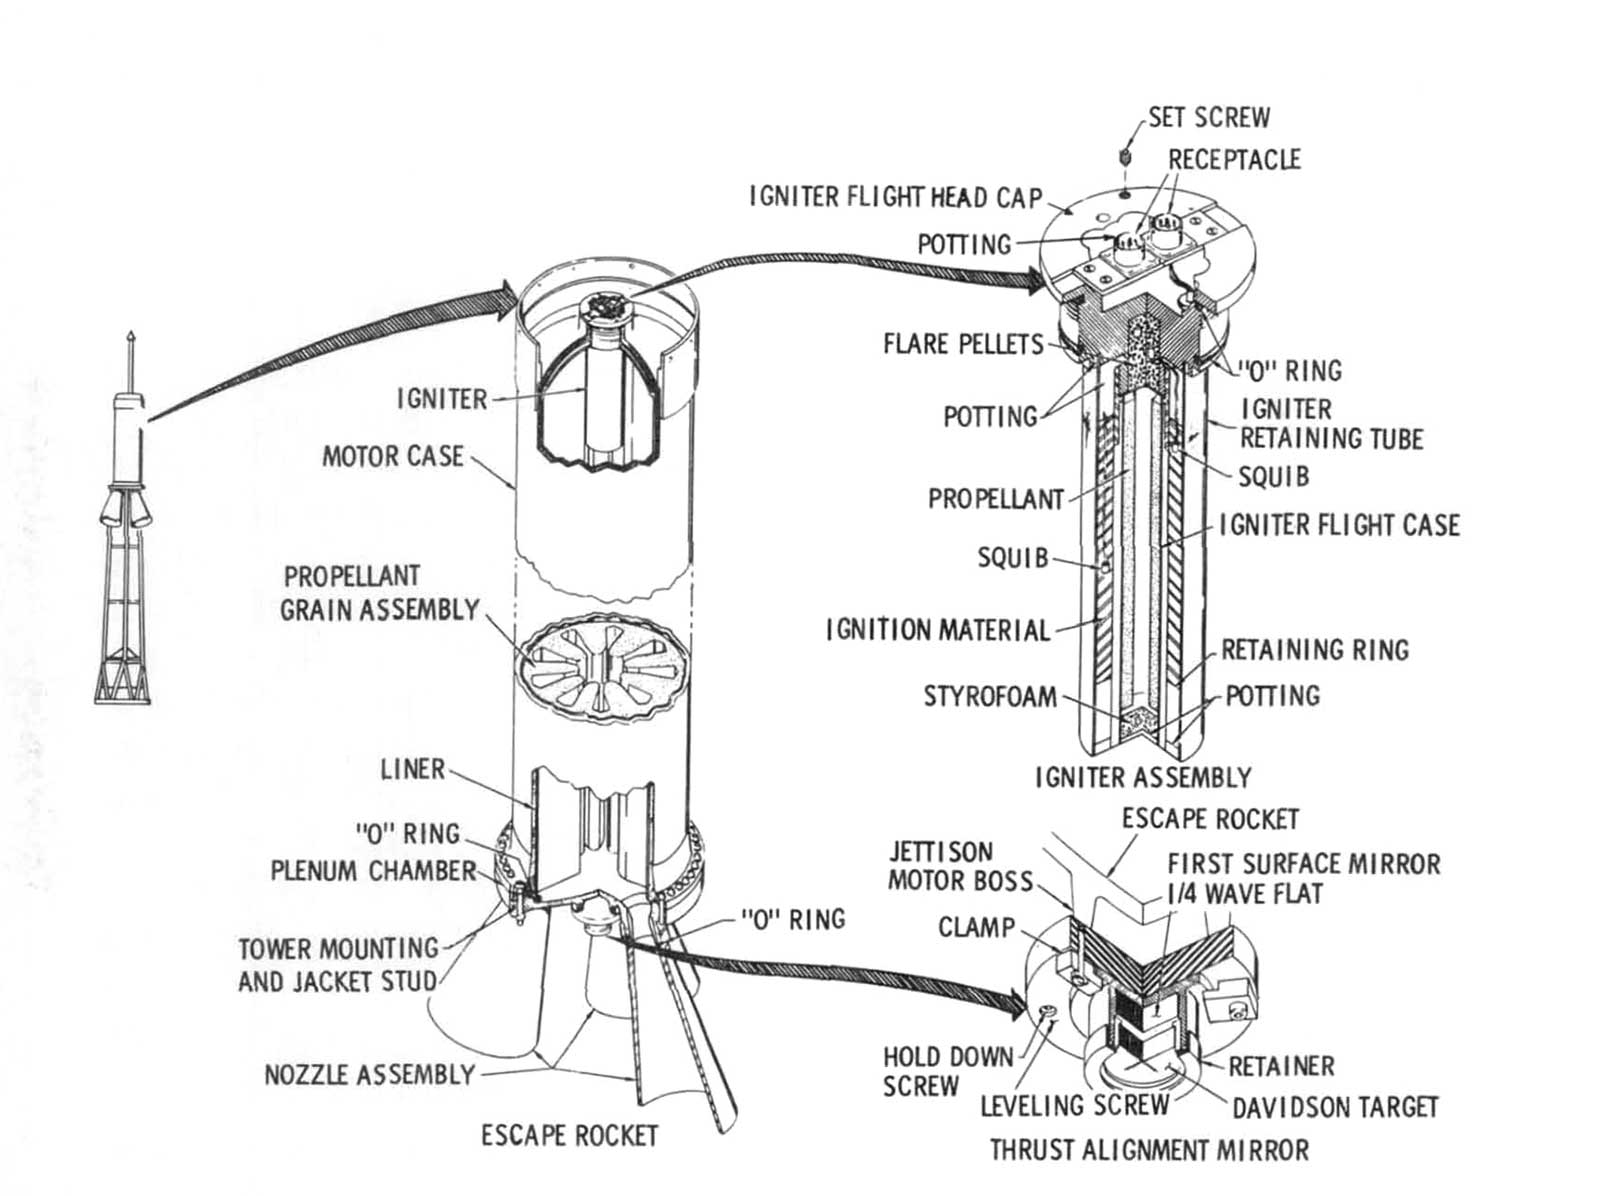
- Figure 9: Escape rocket motor
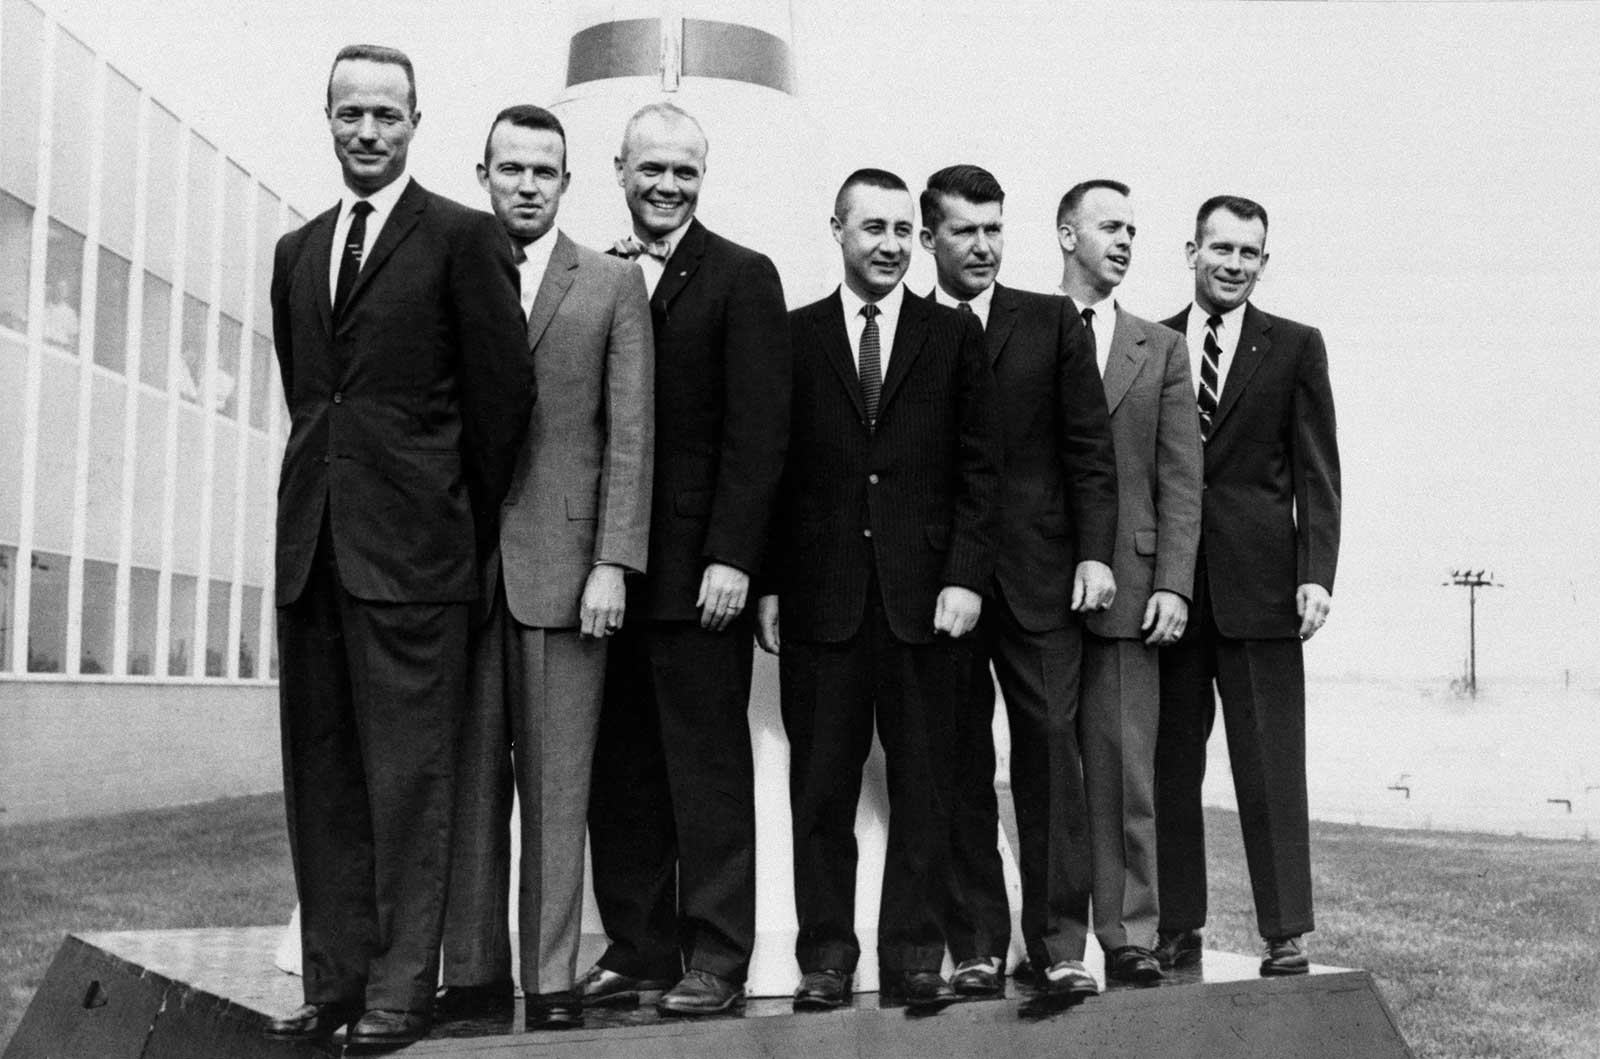
- Figure 10: The seven Mercury astronauts
- Figure 11: Scale model of escape tower configuration
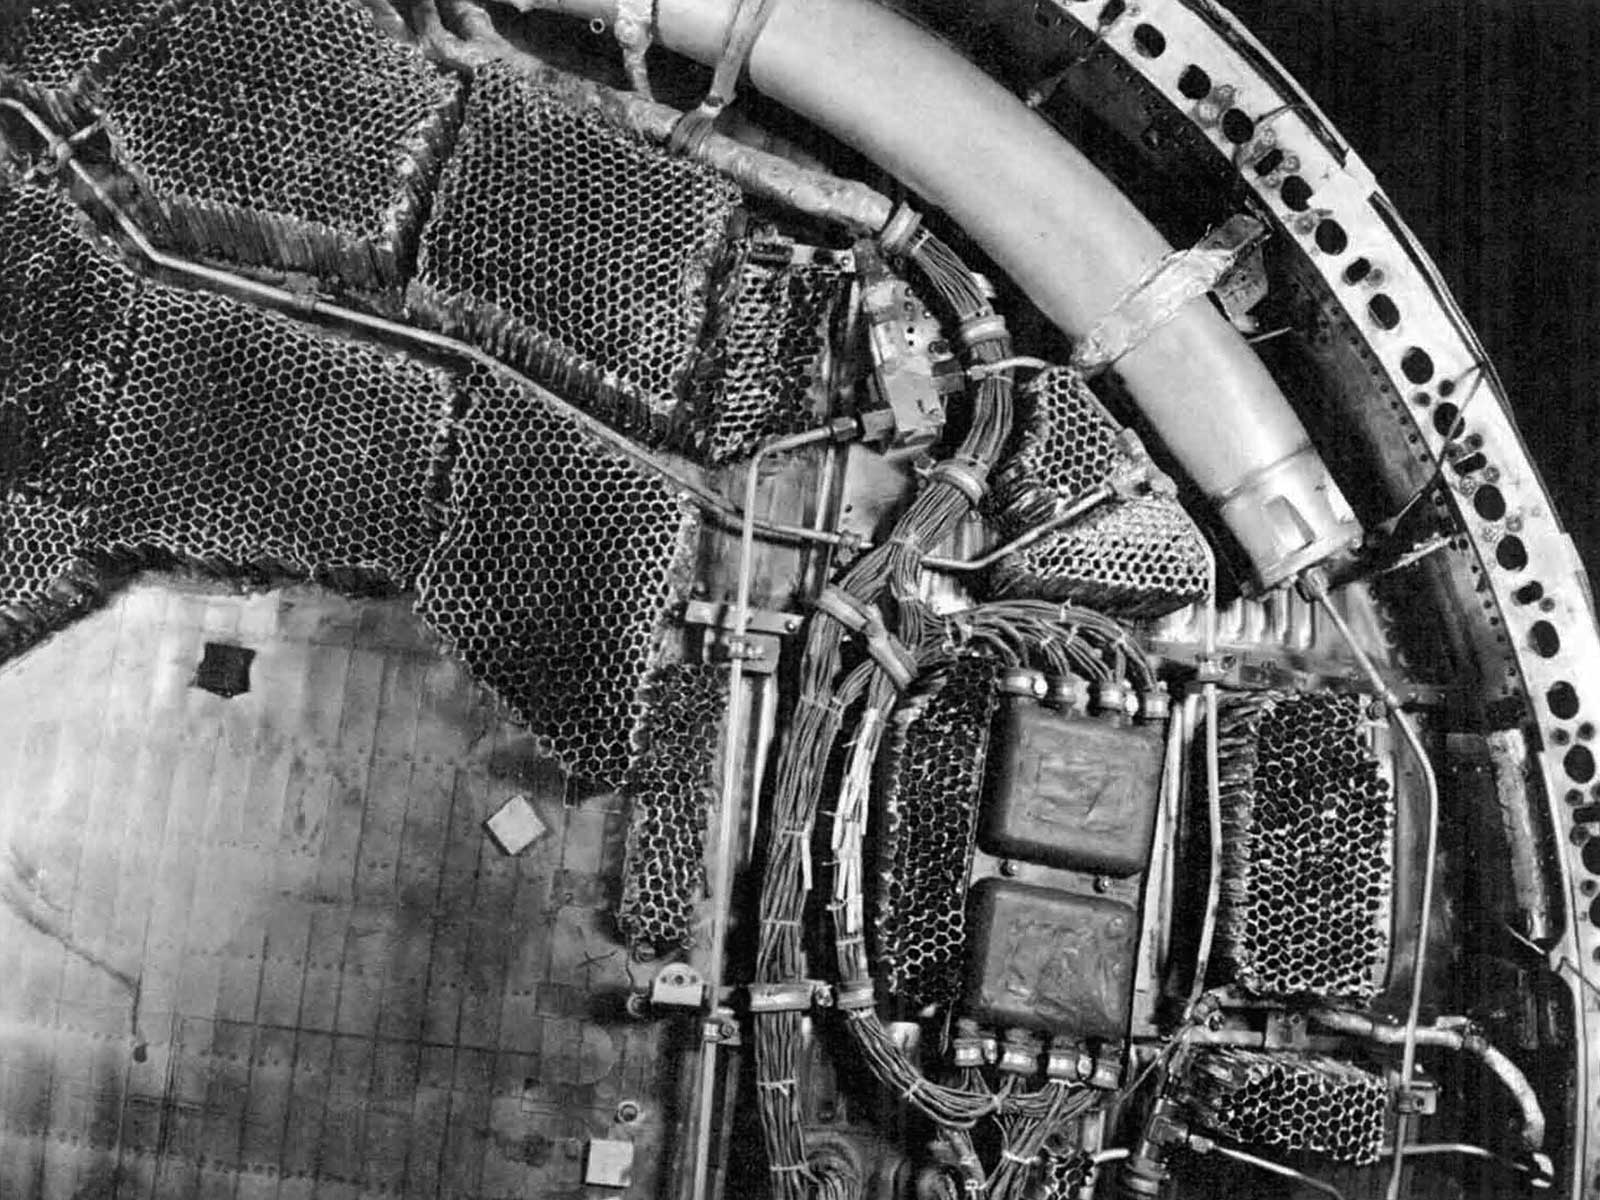
- Figure 12: Honeycomb structure partially to absorb impact force
- Figure 13: Spacecraft and escape system configuration
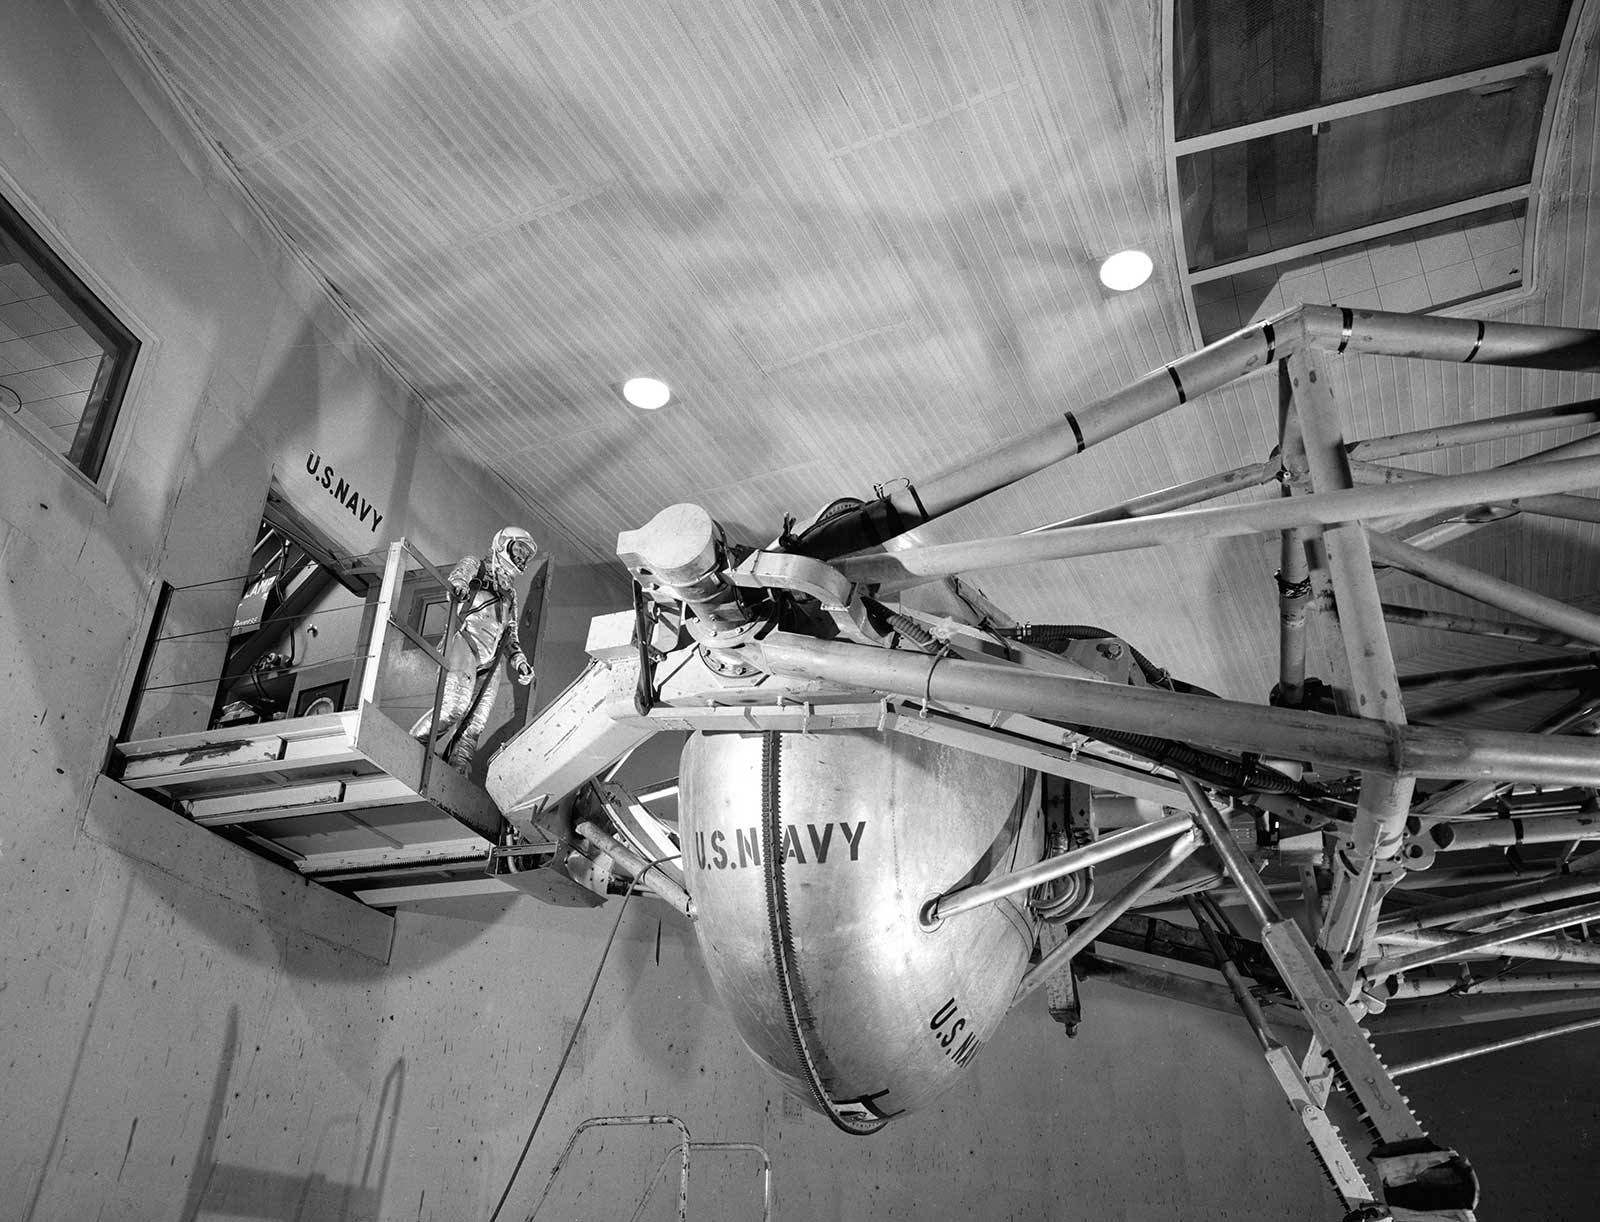
- Figure 14: Human centrifuge used in Mercury astronaut training program
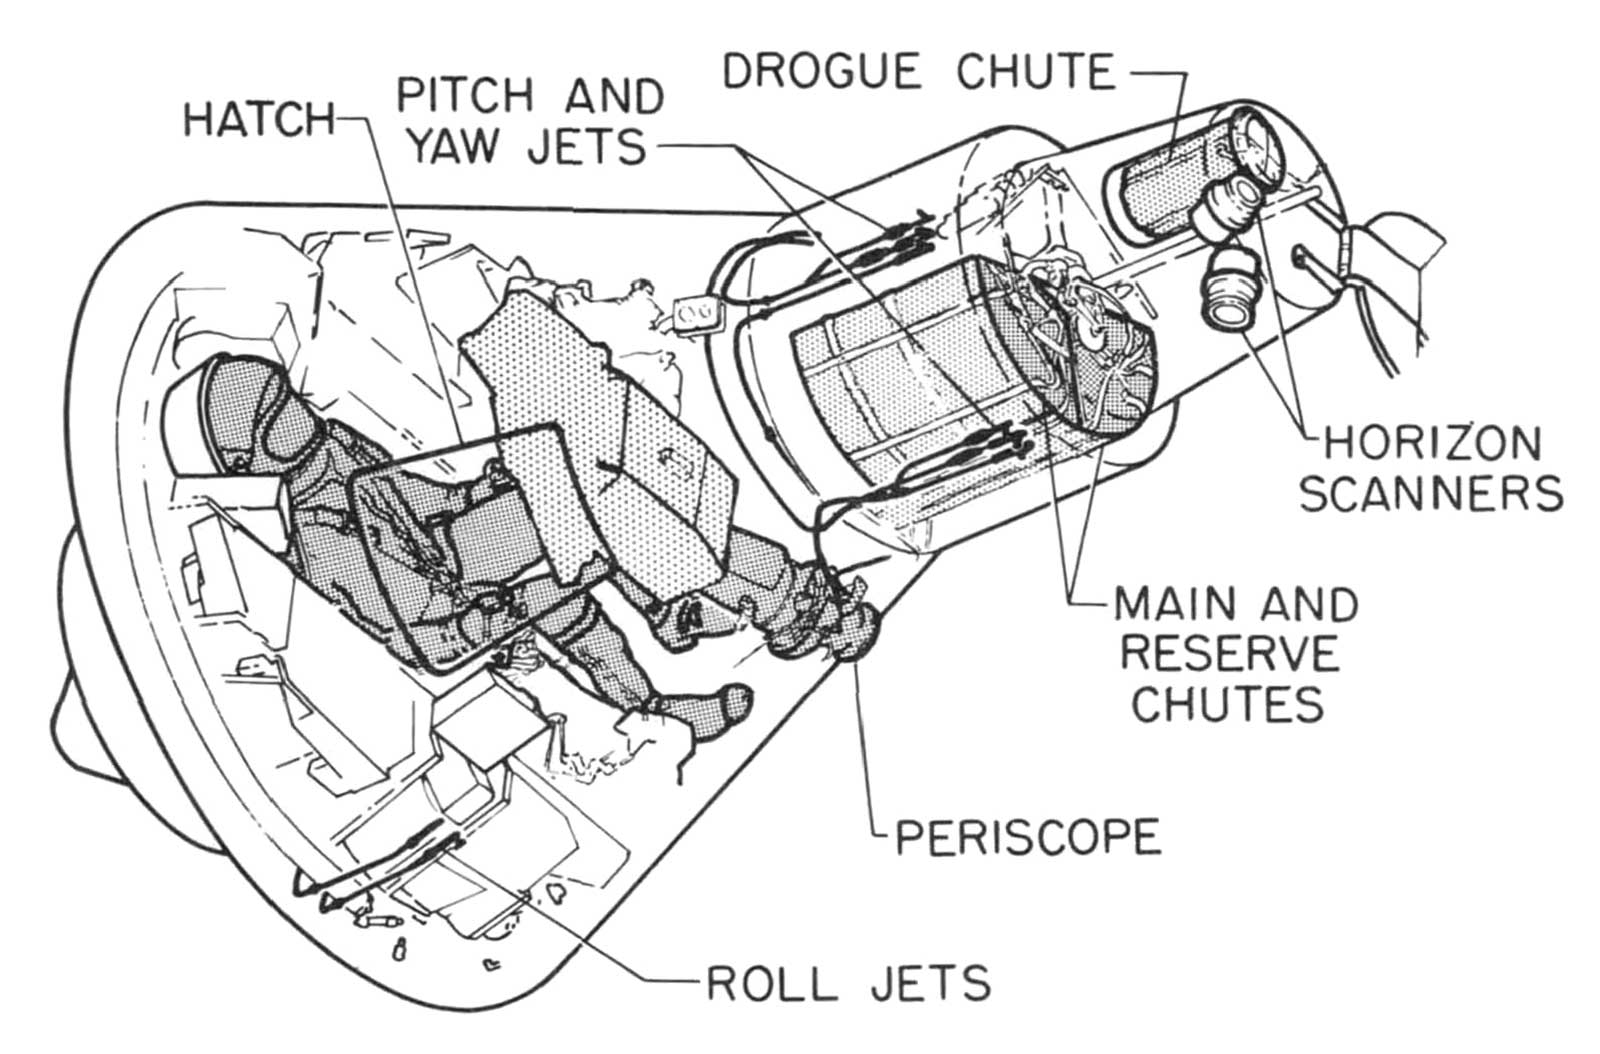
- Figure 15: Spacecraft interior arrangement
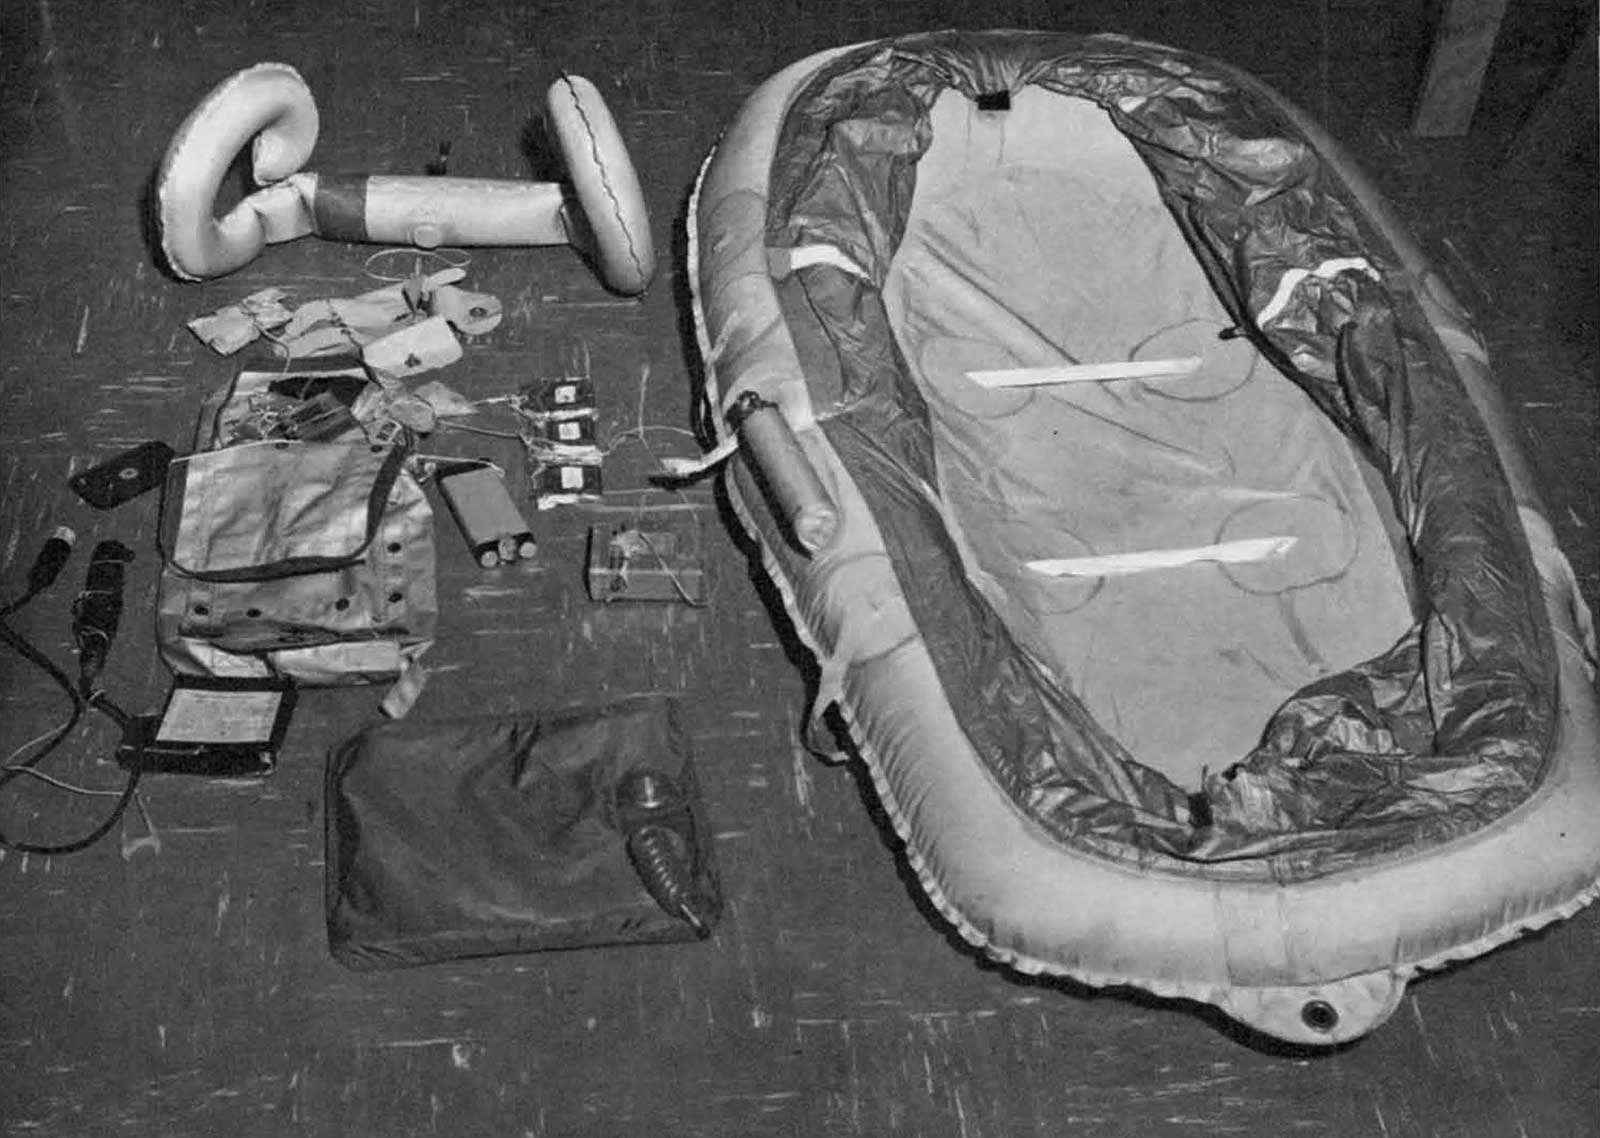
- Figure 16: Astronaut survival equipment stowed in Mercury spacecraft
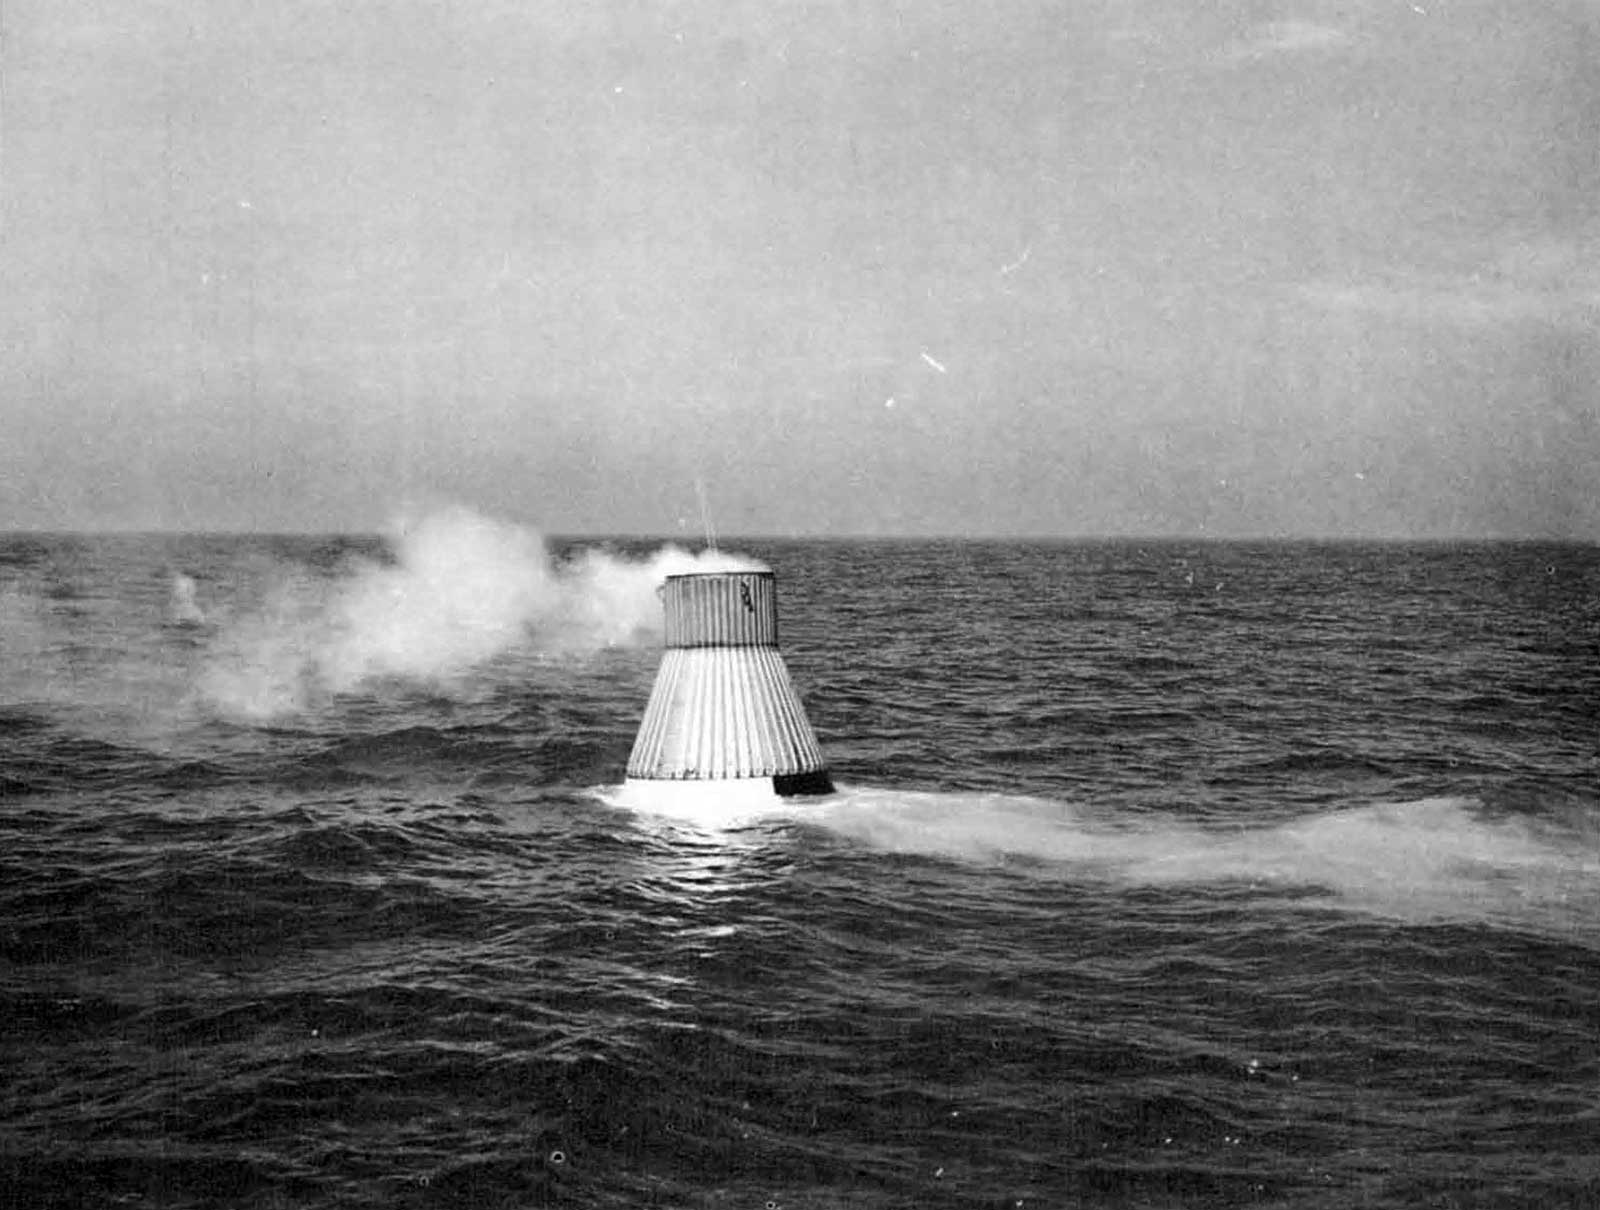
- Figure 17: Recovery test spacecraft showing recovery aids
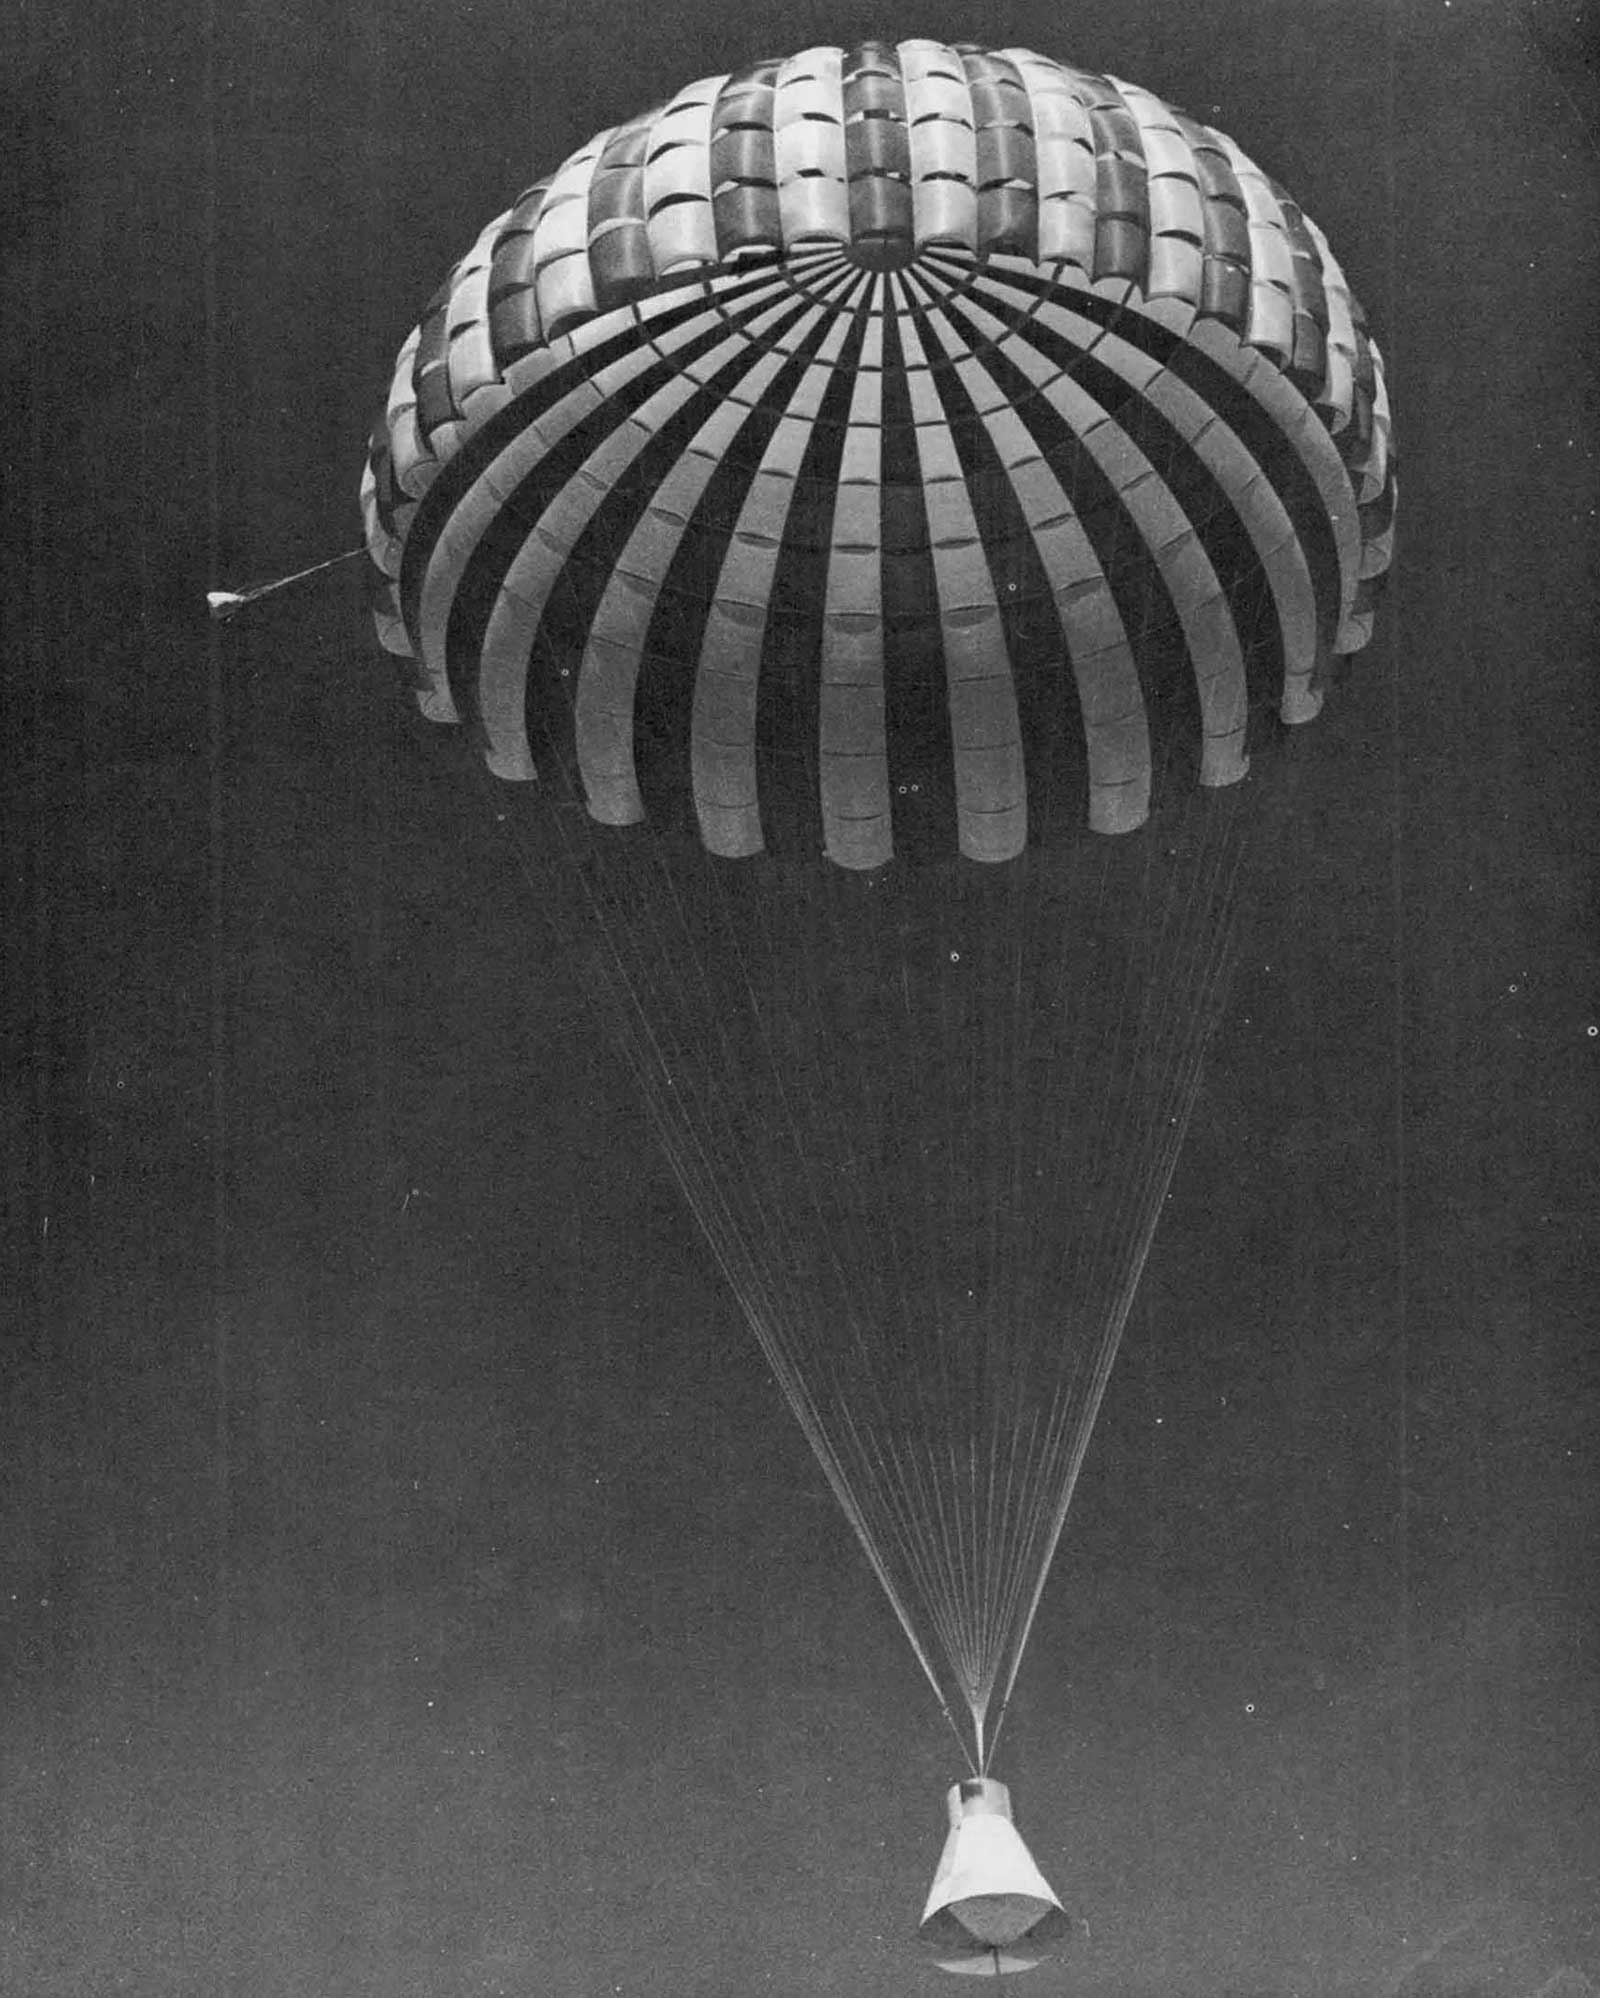
- Figure 18: Main 63-foot ringsail parachute
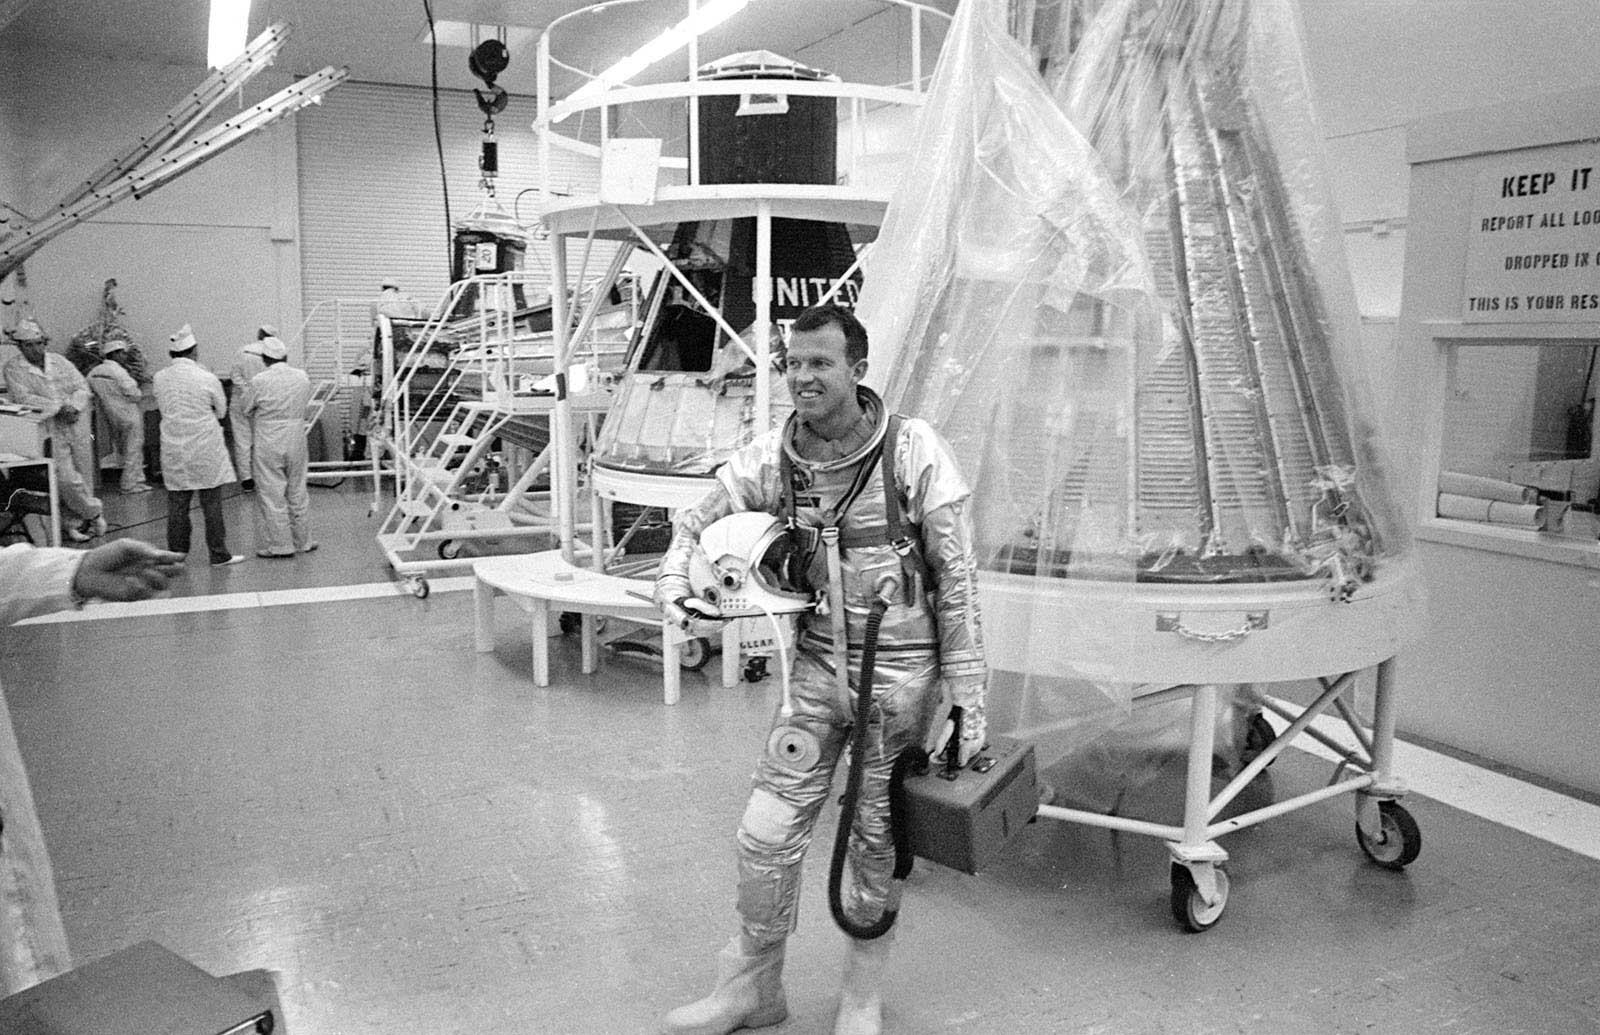
- Figure 19: White room in Hanger S at Cape Canaveral
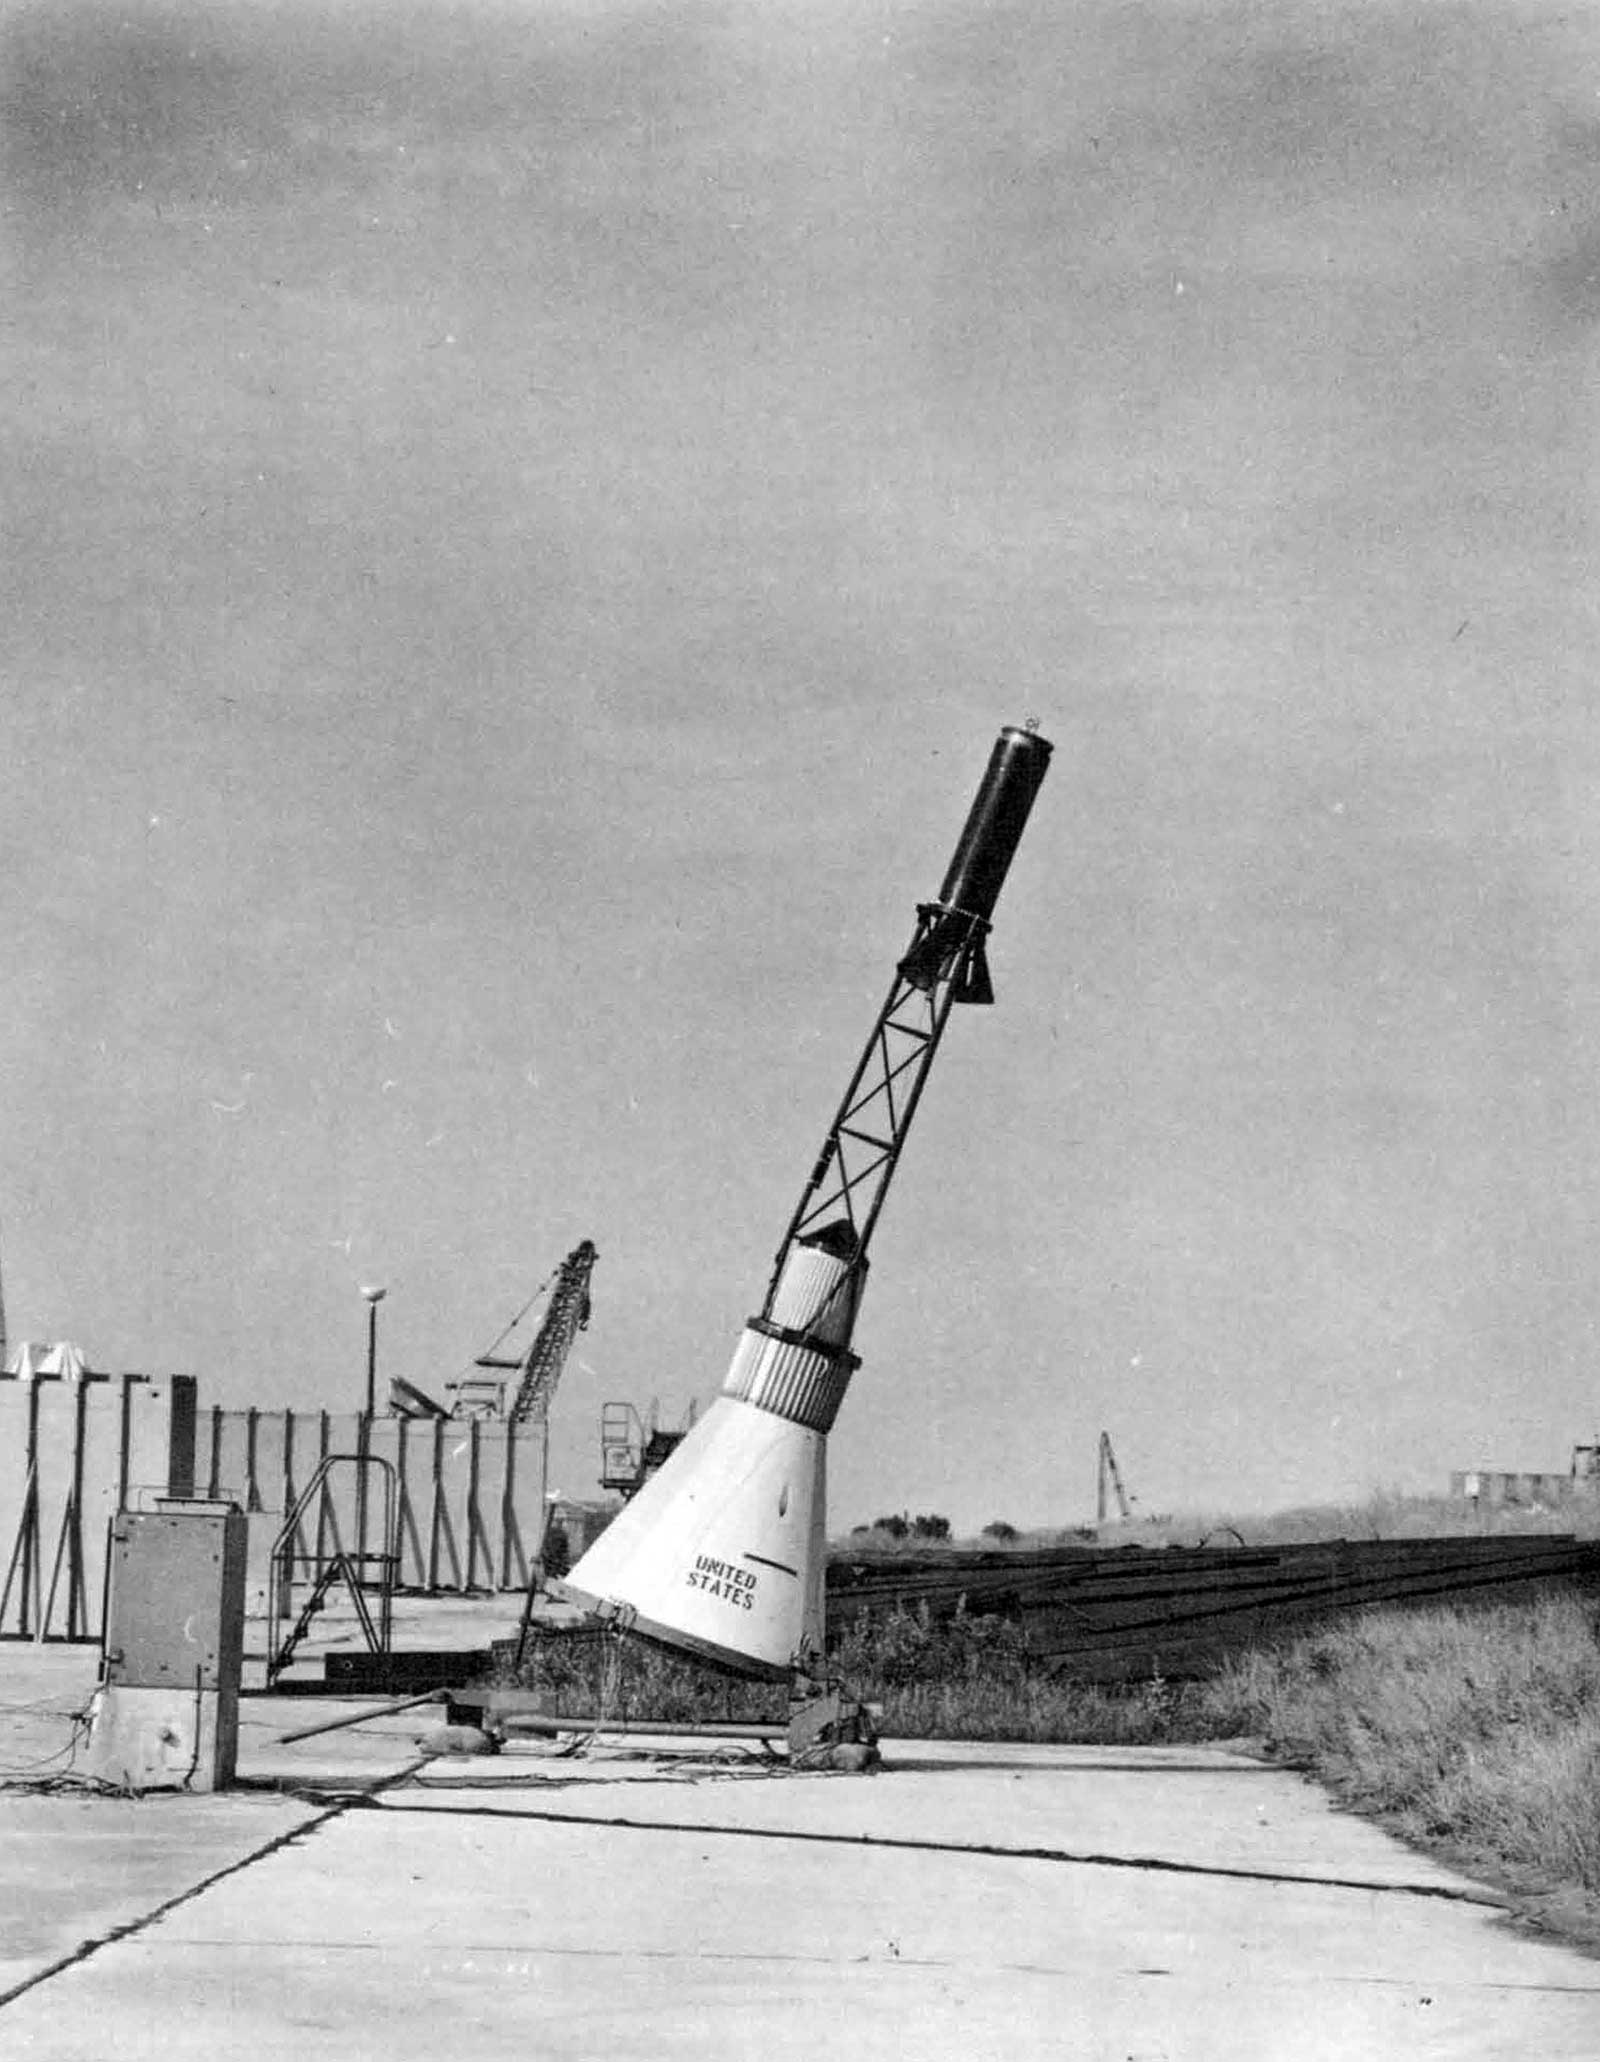
- Figure 20: Spacecraft with McDonnell designed escape system ready for firing at Wallops Island
- Figure 21: Spacecraft reaction control system
- Figure 22: Vehicle for drogue parachute test at NASA Flight Research Center
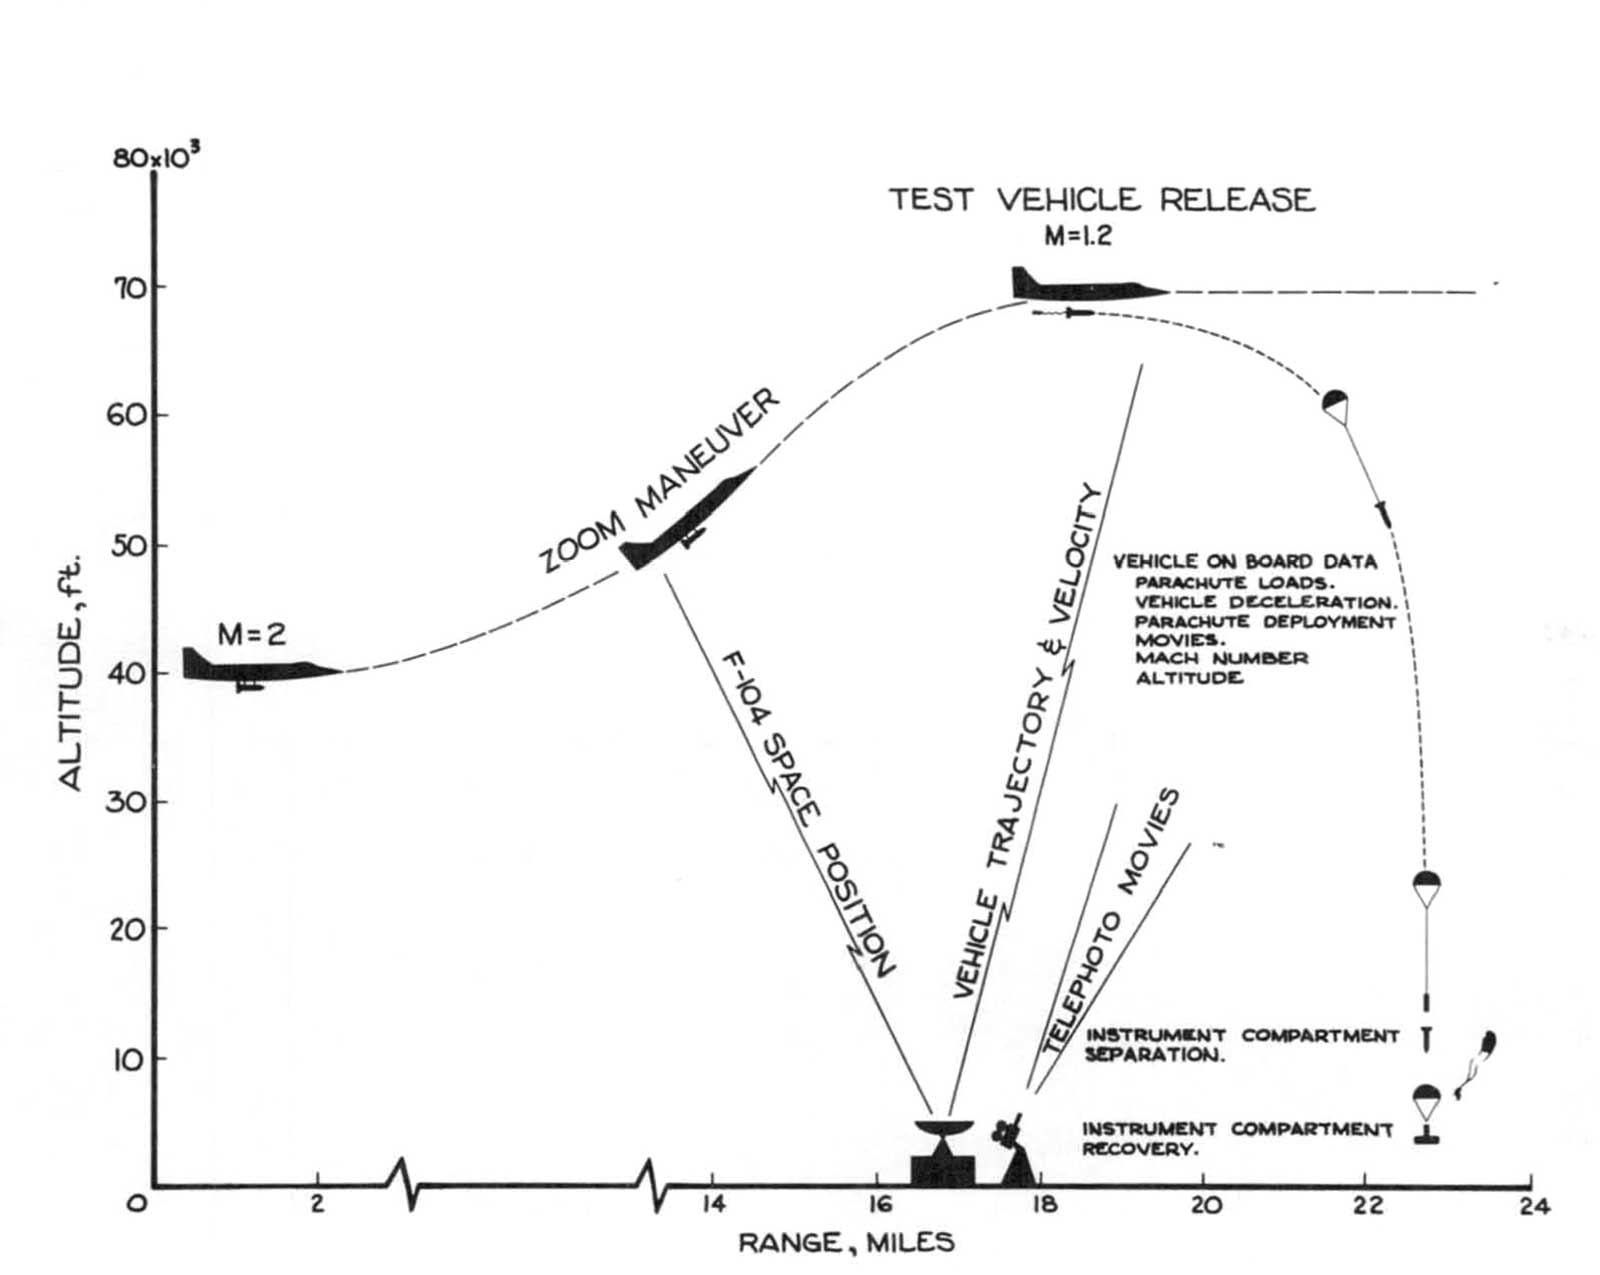
- Figure 23: Flight plan for drogue parachute tests at NASA Flight Research Center
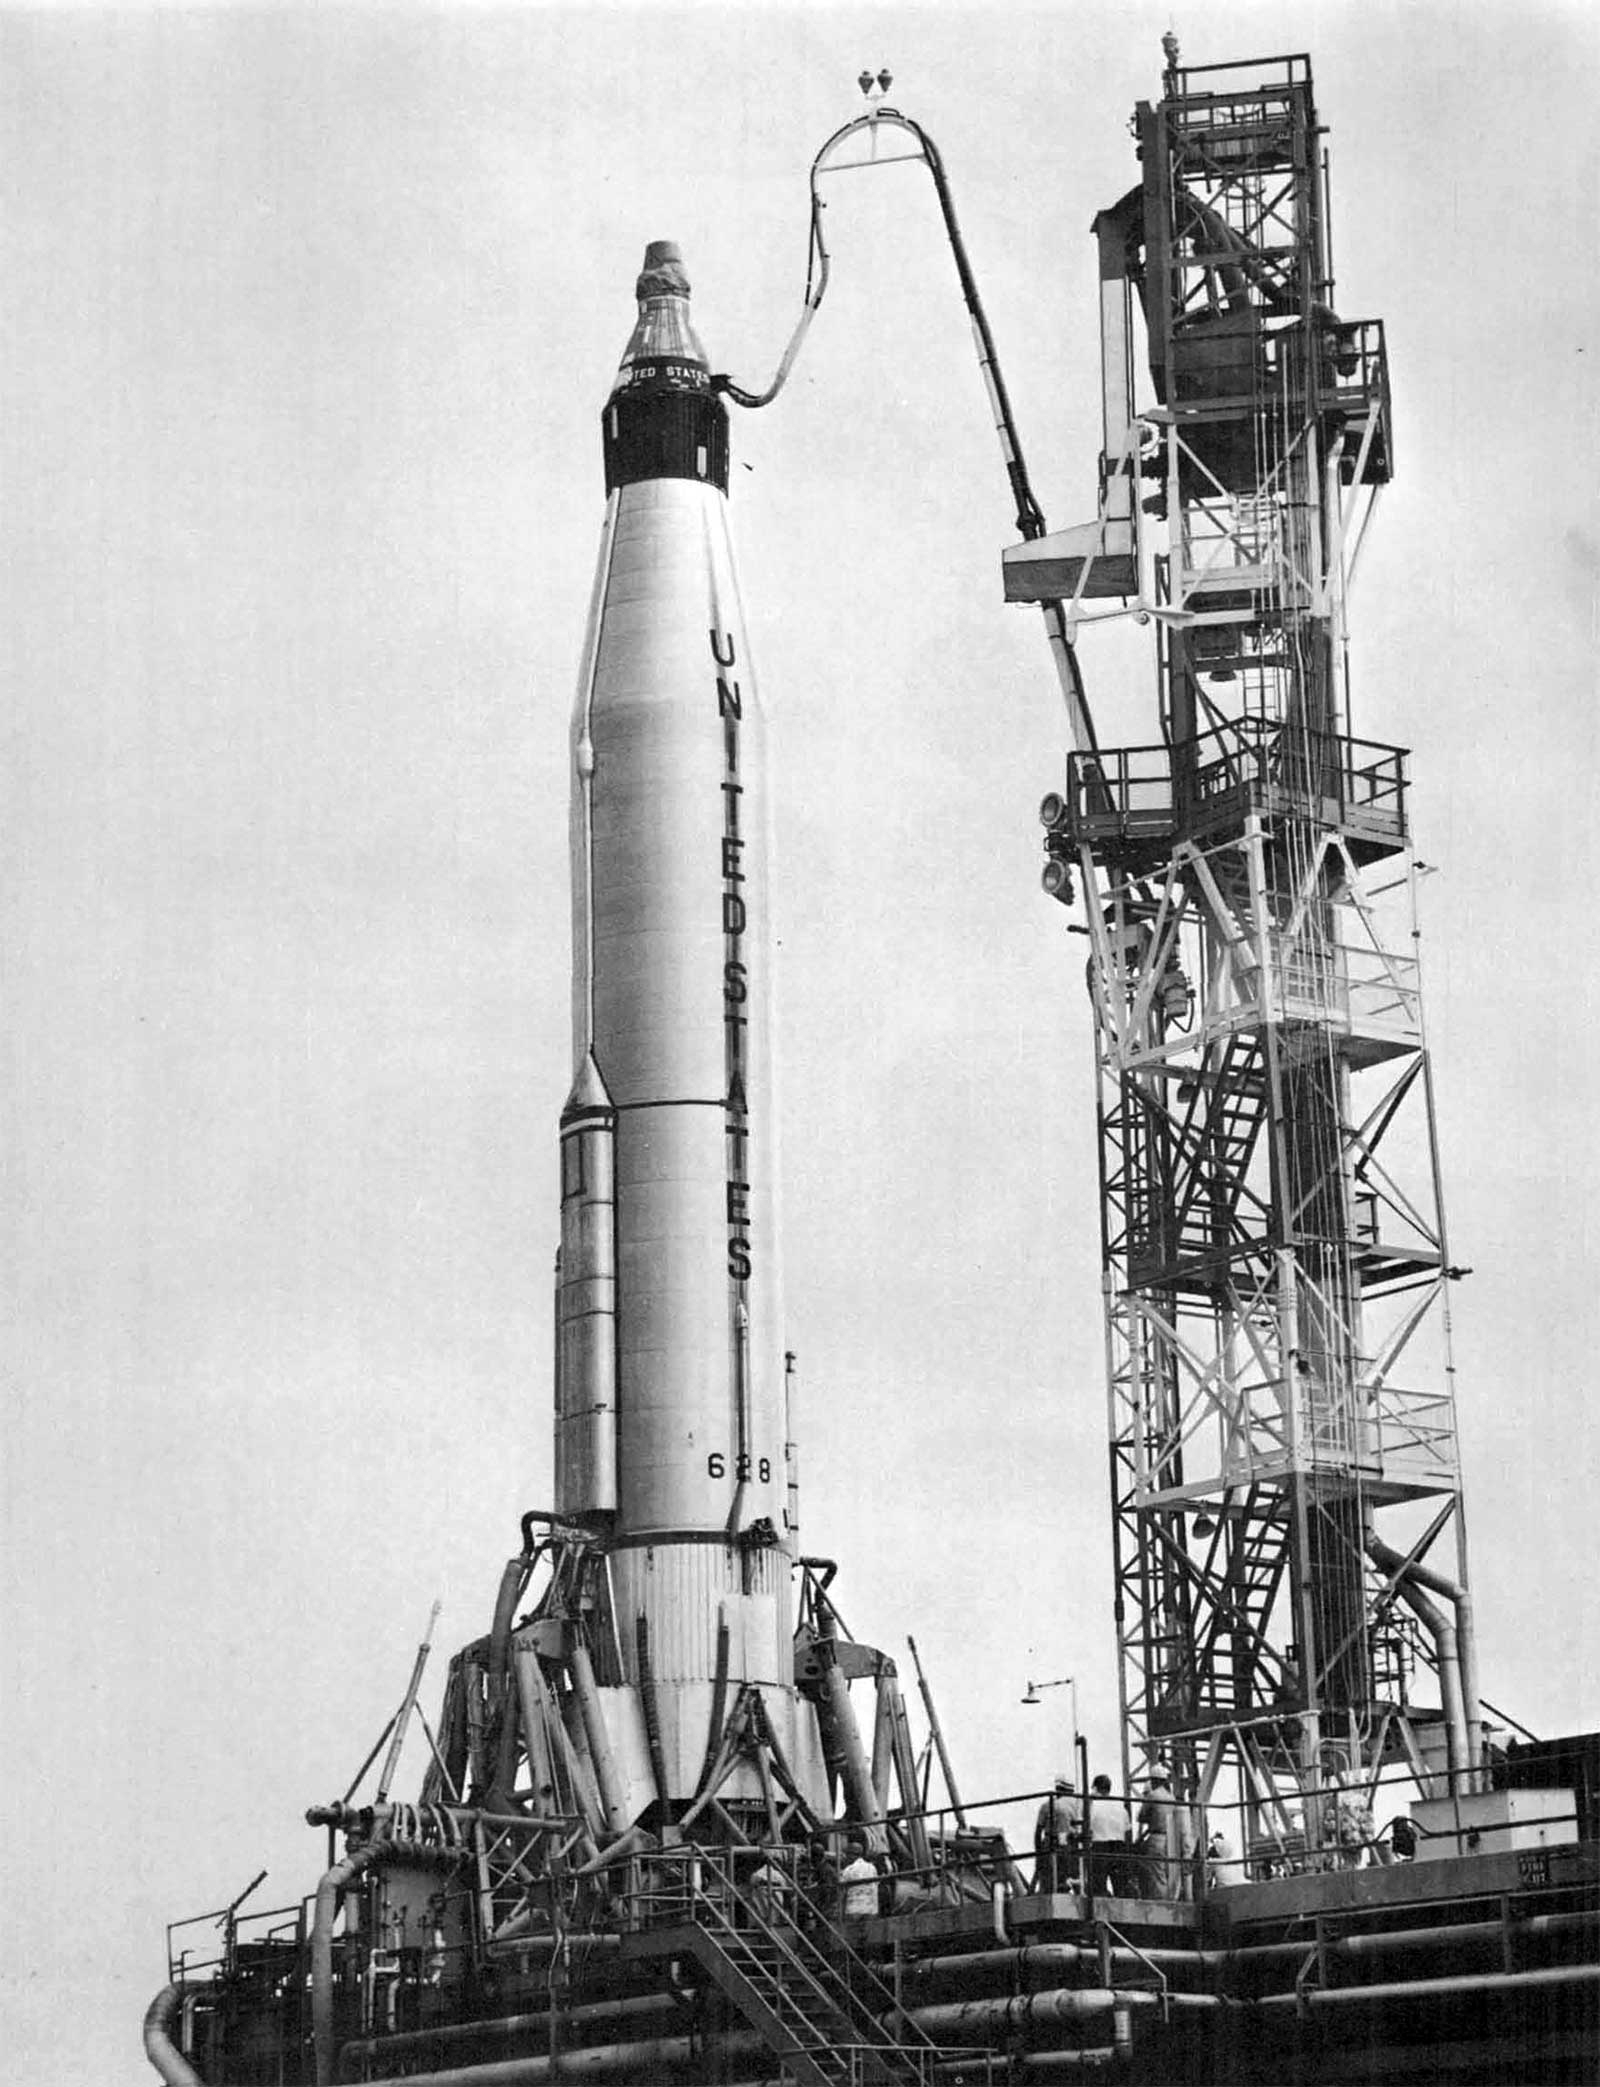
- Figure 24: Big Joe on launch pad at Cape Canaveral for ballistic reentry flight test
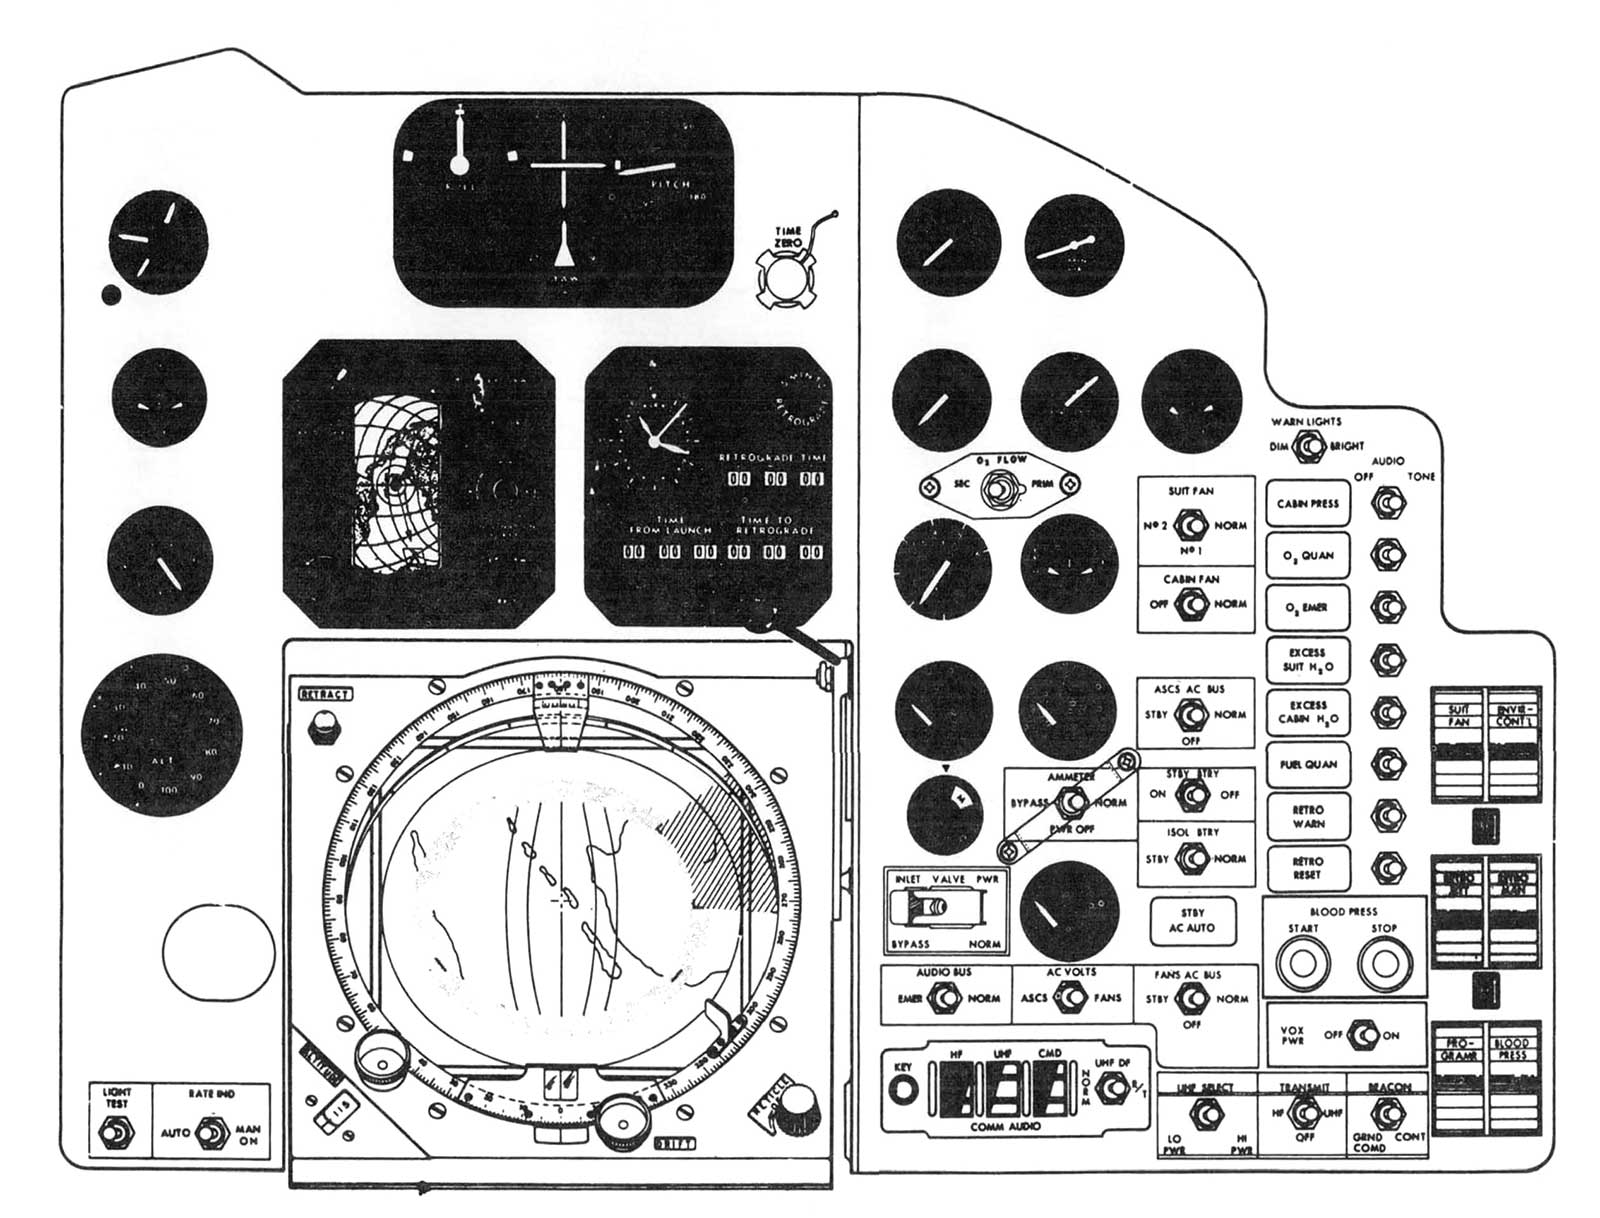
- Figure 25: Spacecraft instrument control panel
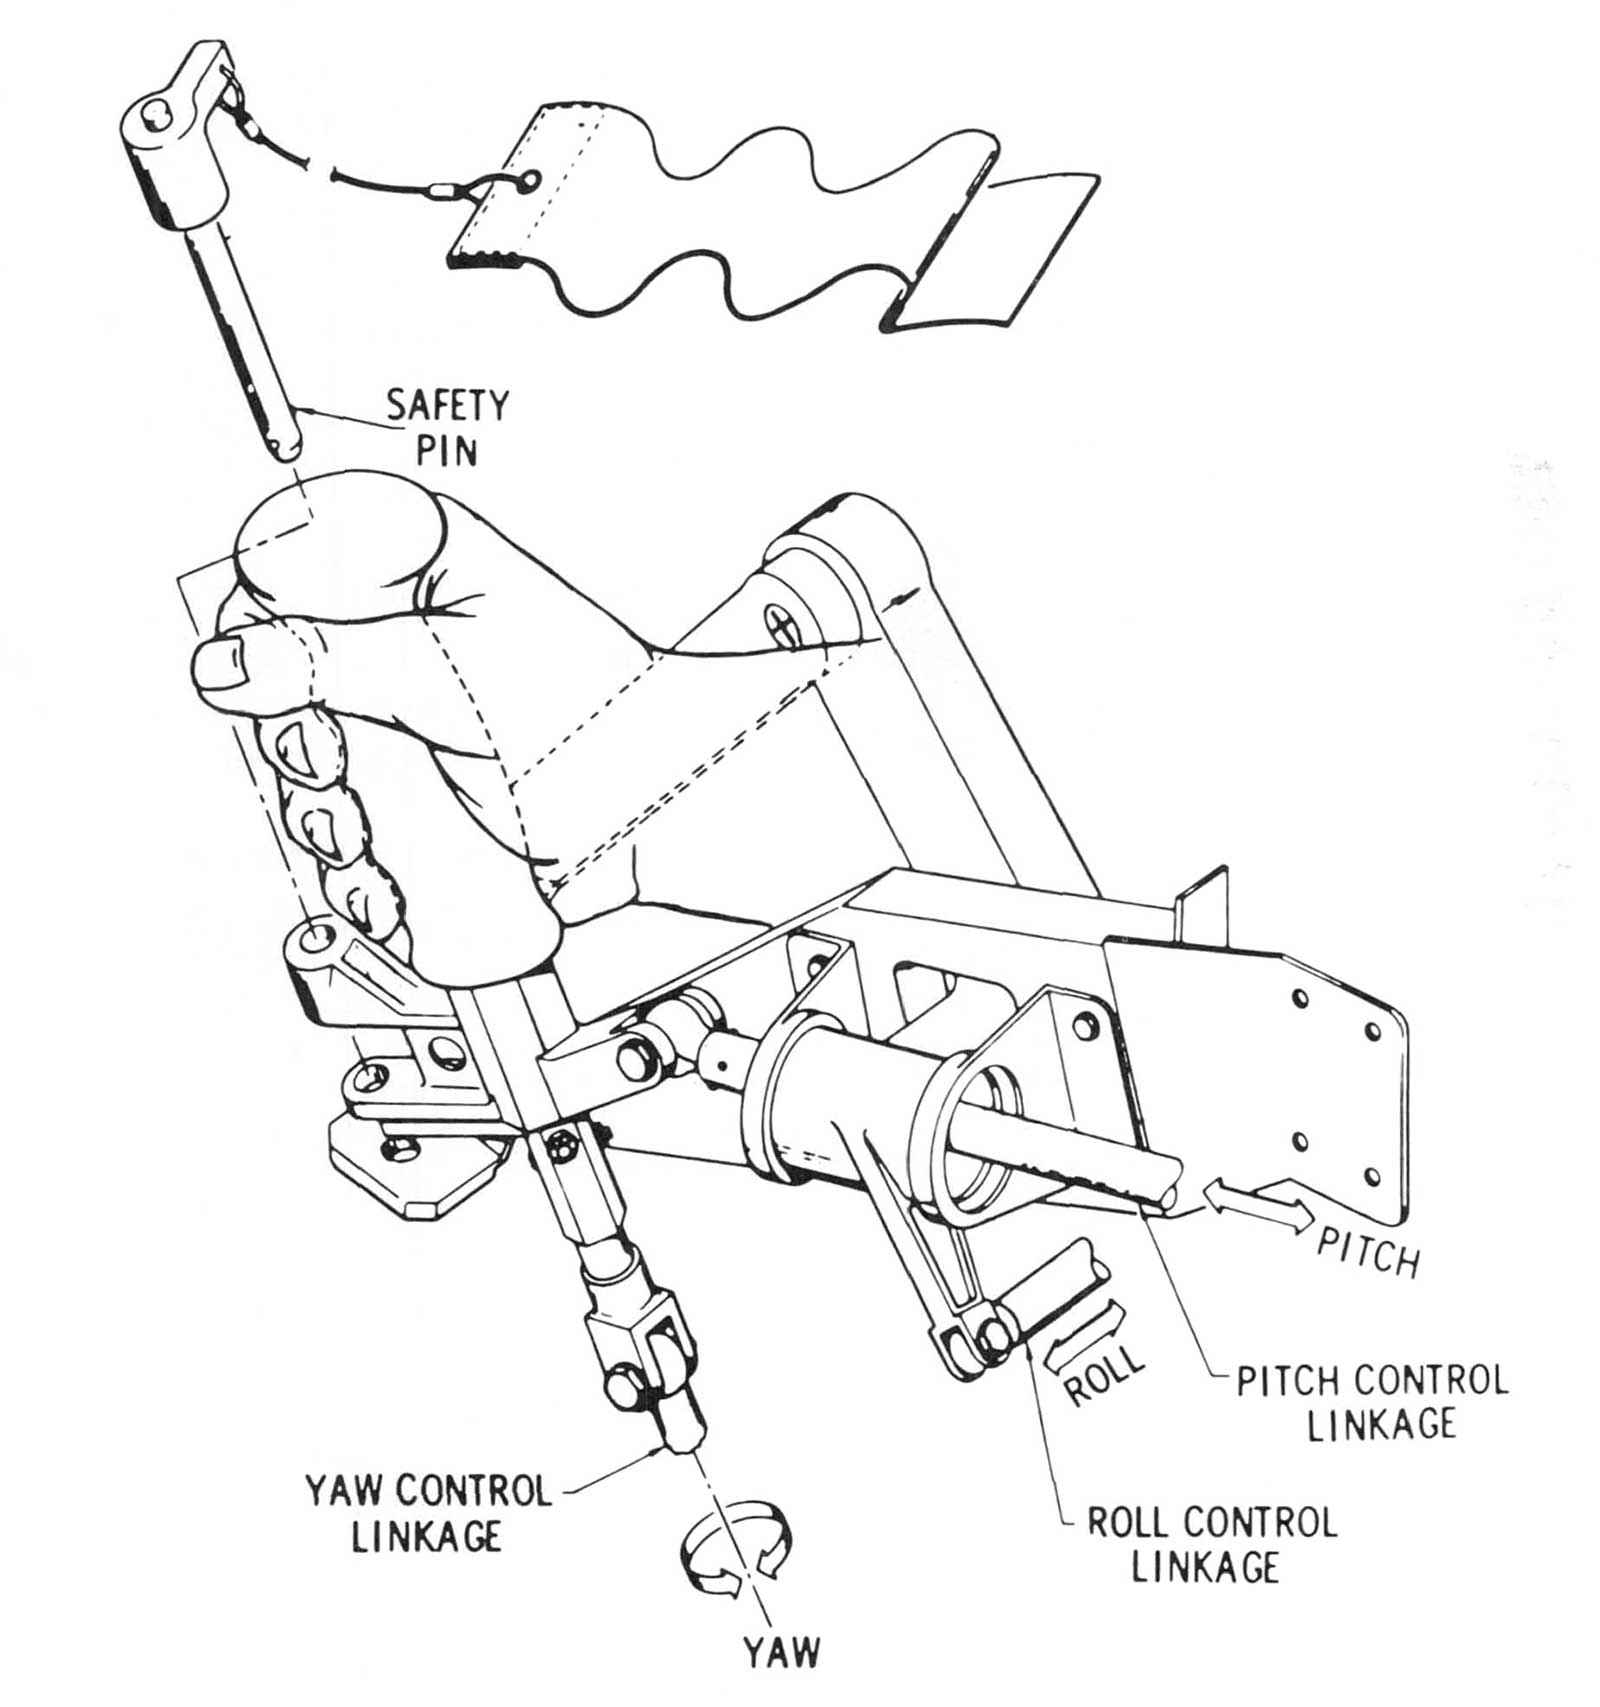
- Figure 26: Three-axis hand controller
- Figure 27: Mercury spacecraft heat shield after reentry
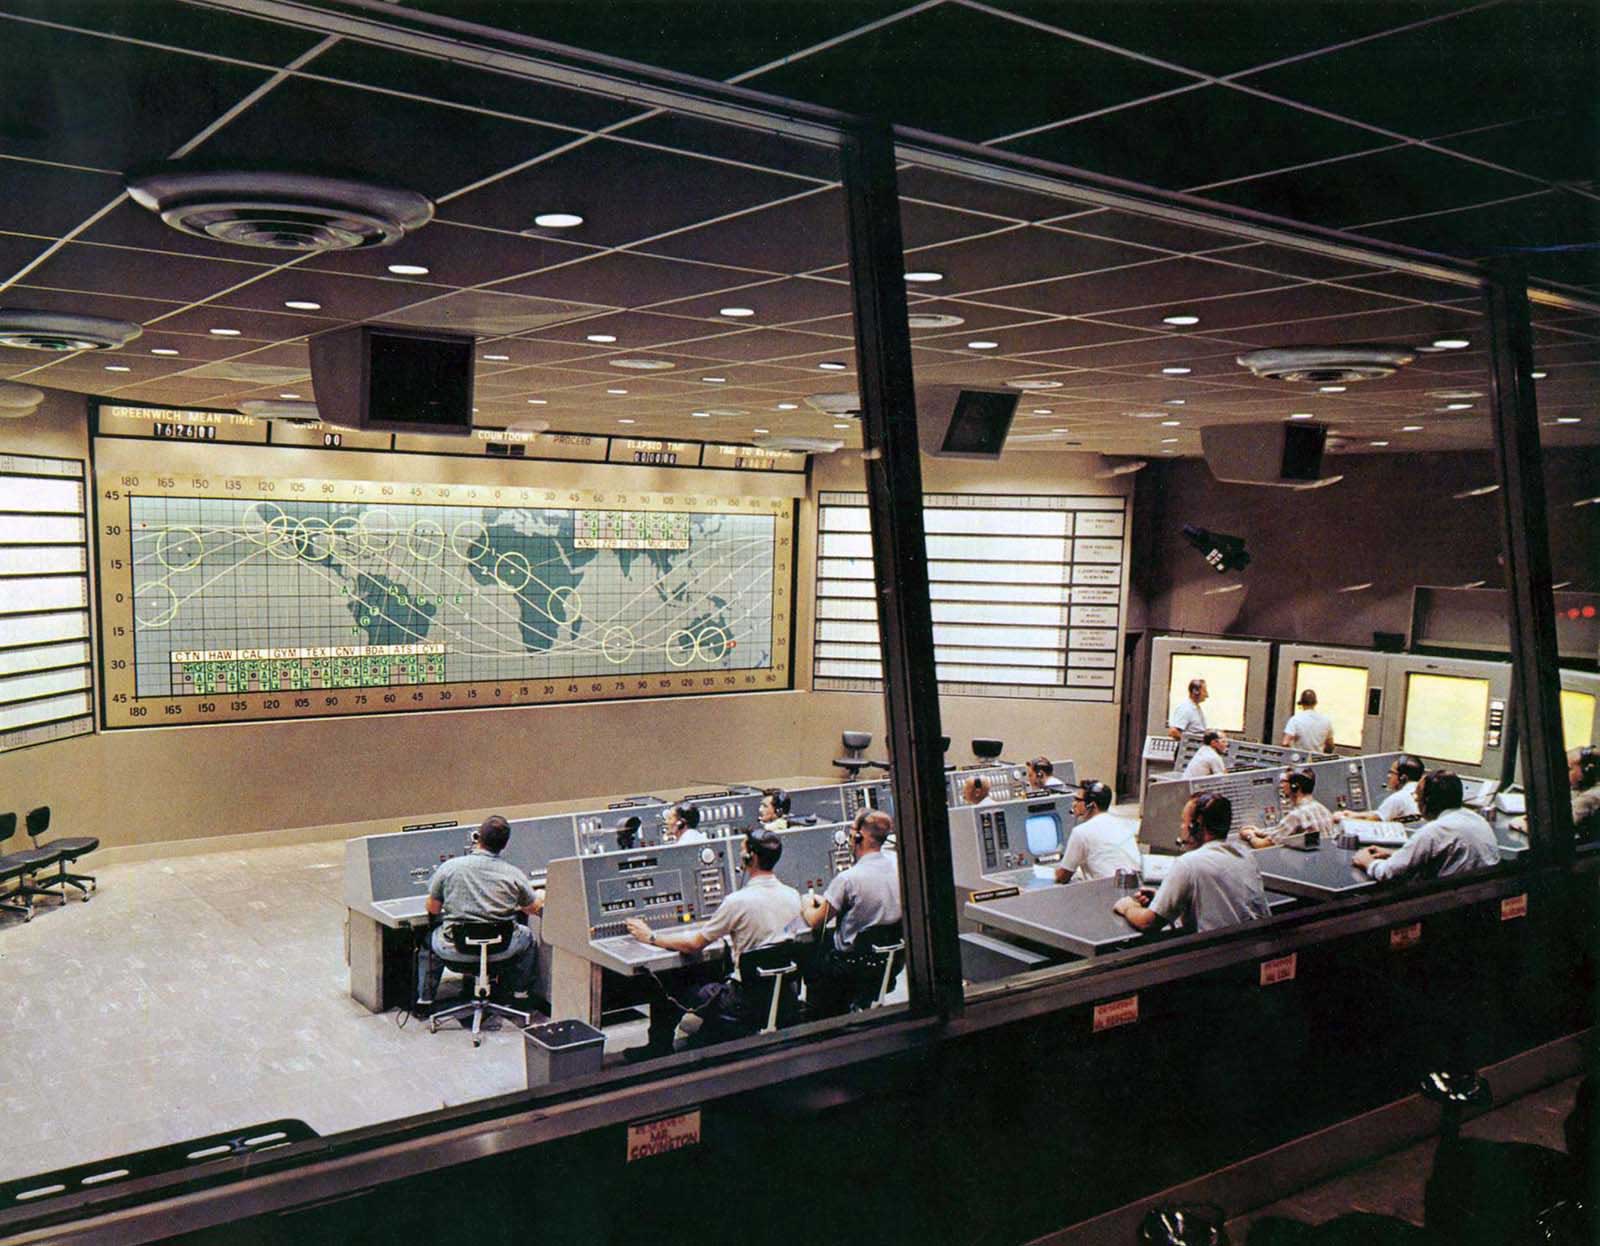
- Figure 28: Mercury Control Center at Cape Canaveral
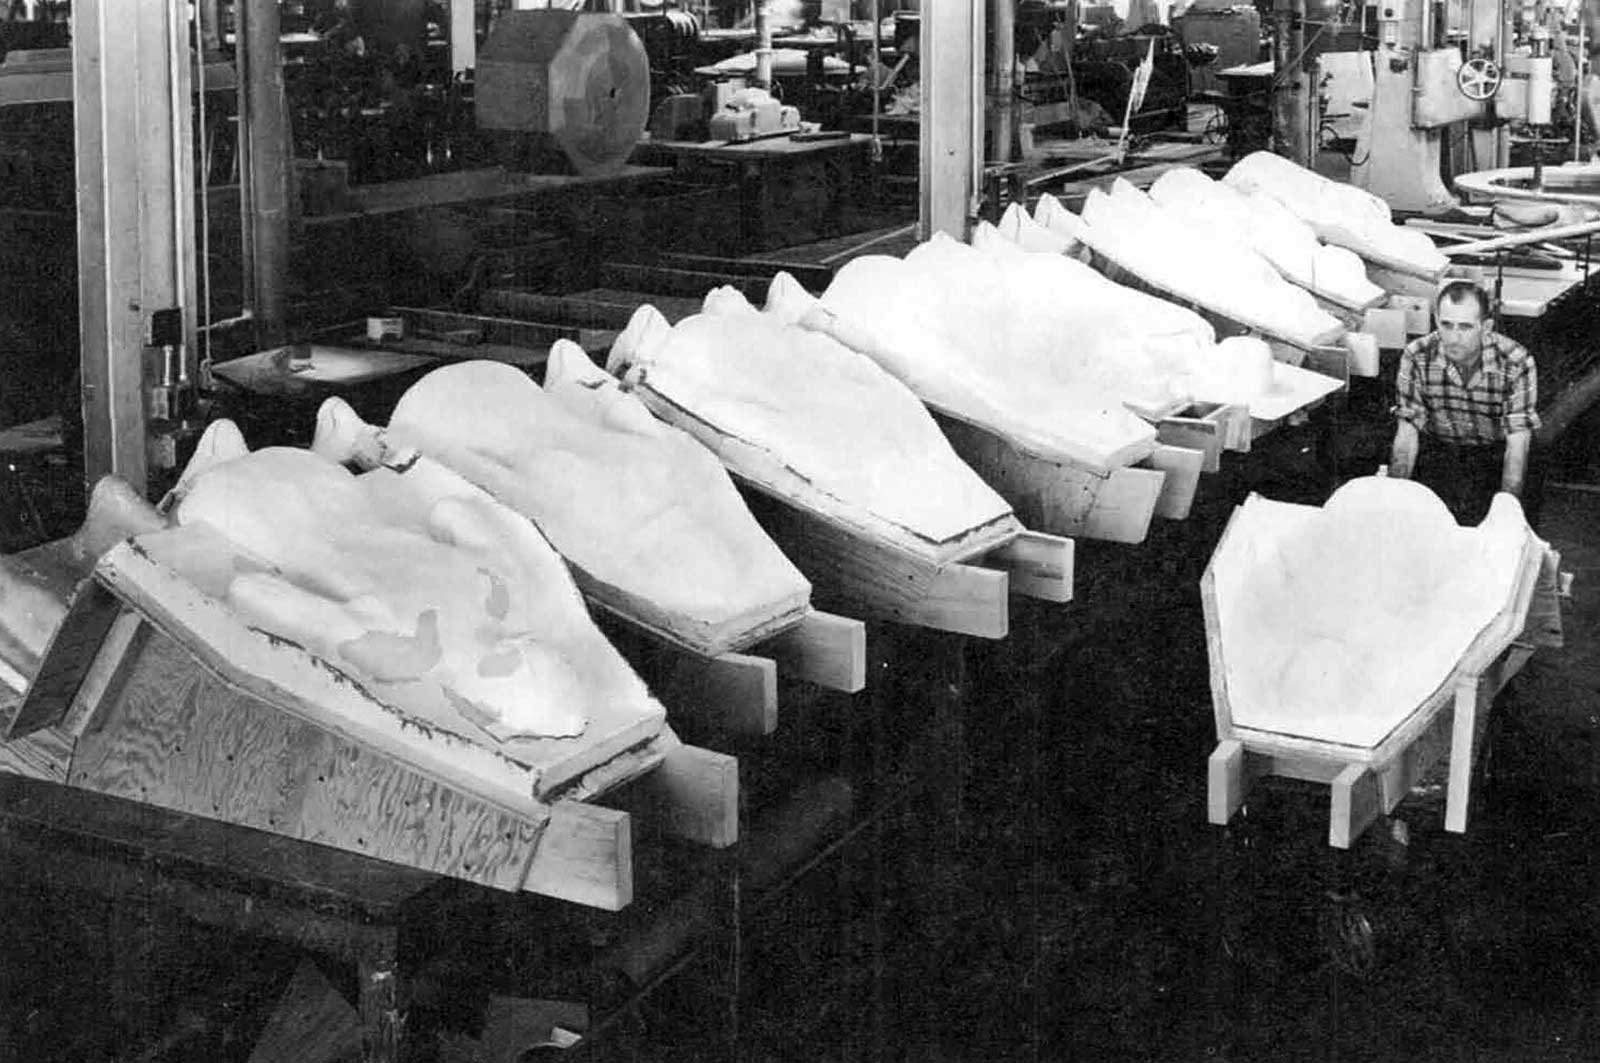
- Figure 29: Plaster forms of contour couches
- Figure 30: Reaction control thrust chamber
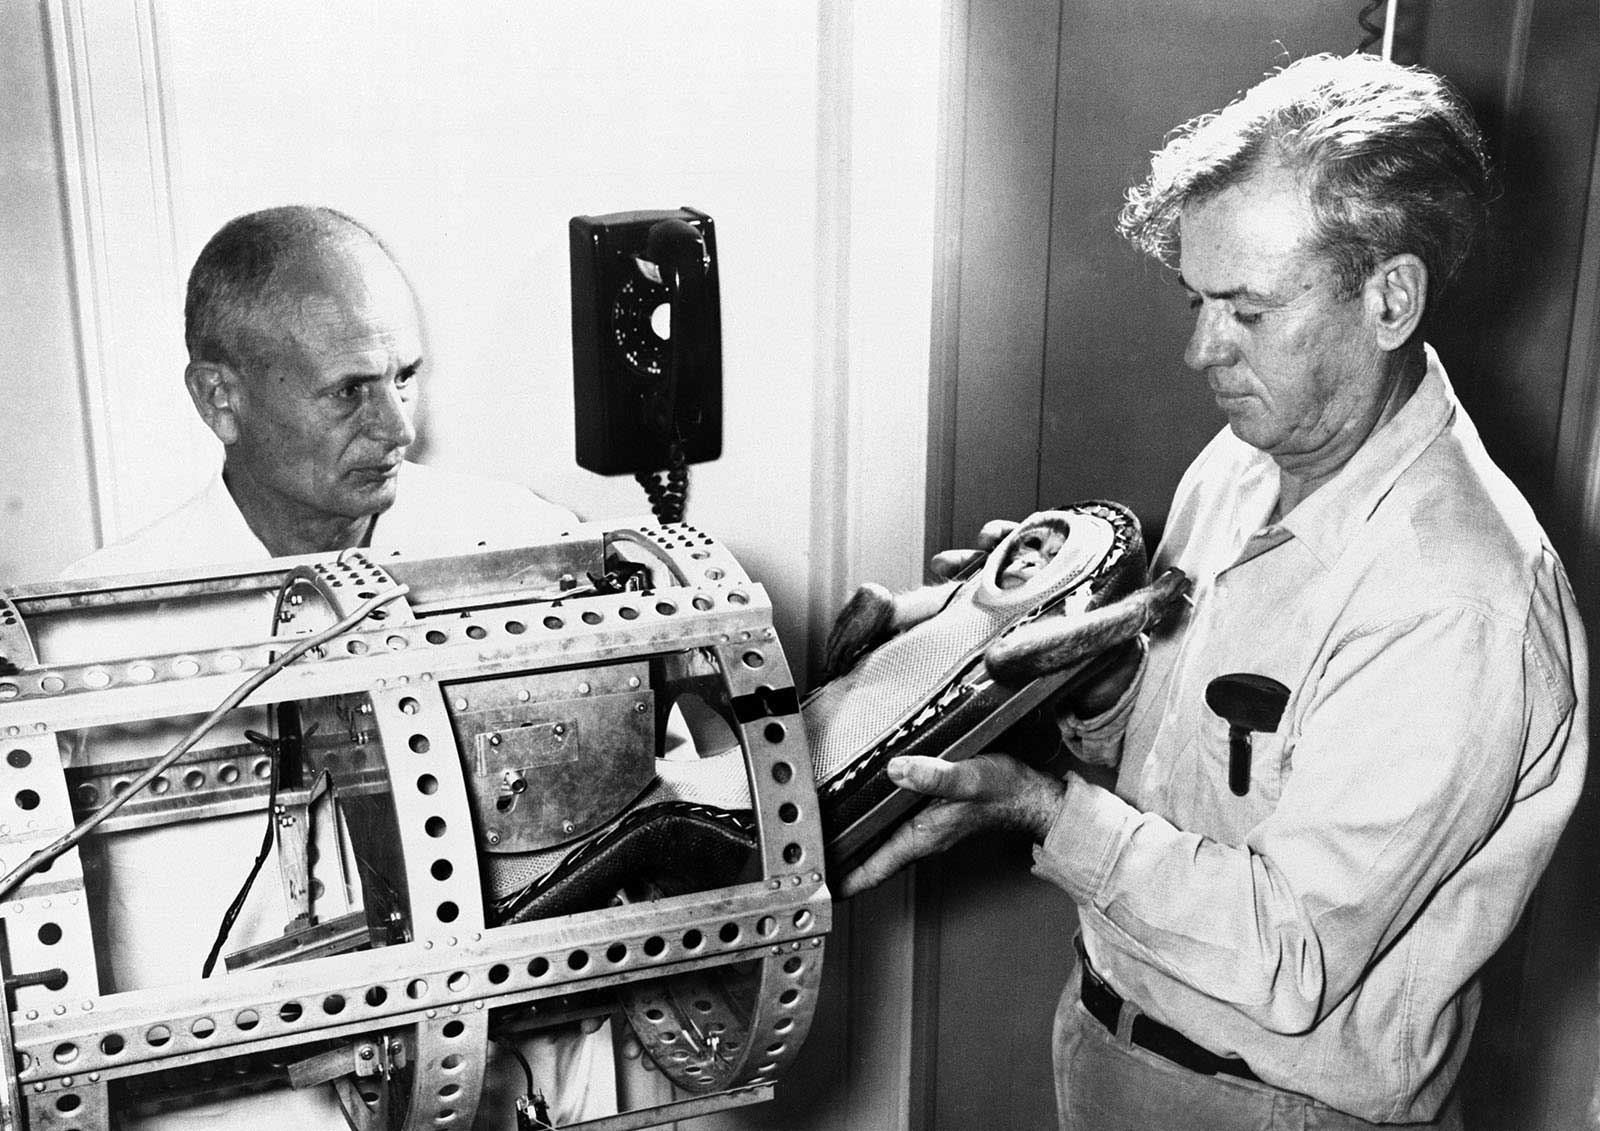
- Figure 31: Rhesus monkey, "Miss Sam," being placed in container for LJ-1B flight
- Figure 32: Manufacture of Mercury spacecraft at McDonnell plant, St. Louis, Mo.
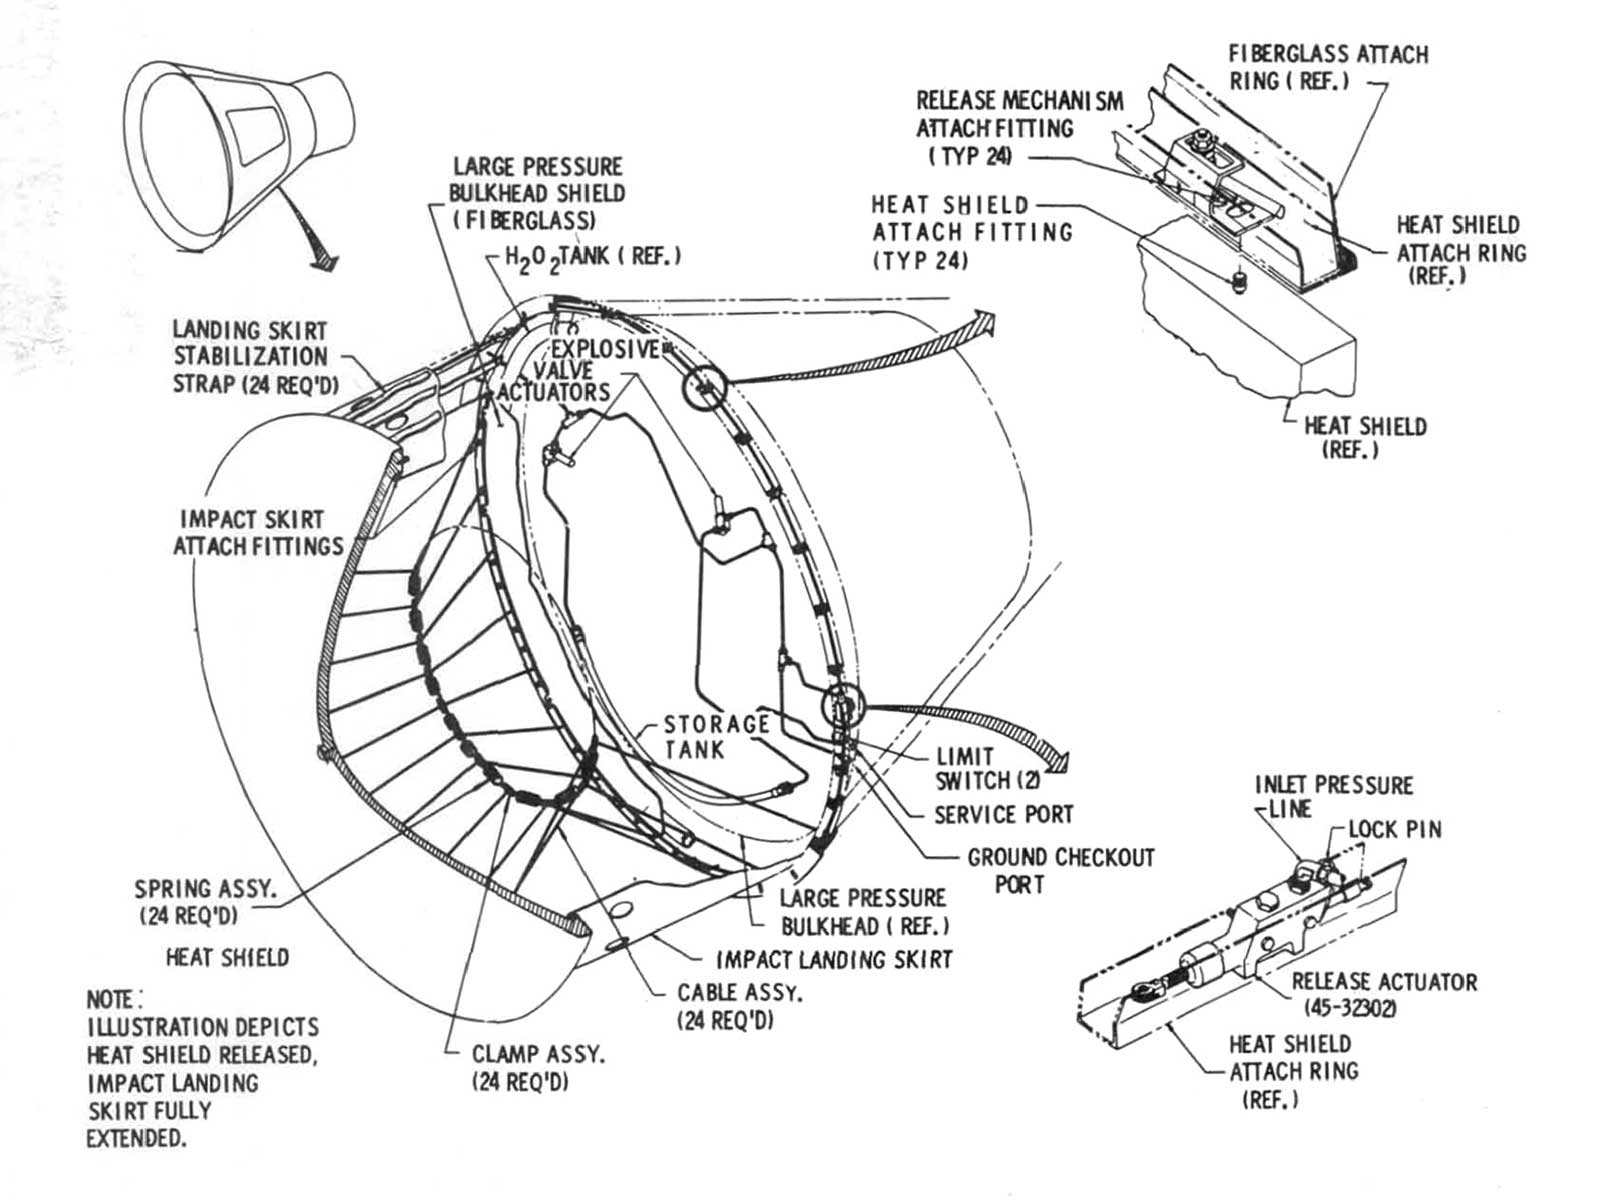
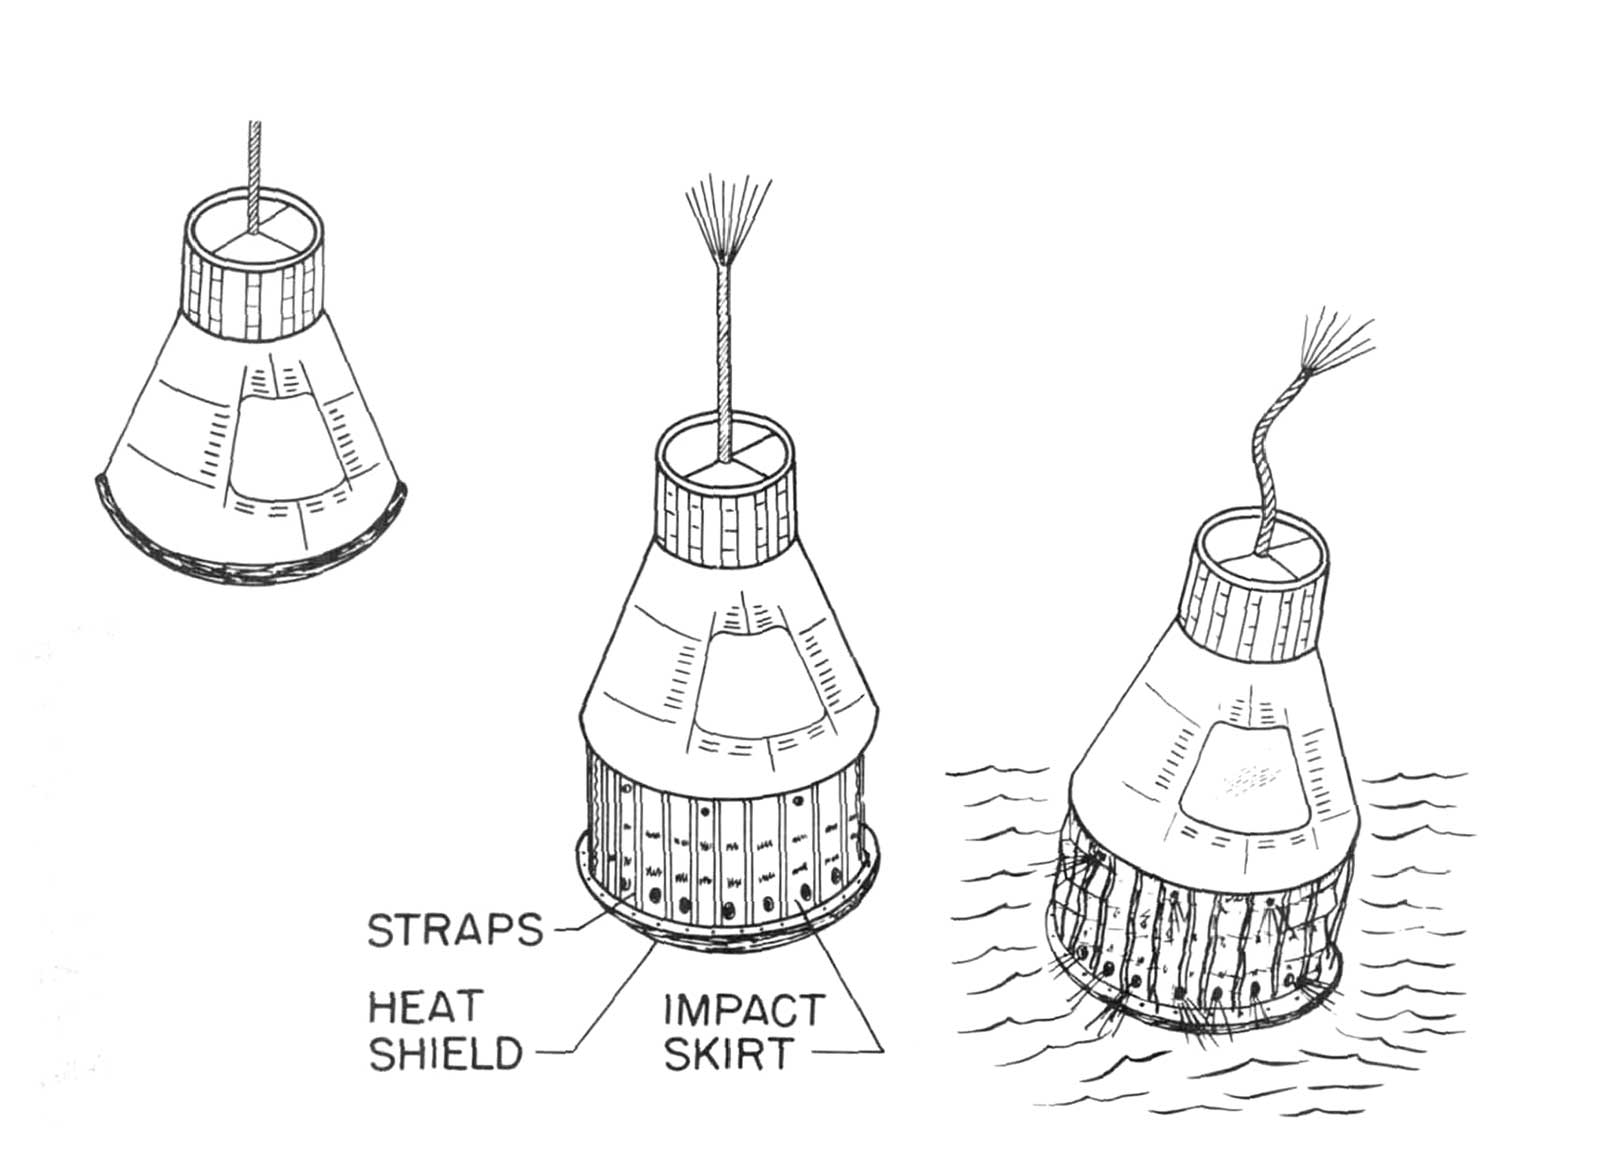
- Figure 33: Landing shock attenuation system
- Figure 34: Astronauts in weightless flight in C-131 aircraft
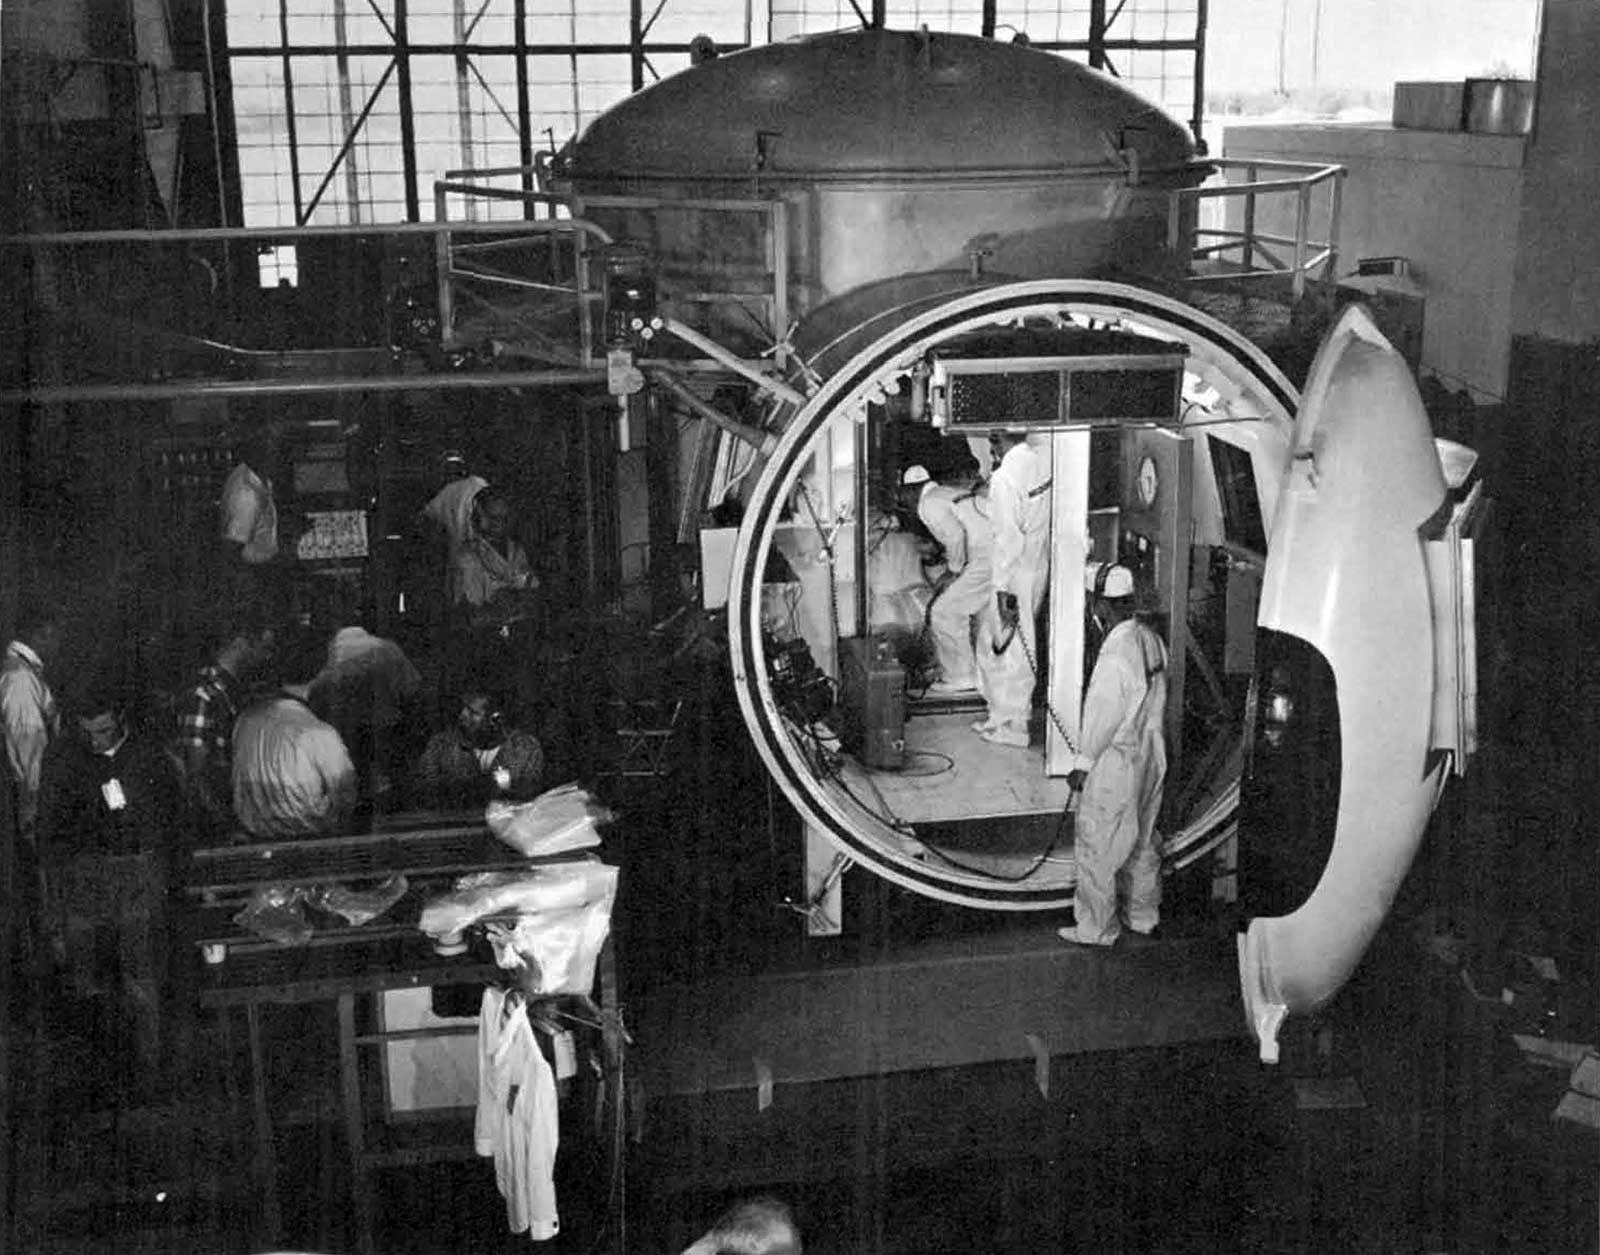
- Figure 35: Mercury altitude test chamber in Hanger S, Cape Canaveral
- Figure 36: Posigrade rocket motor
- Figure 37: Pressure suit worn by Alan Shepard on first manned suborbital space flight
- Figure 38: Mercury environmental control system
- Figure 39: Mercury-Atlas 1
- Figure 40: Mobile pad egress tower (cherry picker)
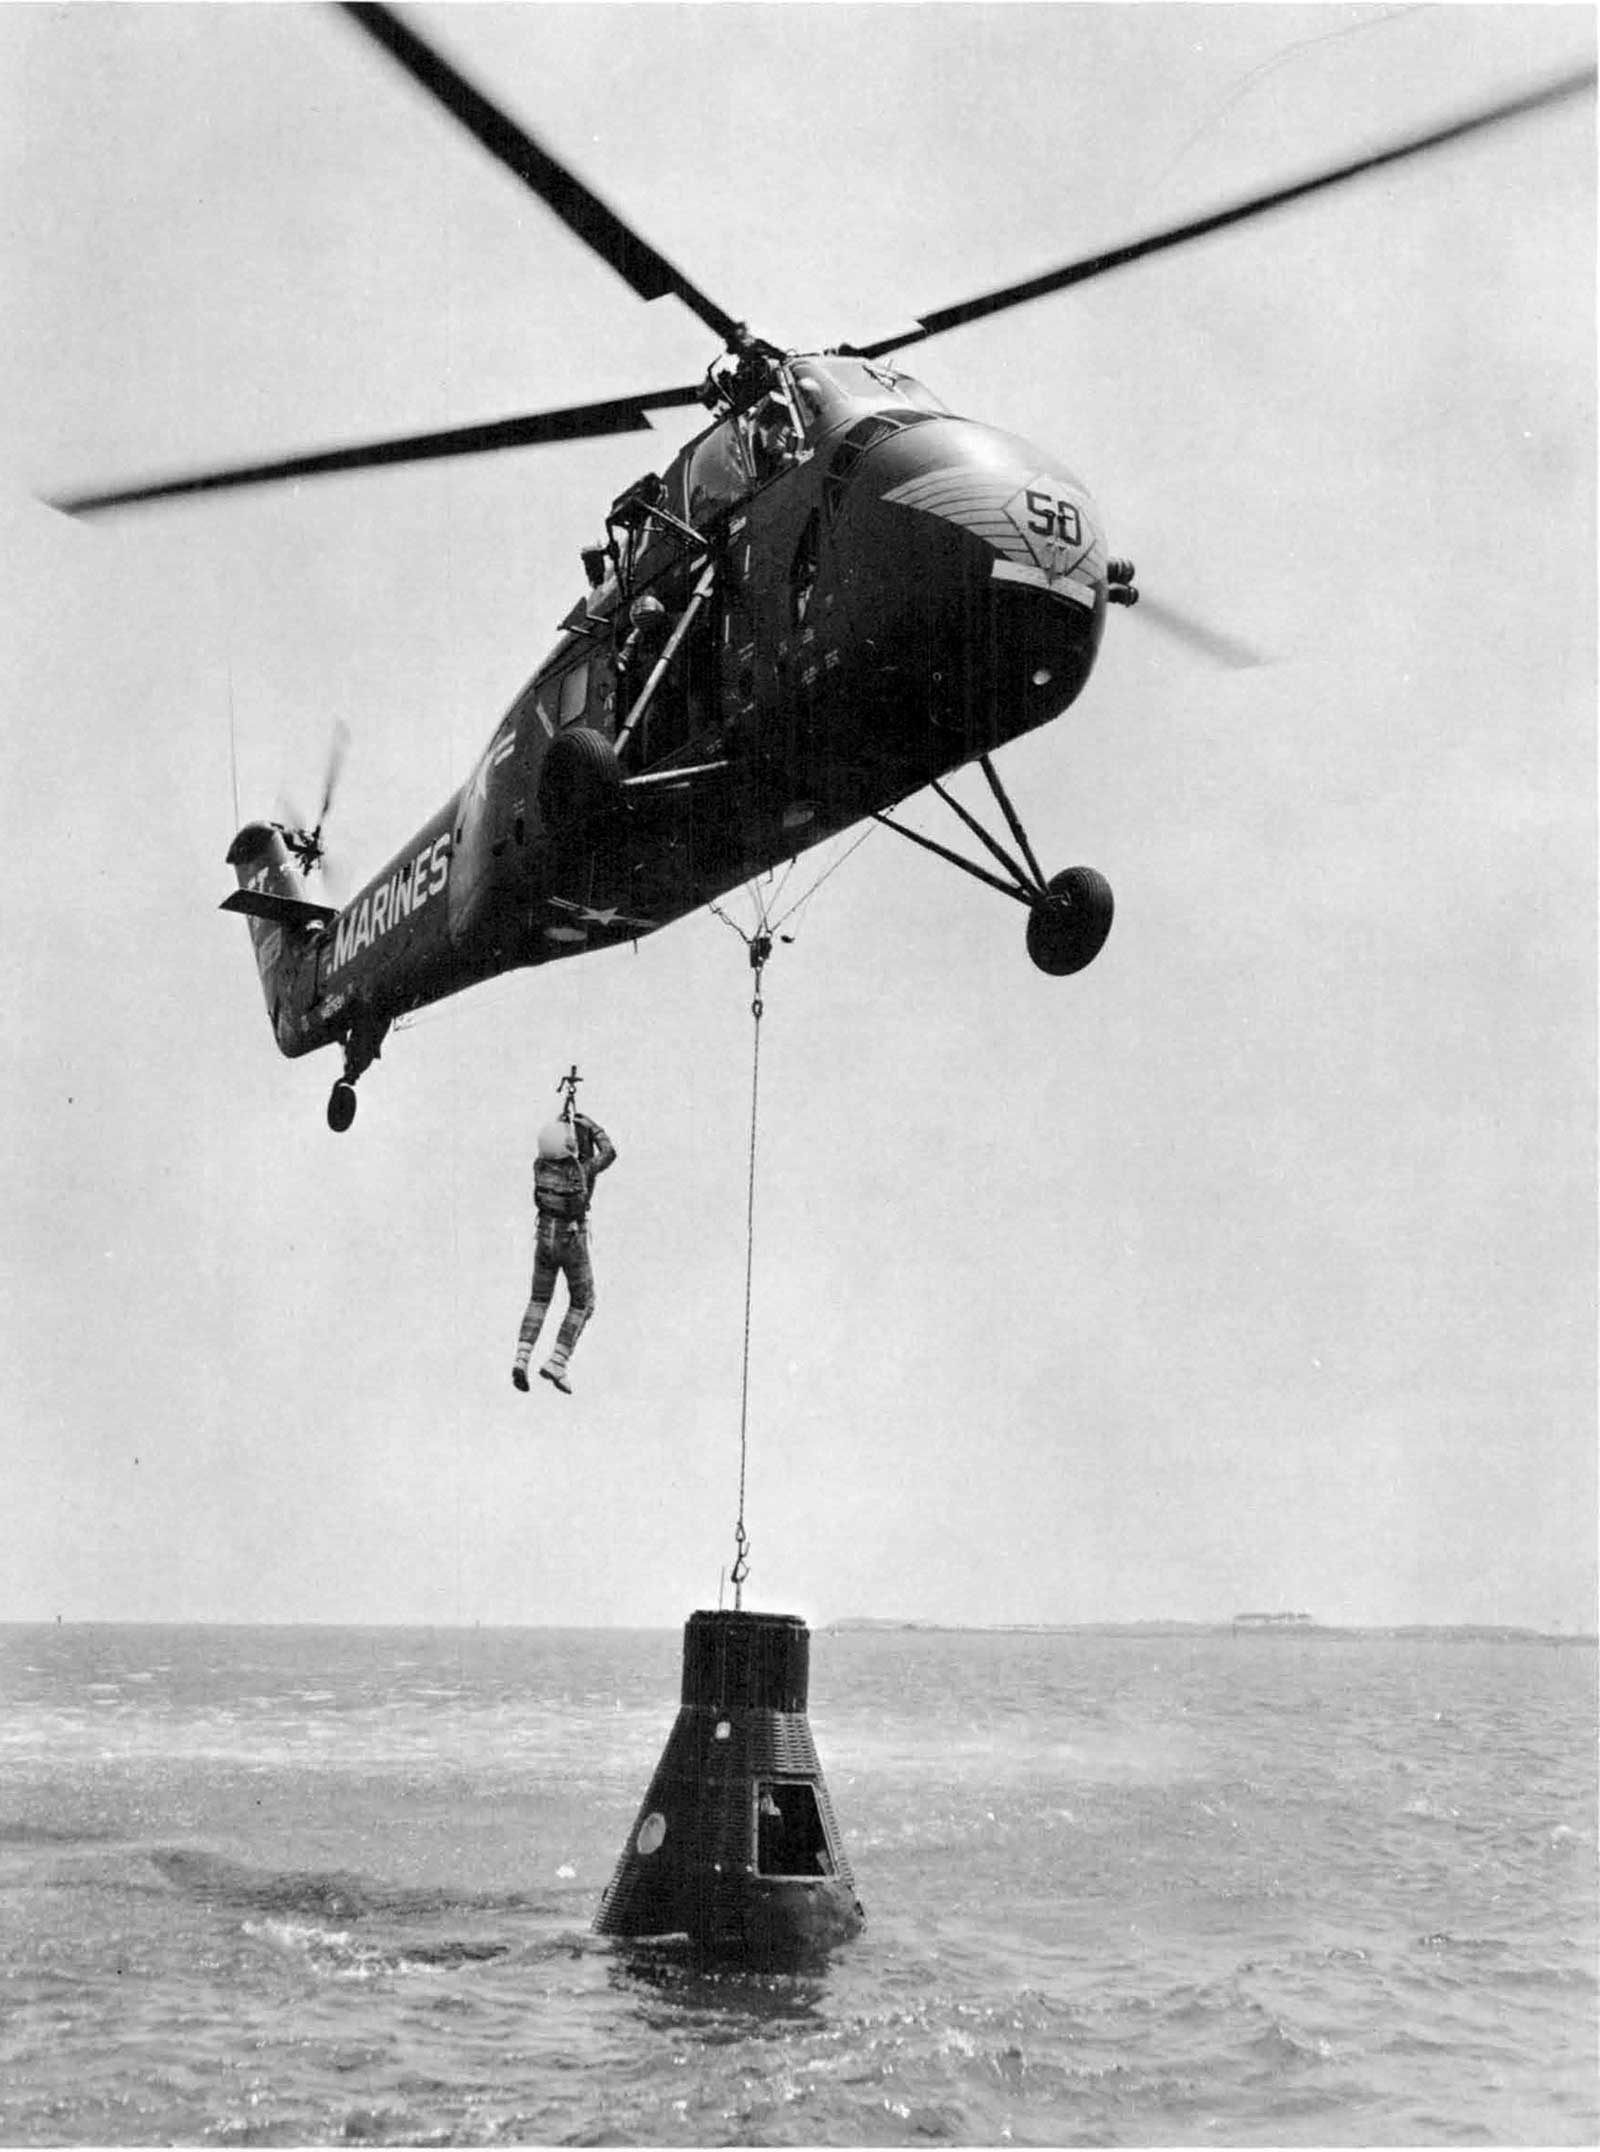
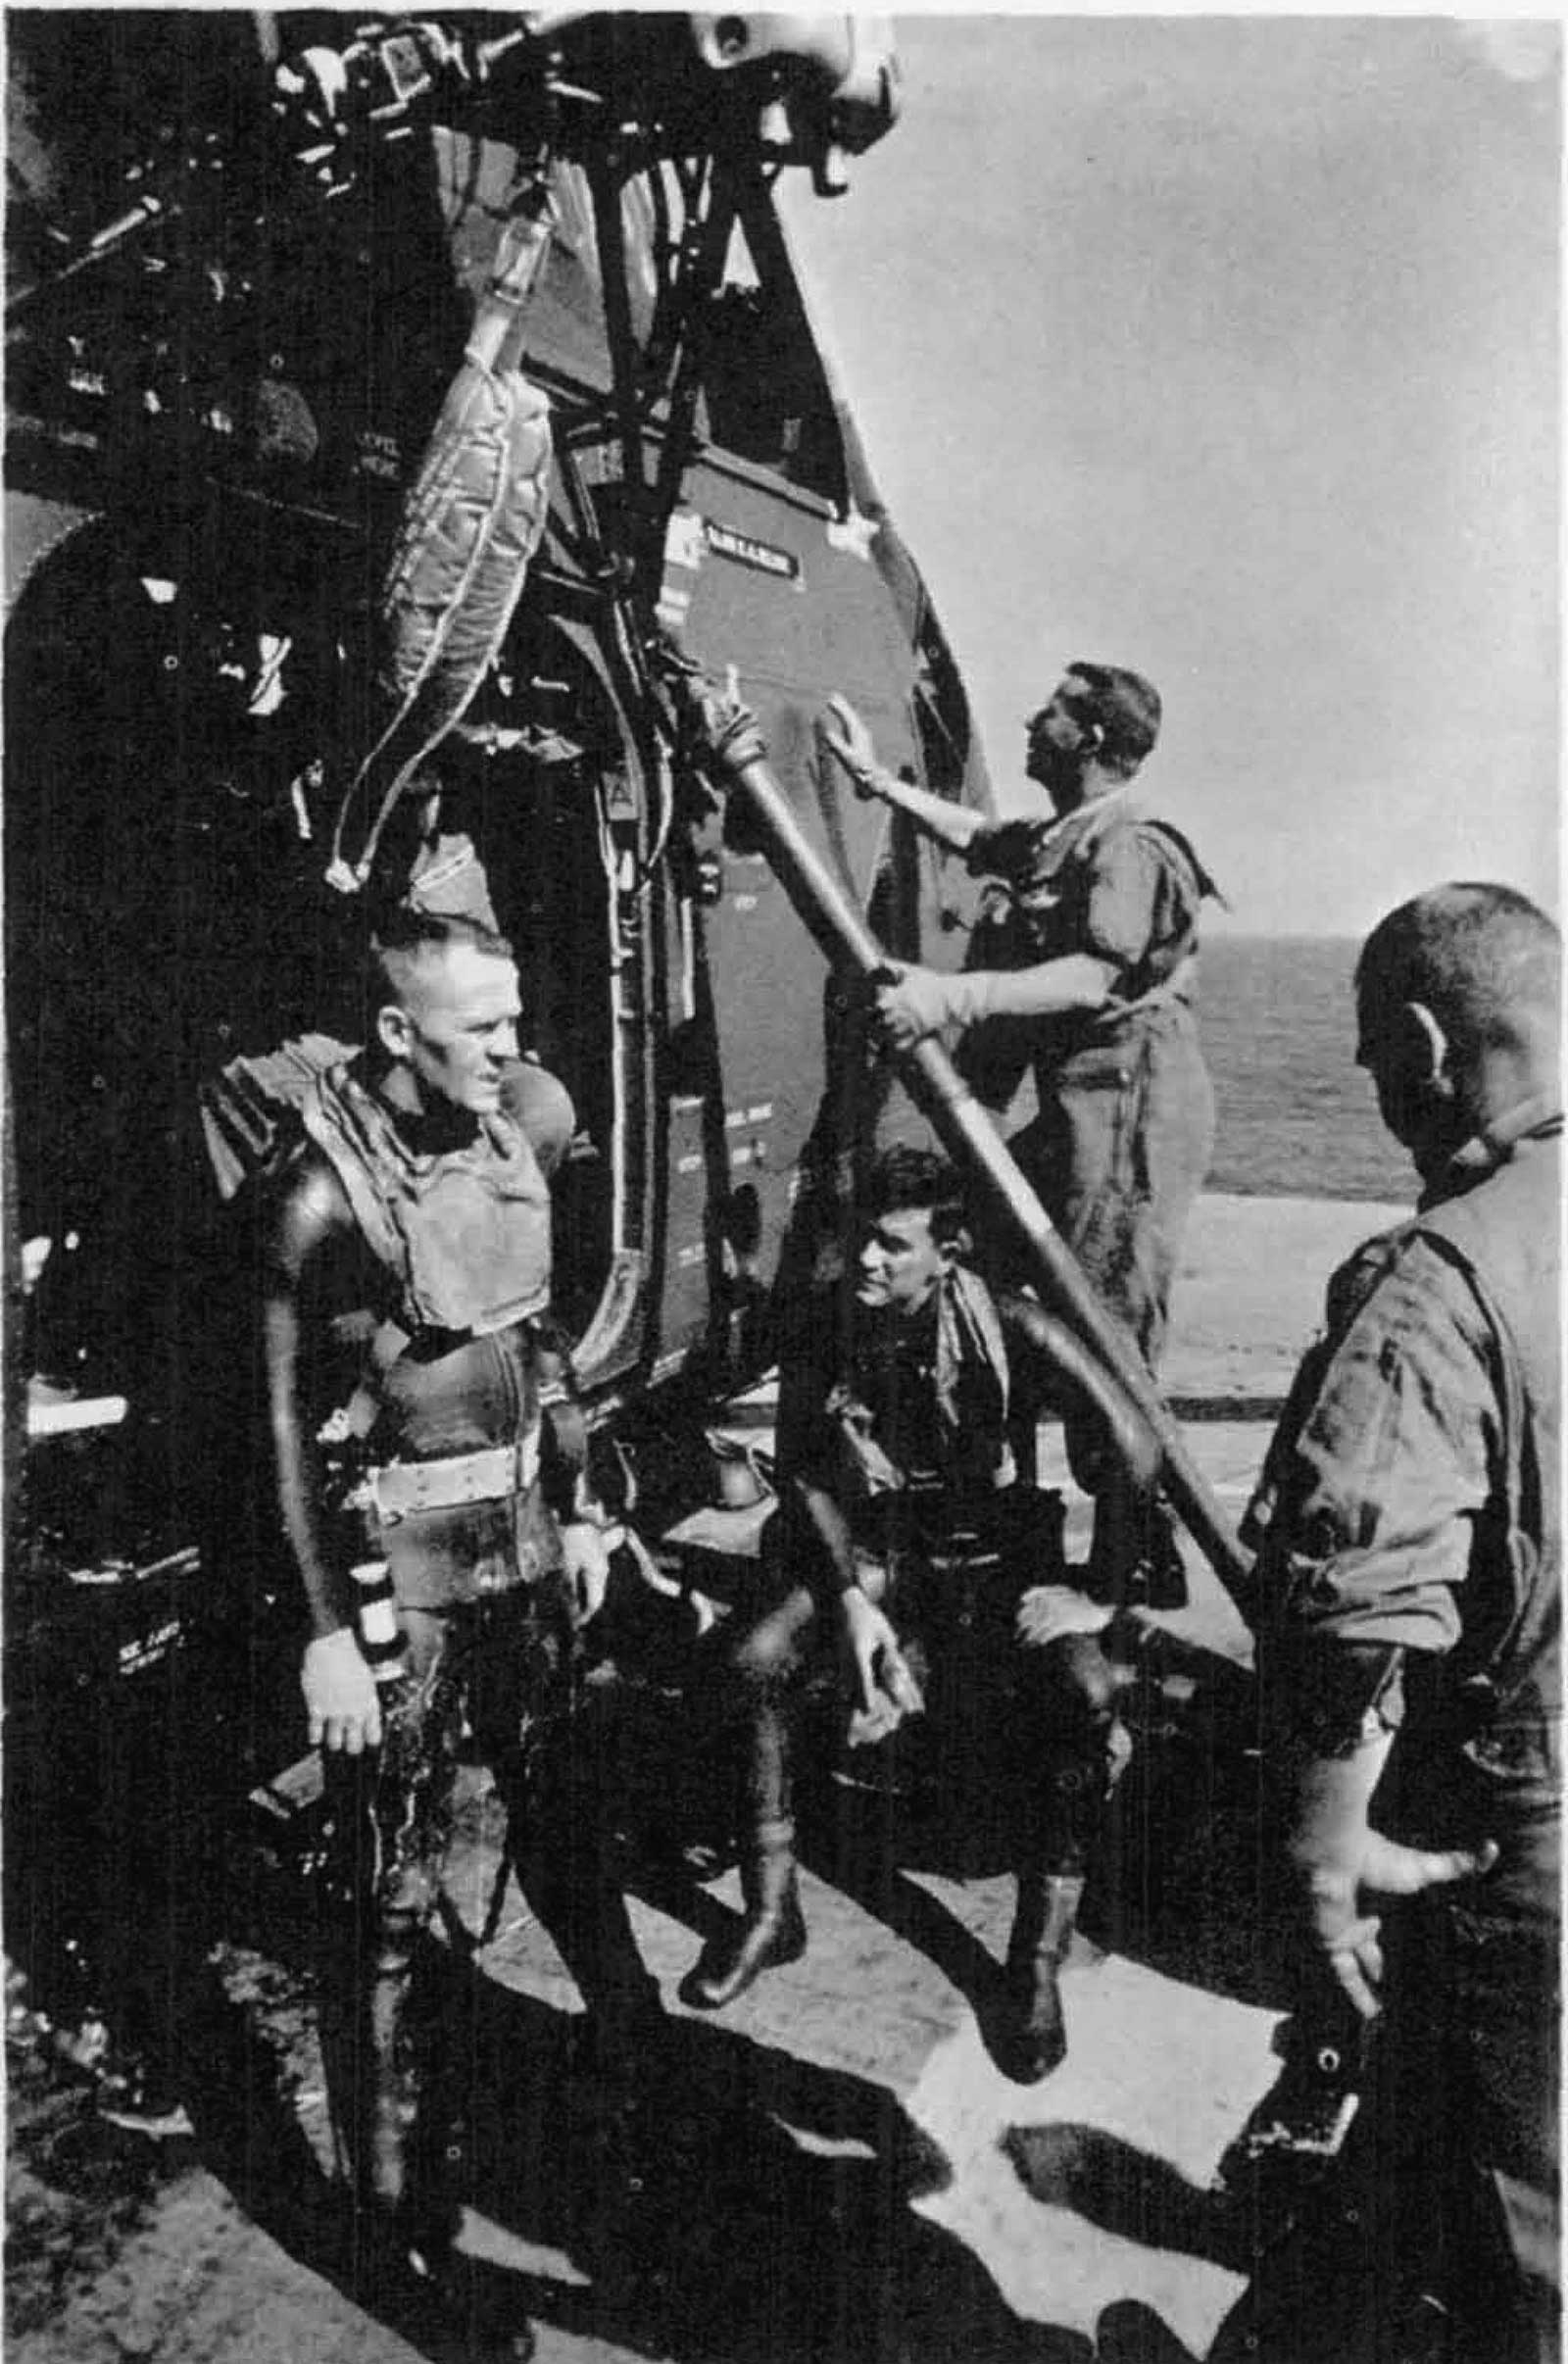
- Figure 41: Mercury spacecraft and astronaut Shepard being recovered by Marine Corps helicopter
- Figure 42: Tower jettison rocket motor
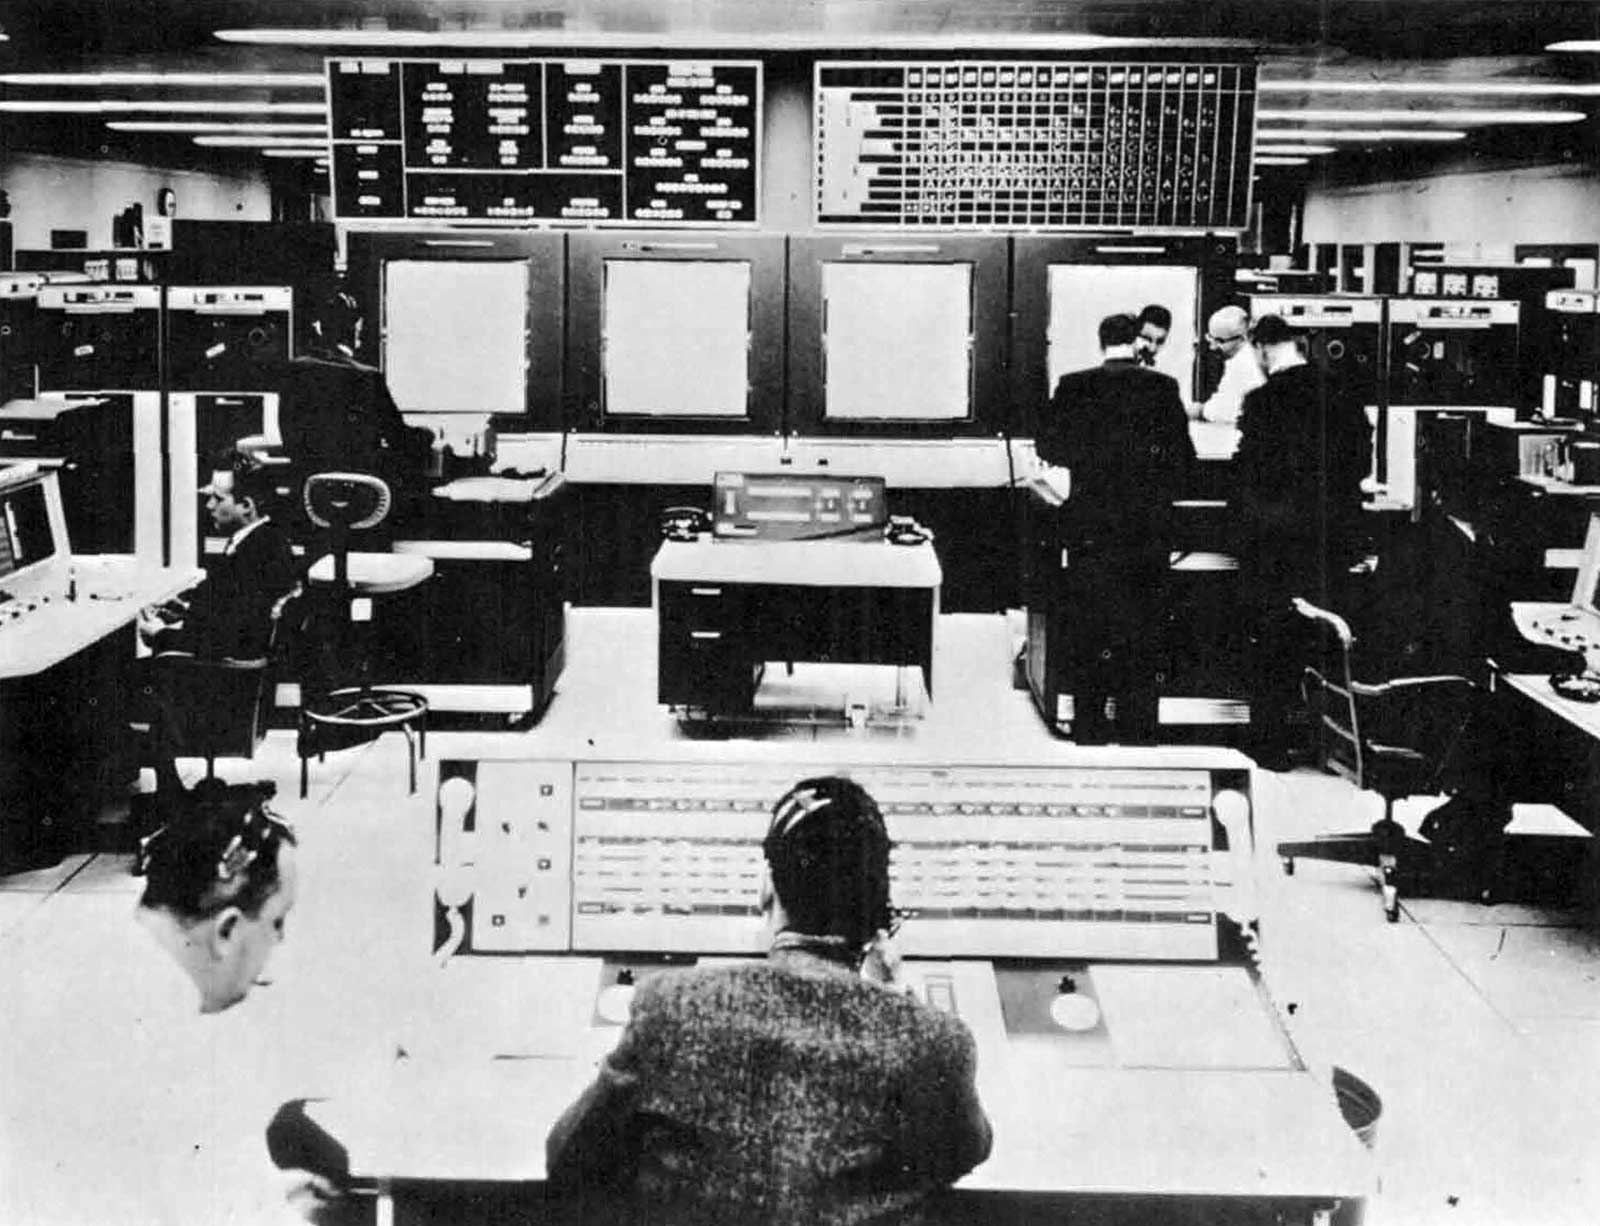
- Figure 43: Computers used in Mercury orbital track at Goddard Space Flight Center
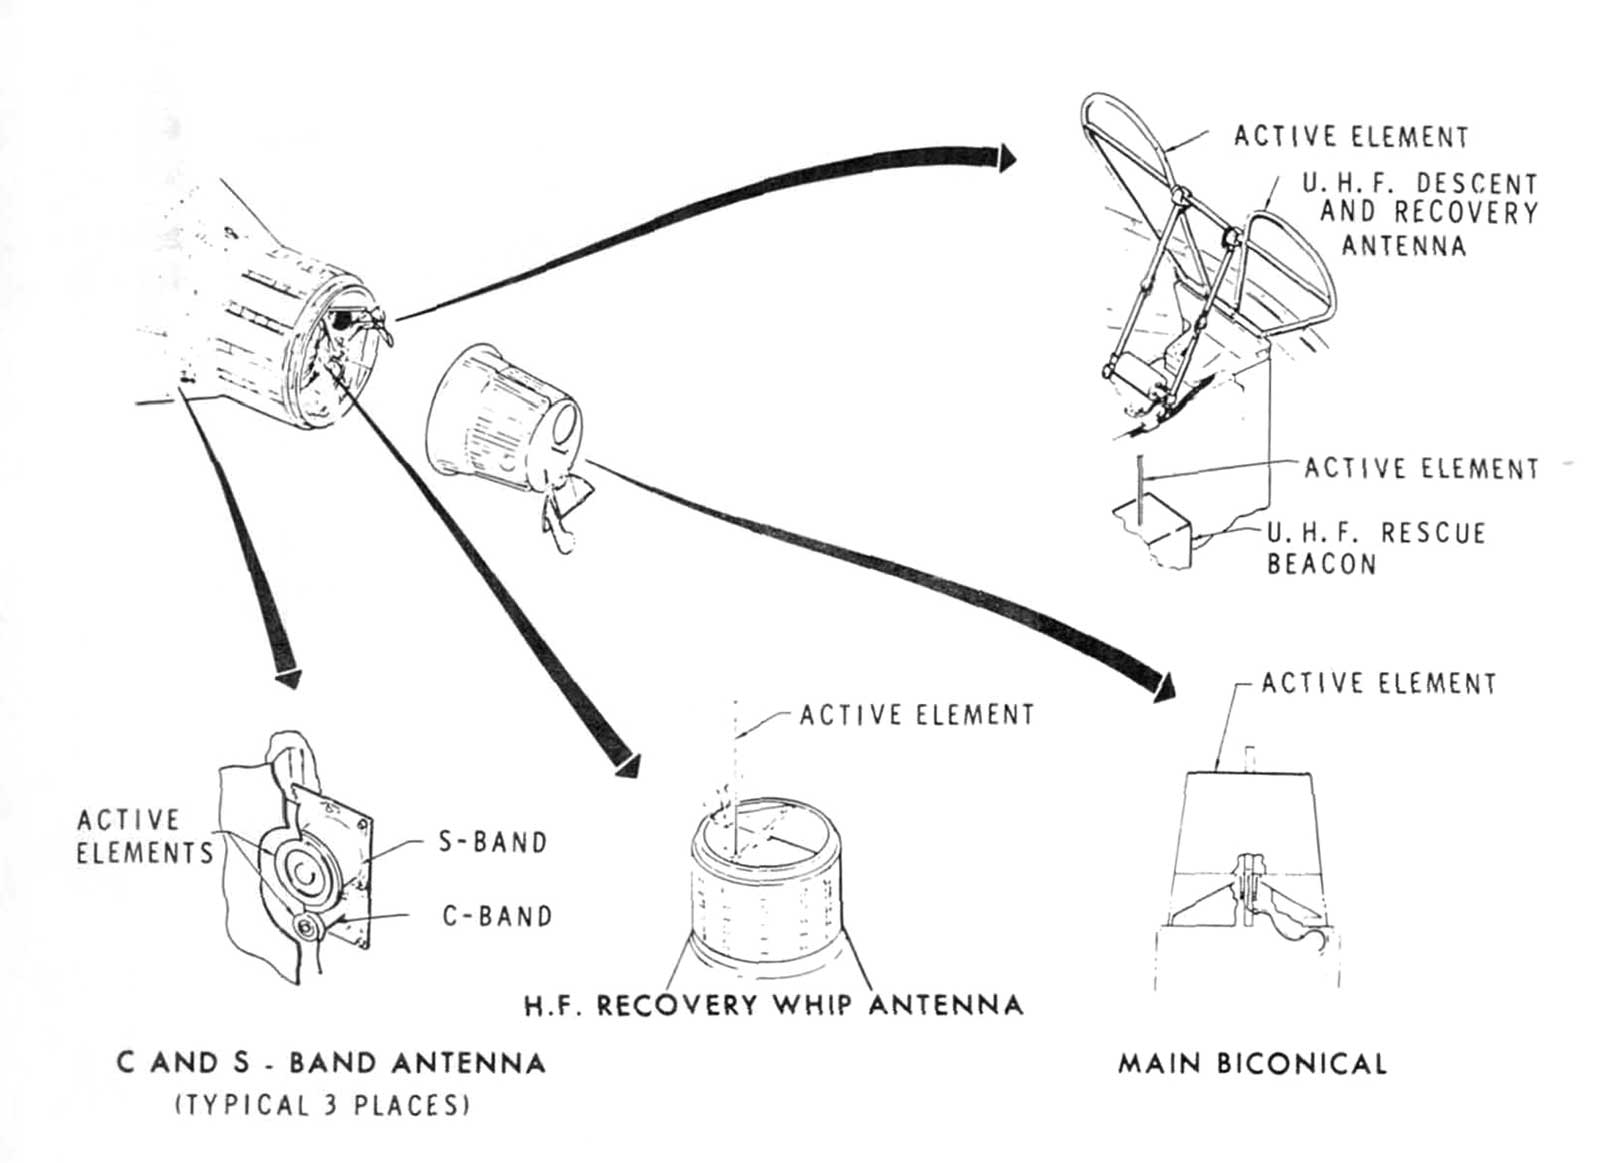
- Figure 44: Spacecraft antennas
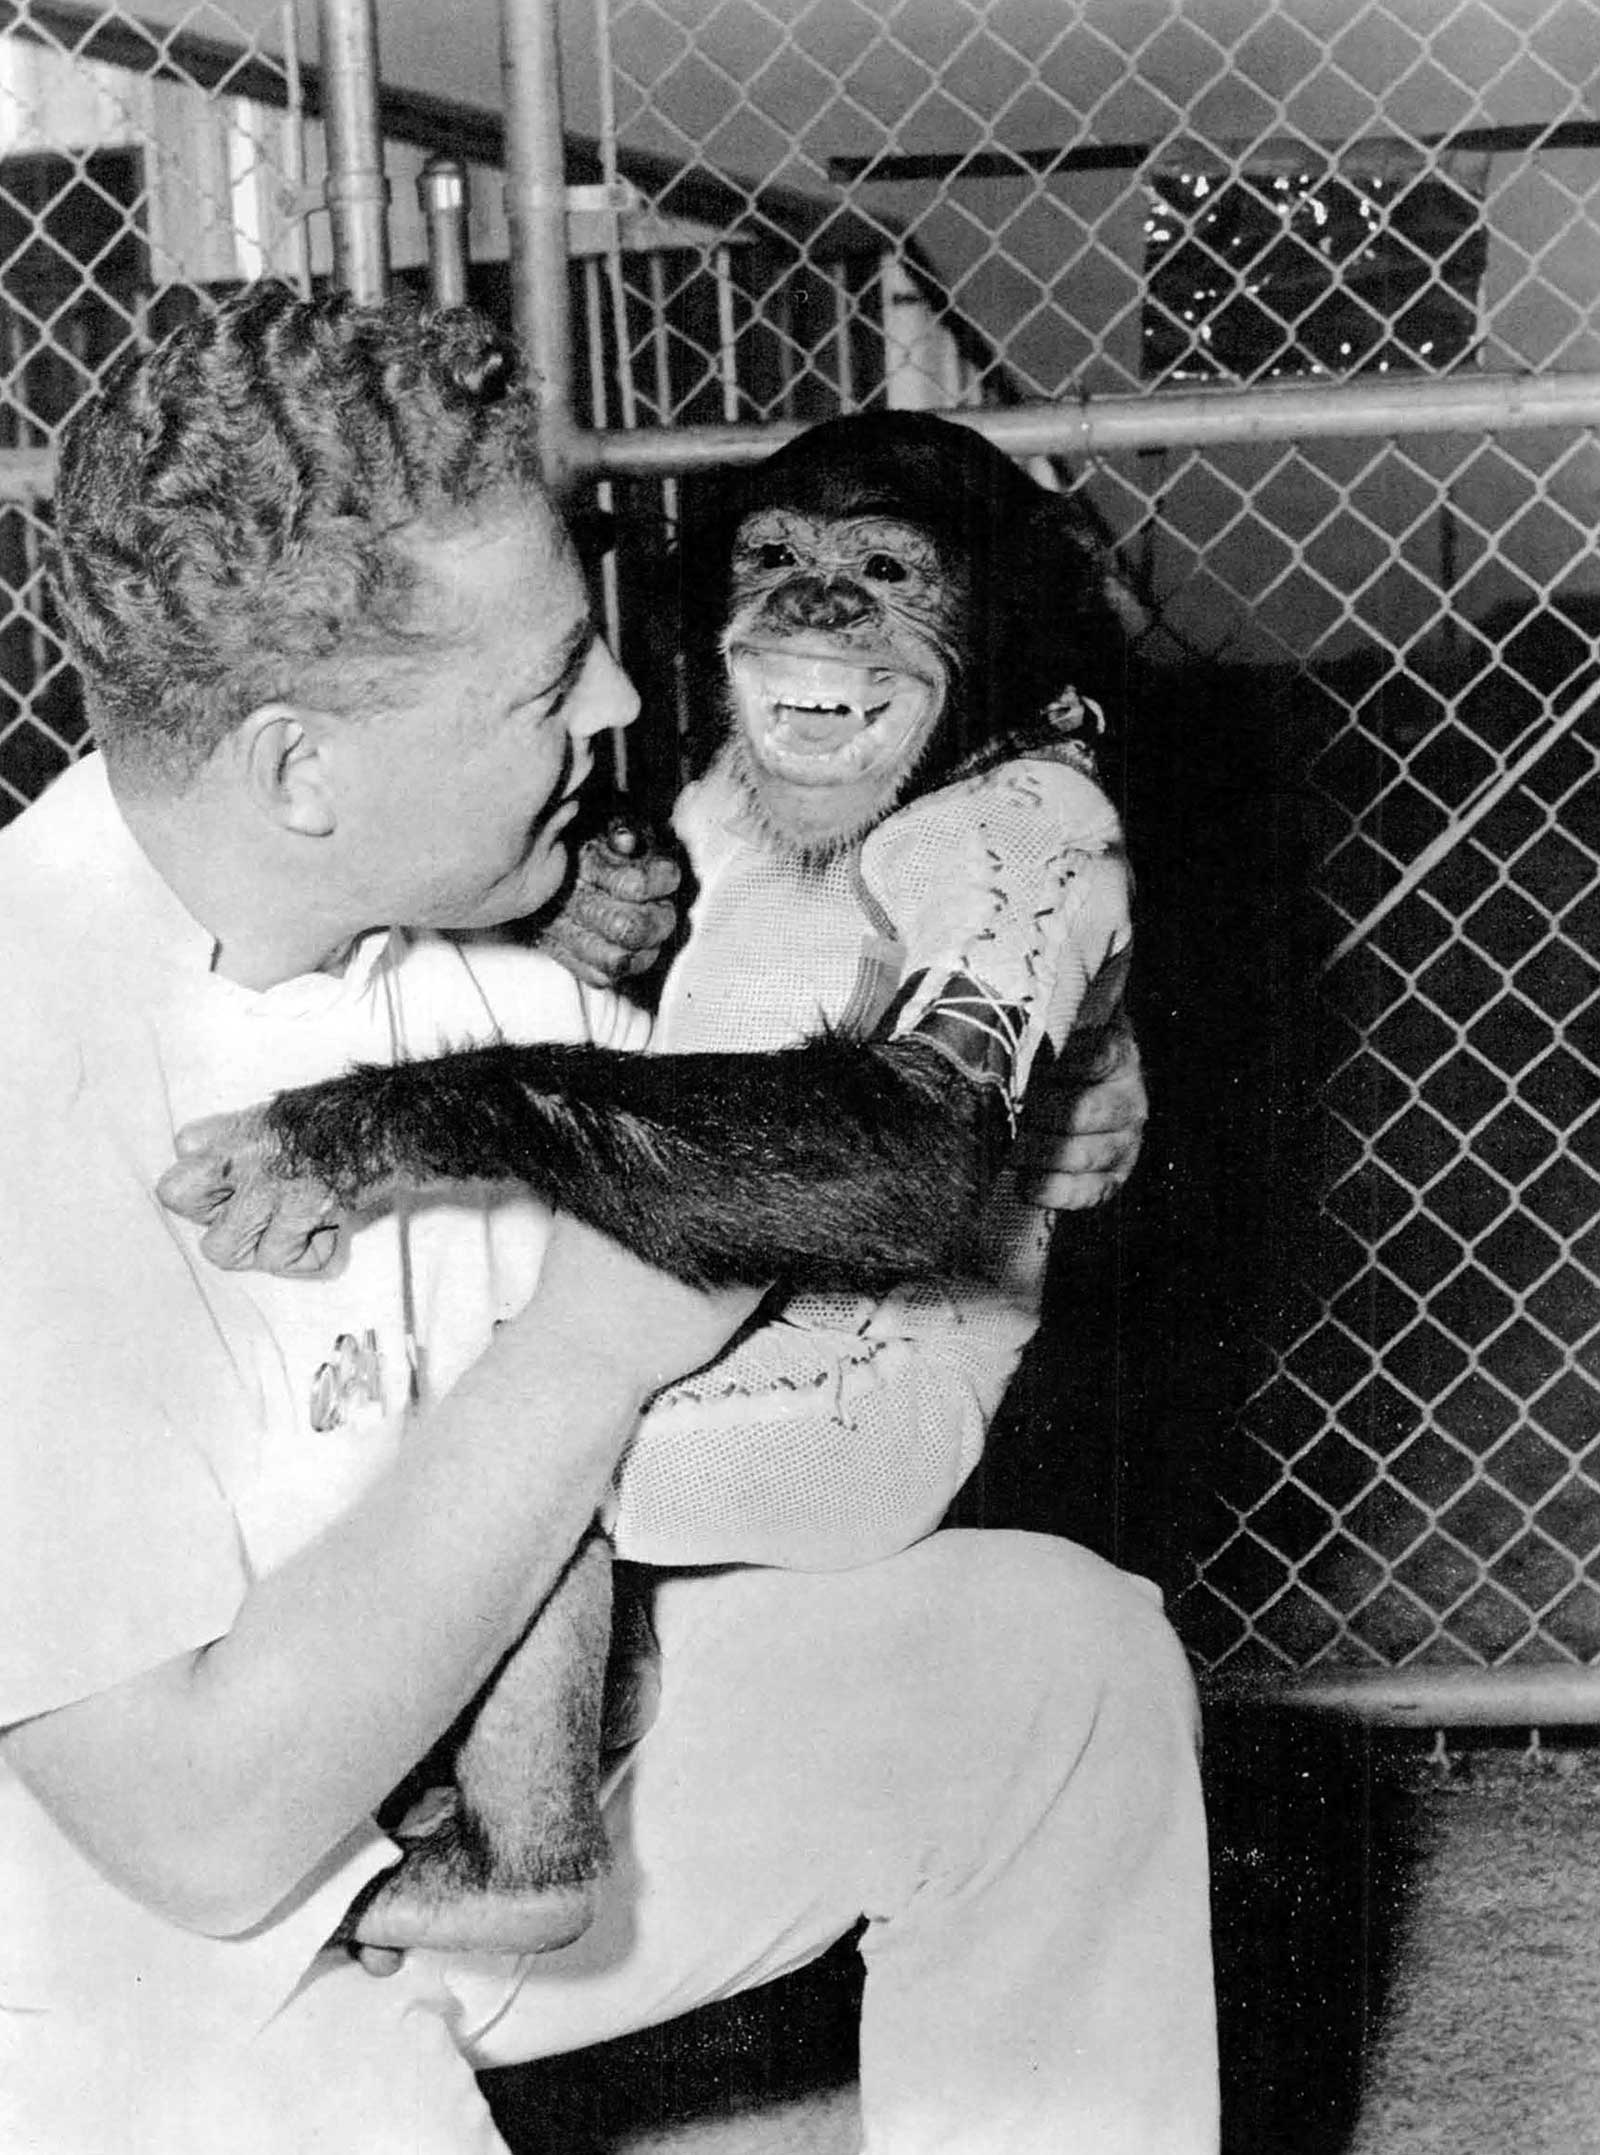
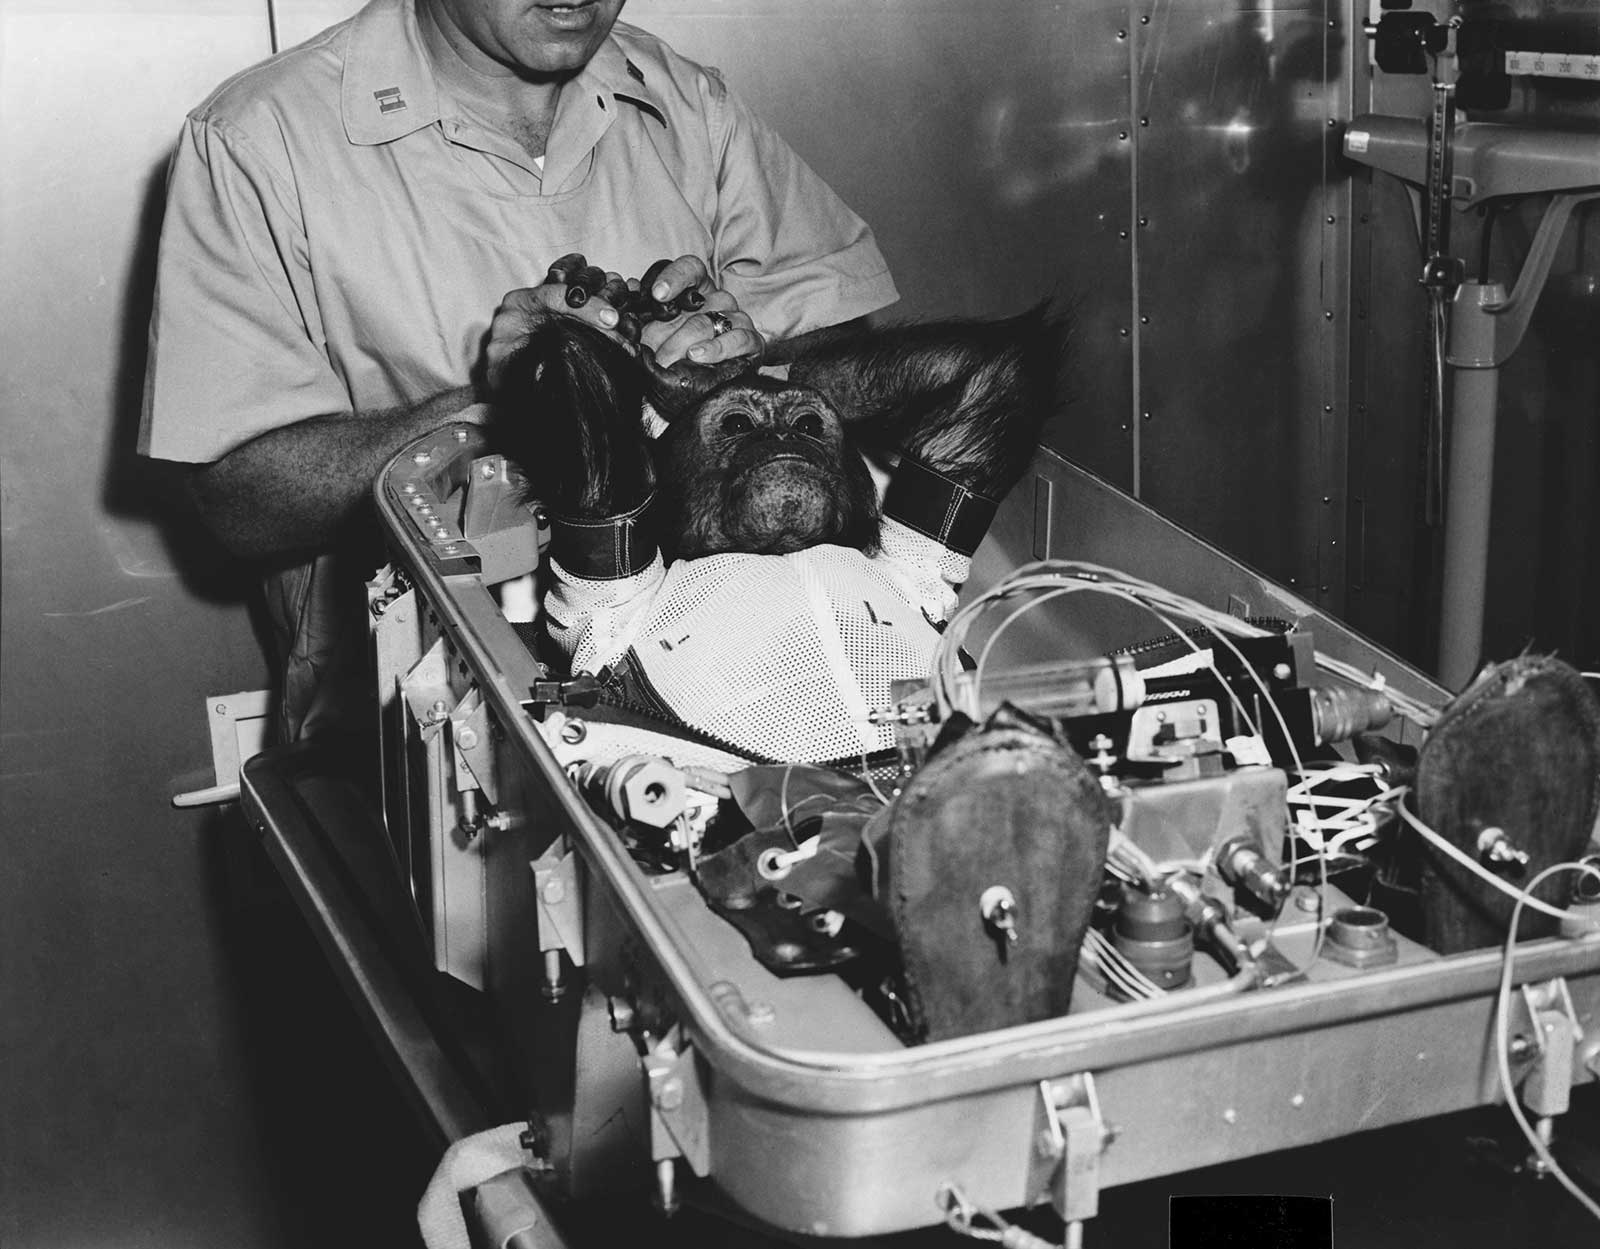
- Figure 45: Chimpanzee, "Ham," flown in Mercury-Redstone 2 suborbital flight
- Figure 46: Impact attenuation
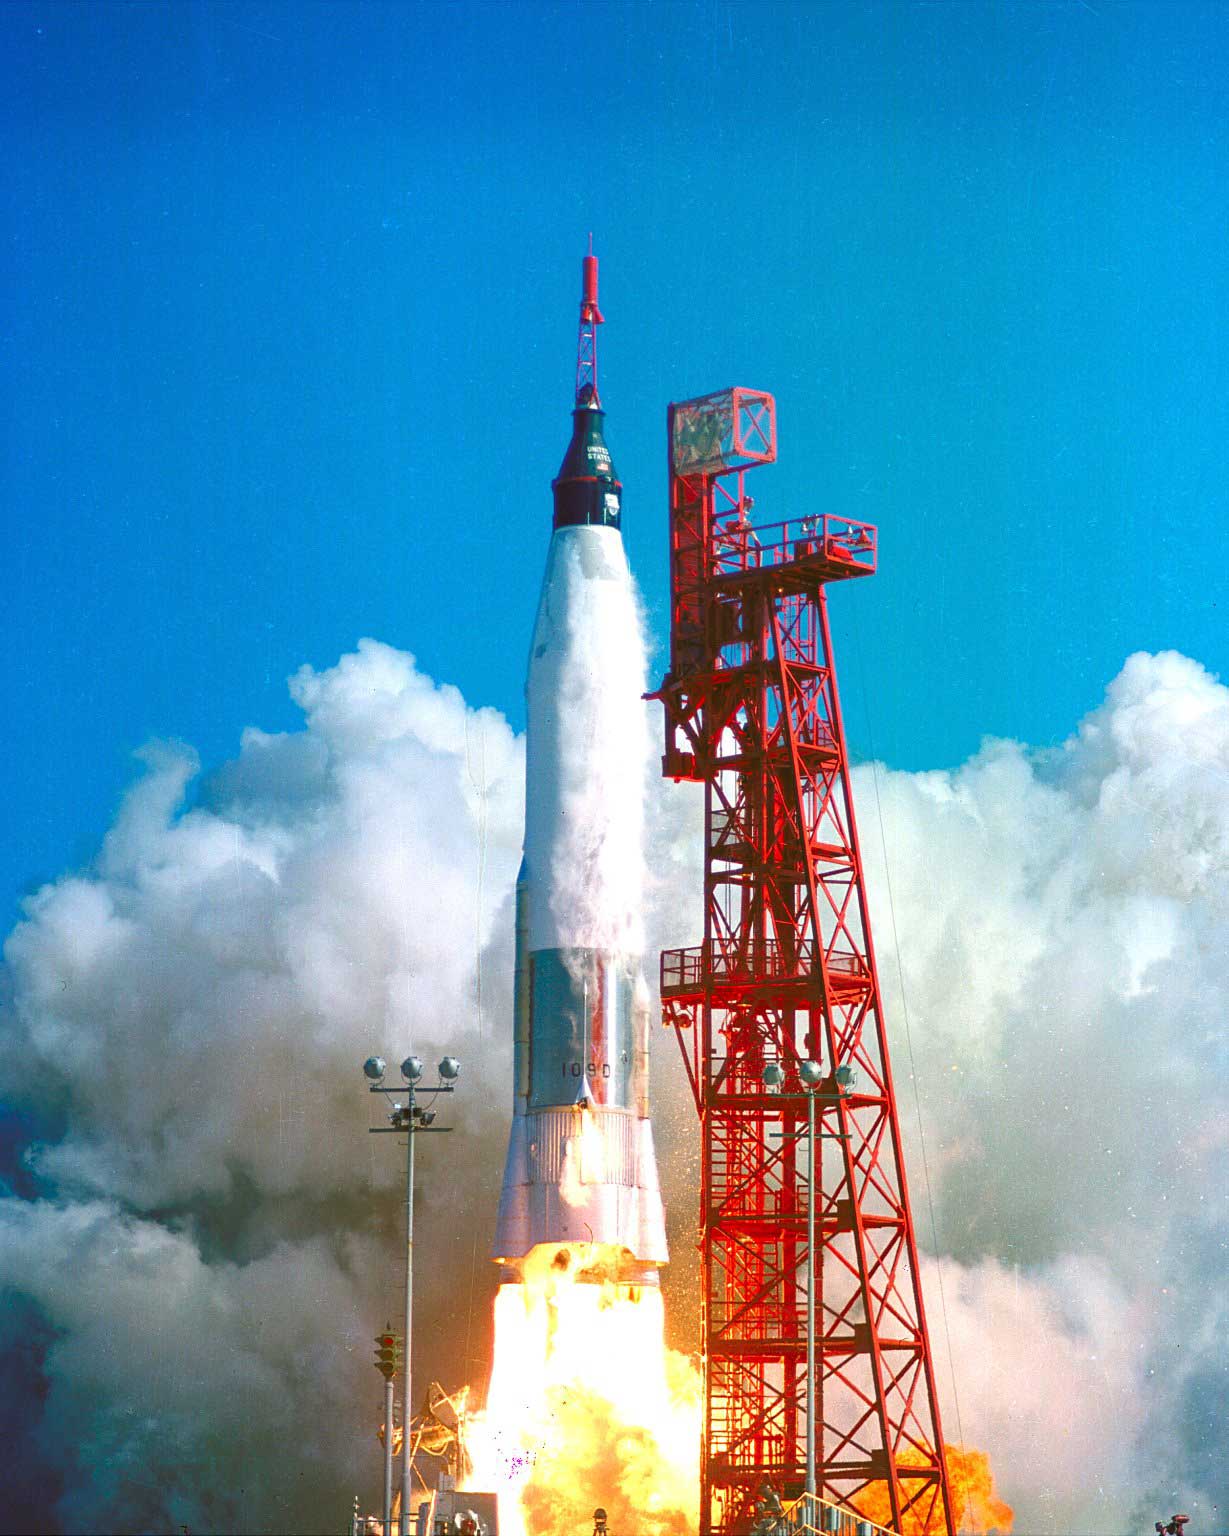
- Figure 47: Atlas launch vehicle 100-D delivered to Cape Canaveral for Mercury-Atlas 3 flight
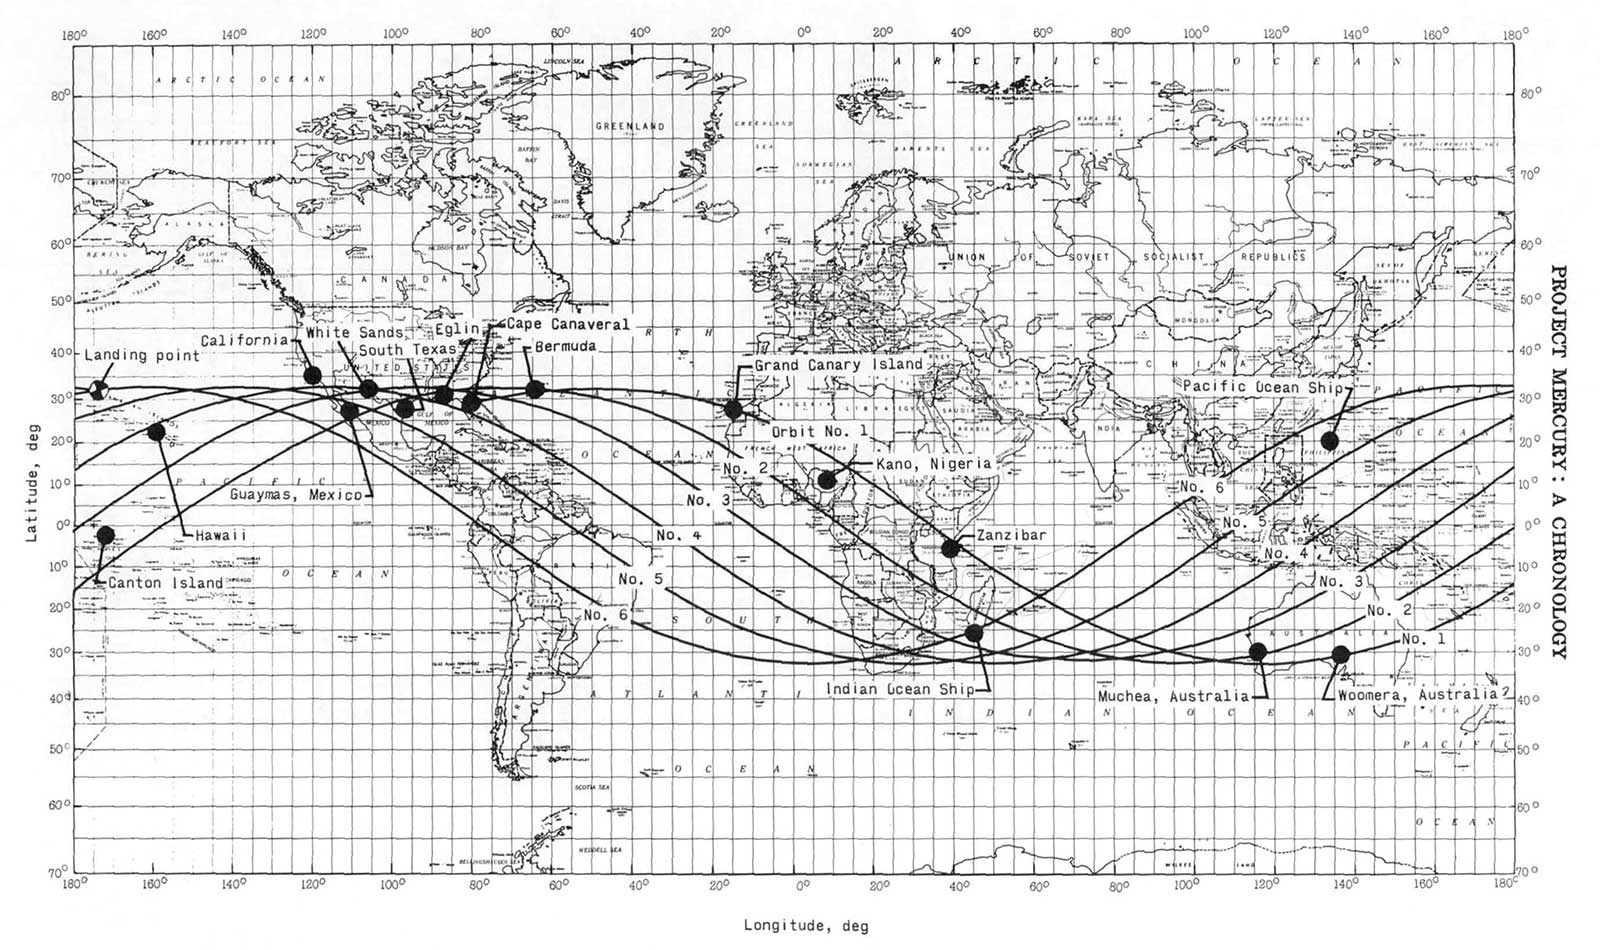
- Figure 48: MA-8 orbital track: Mercury worldwide tracking network
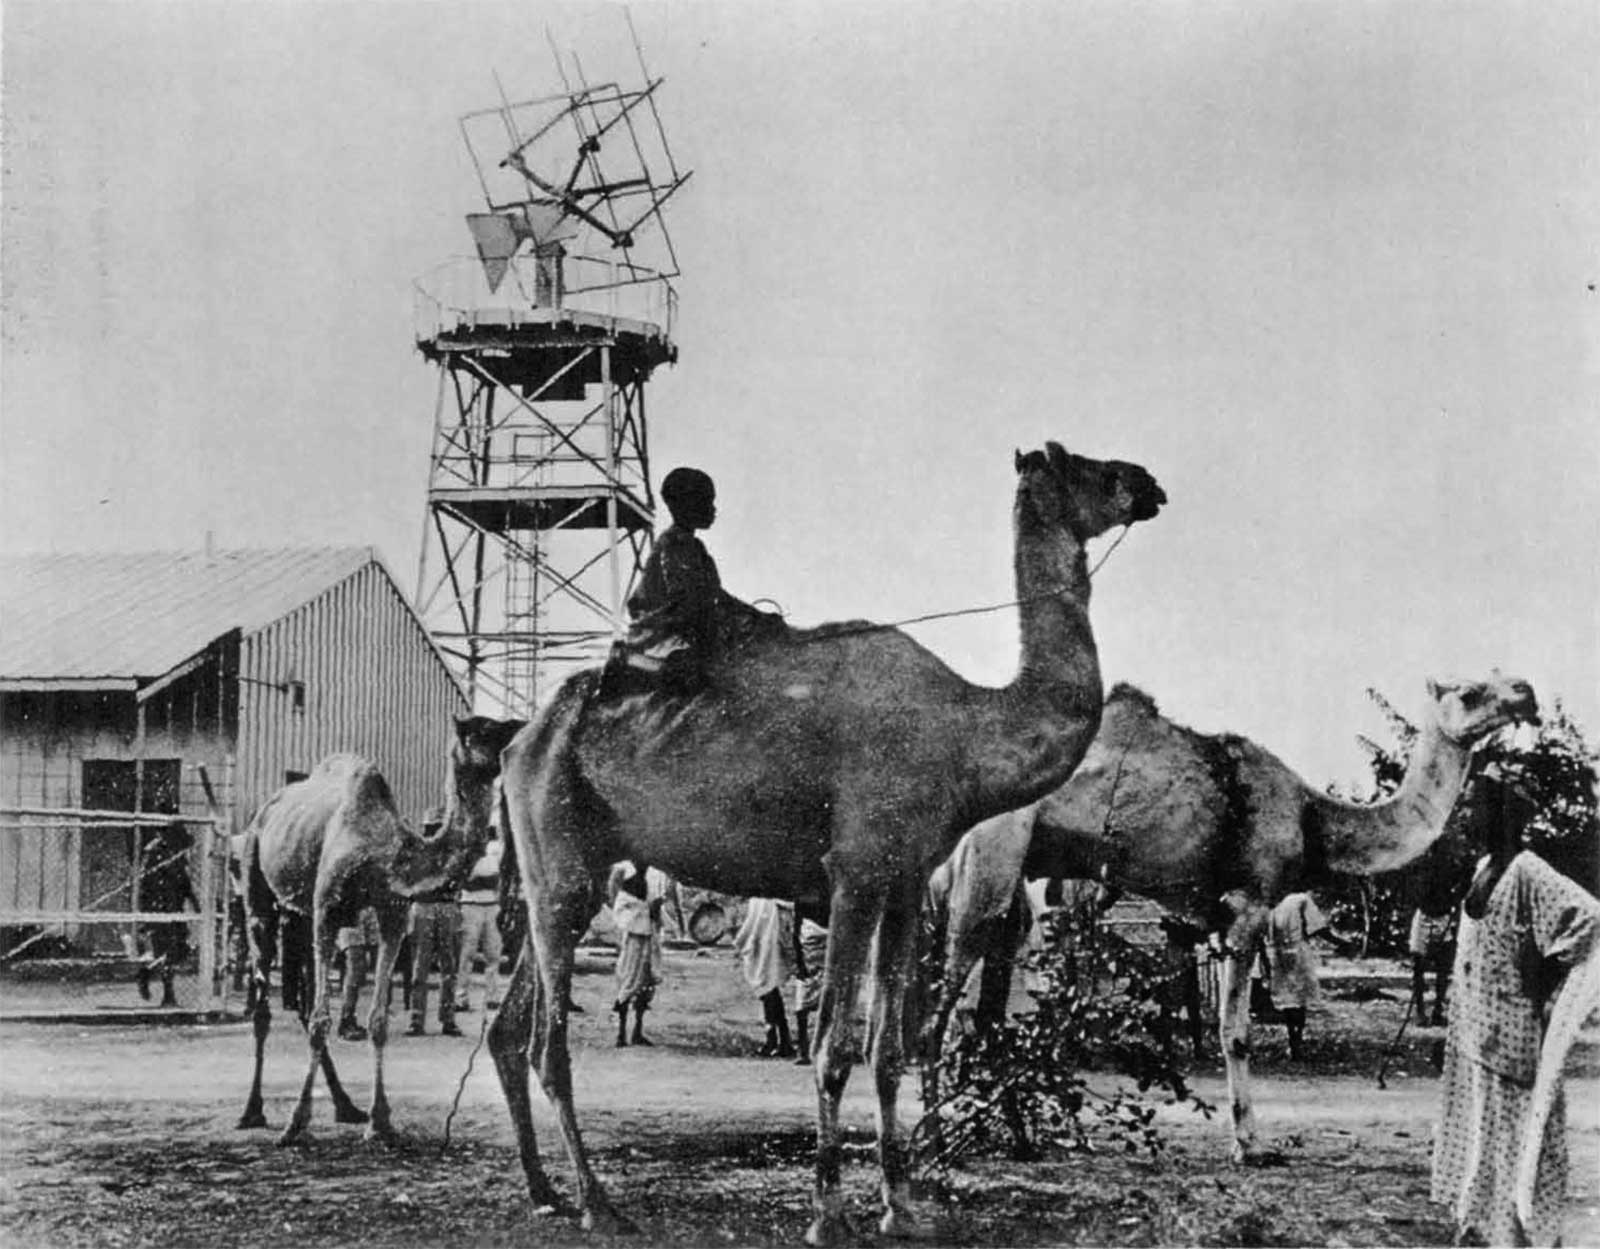
- Figure 49: Tracking site at Kano, Nigeria, Africa
- Figure 50: Scout launch vehicle proposed to test Mercury worldwide tracking network
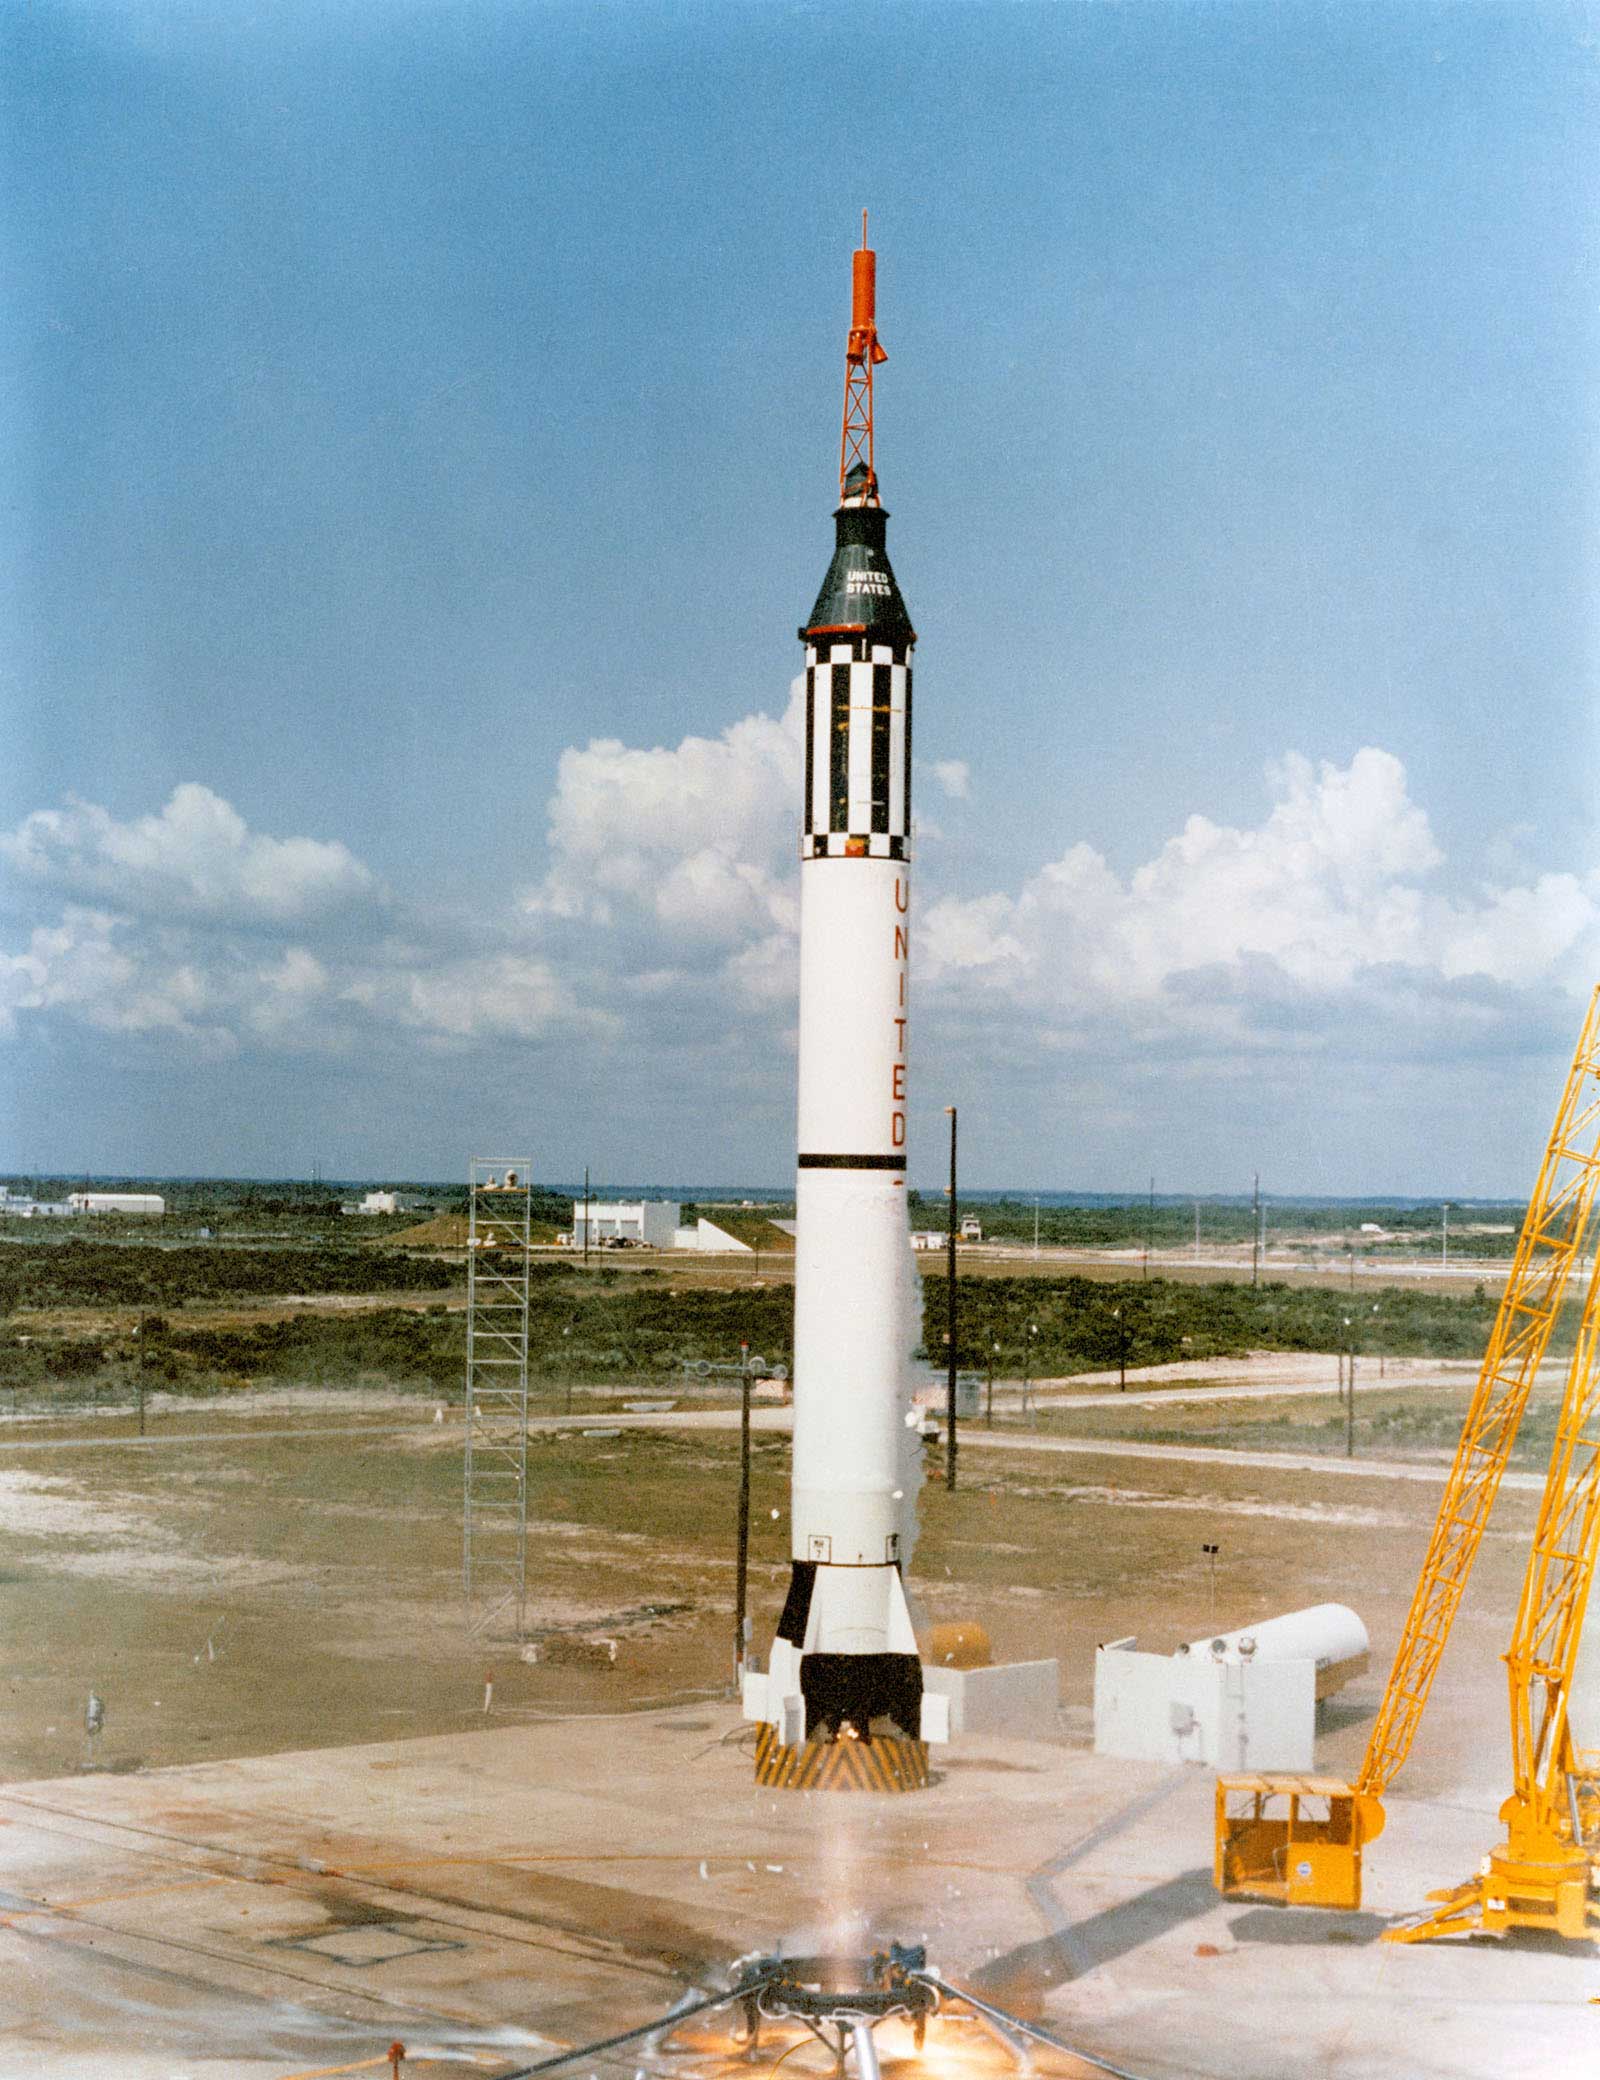
- Figure 51: Mercury-Redstone 3: First manned suborbital space flight
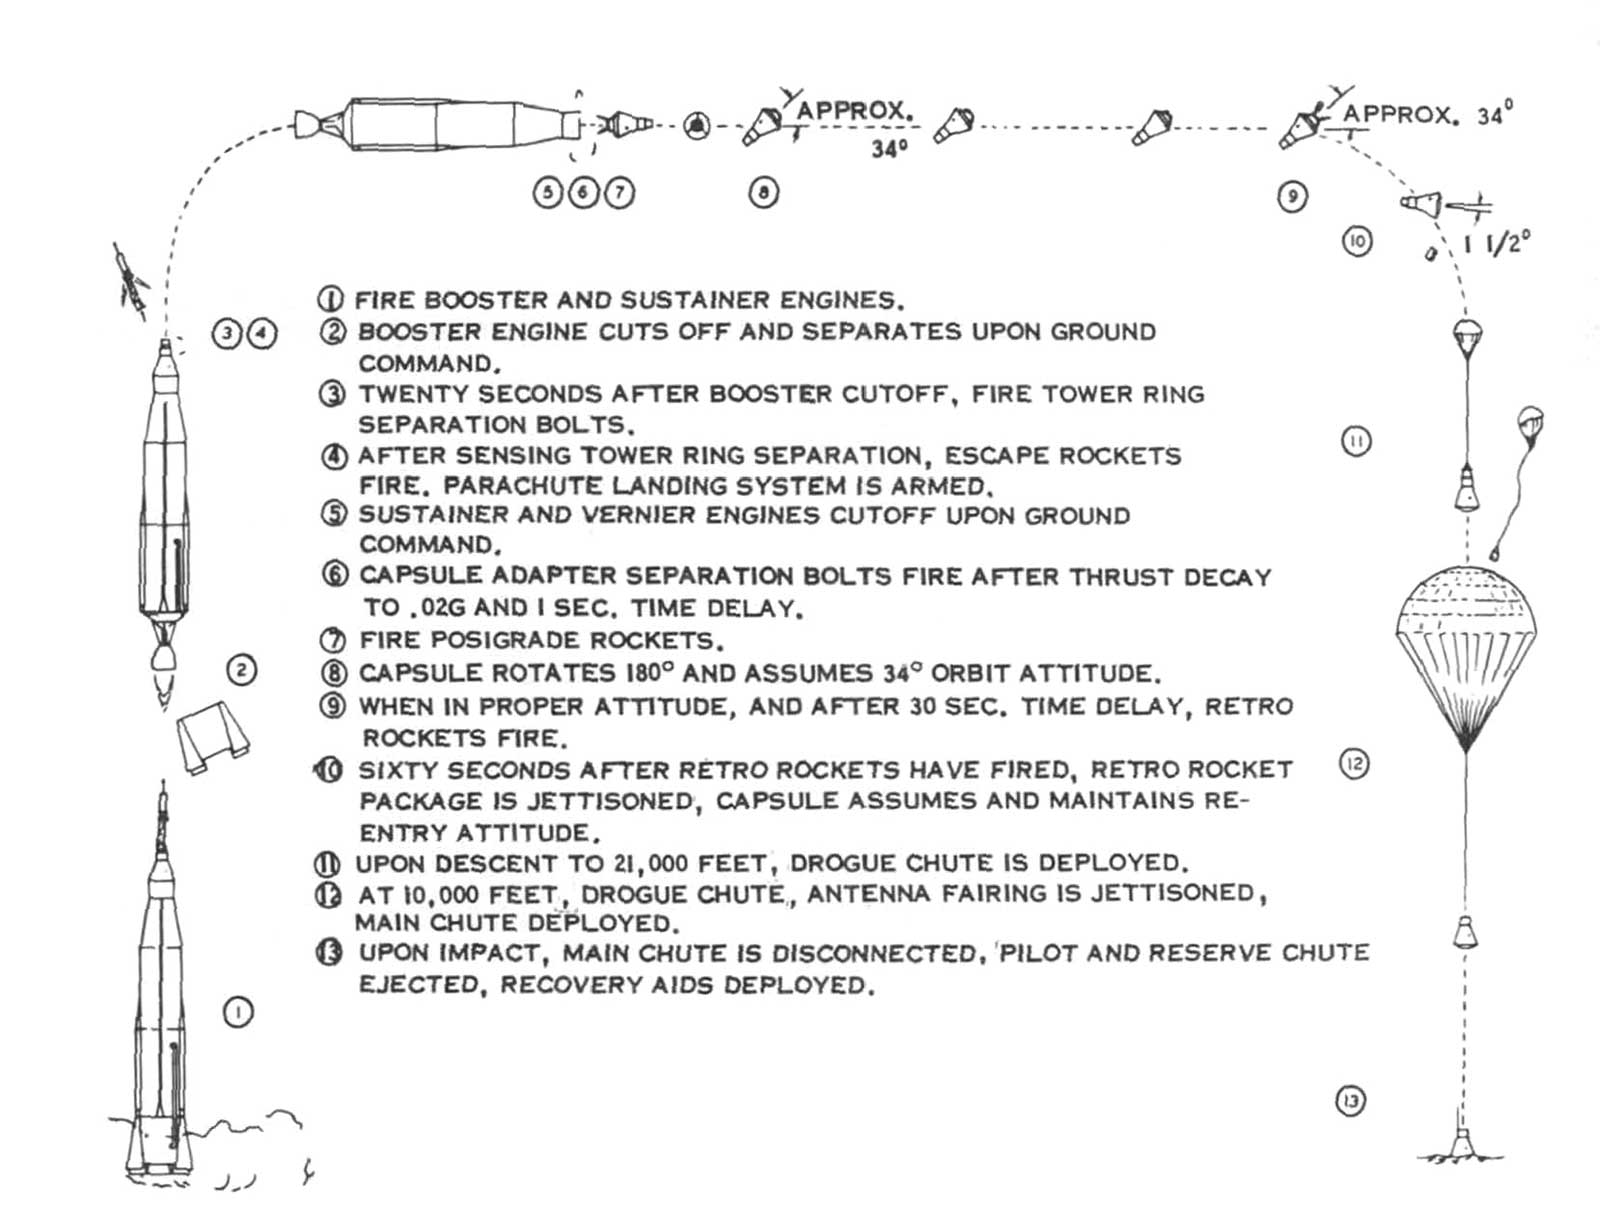
- Figure 52: Mercury-Redstone 3 flight profile
- Figure 53: Freedom 7 returned by helicopter to USS Lake Champlain
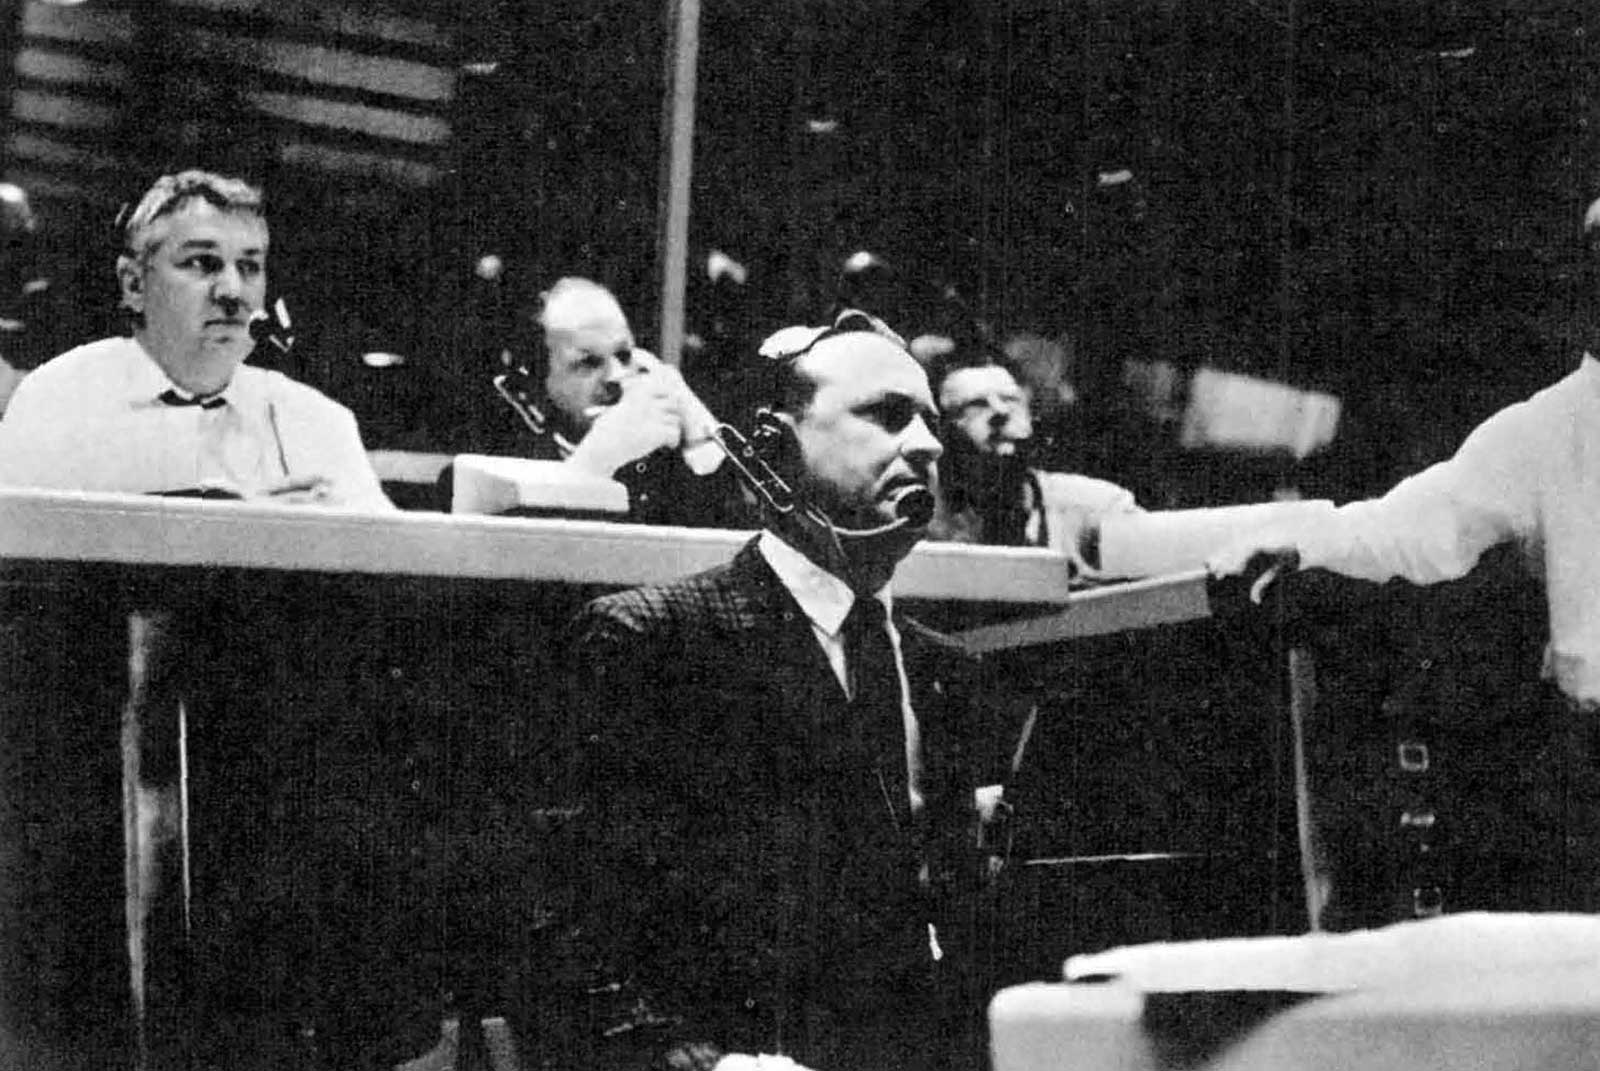
- Figure 54: Key personnel in Mercury Control Center at Cape Canaveral
- Figure 55: Normal Mercury-Atlas orbital mission sequence
- Figure 56: Auxiliary flotation collar
- Figure 57: Production of Atlas launch vehicles at Convair Astronautics plant
- Figure 58: Chimpanzee, "Enos," flown in Mercury-Atlas 5 two-orbit mission
- Figure 59: Scuba divers prepare for recovery of Mercury spacecraft
- Figure 60: Mercury-Atlas 6: First manned (Glenn) orbital flight
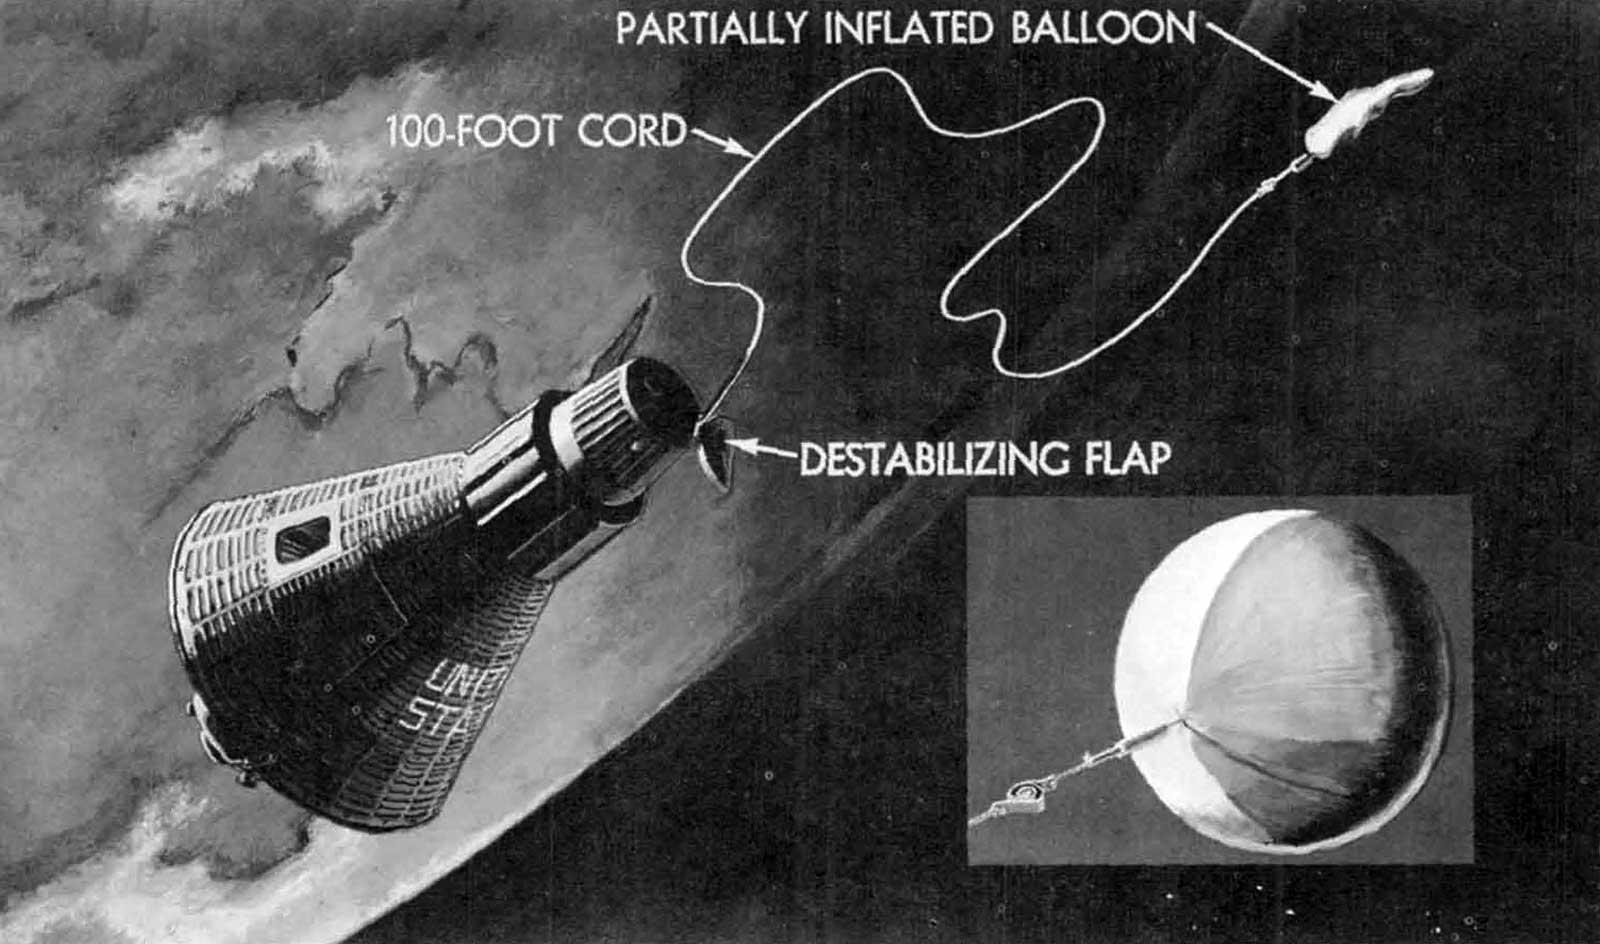
- Figure 61: Balloon experiment
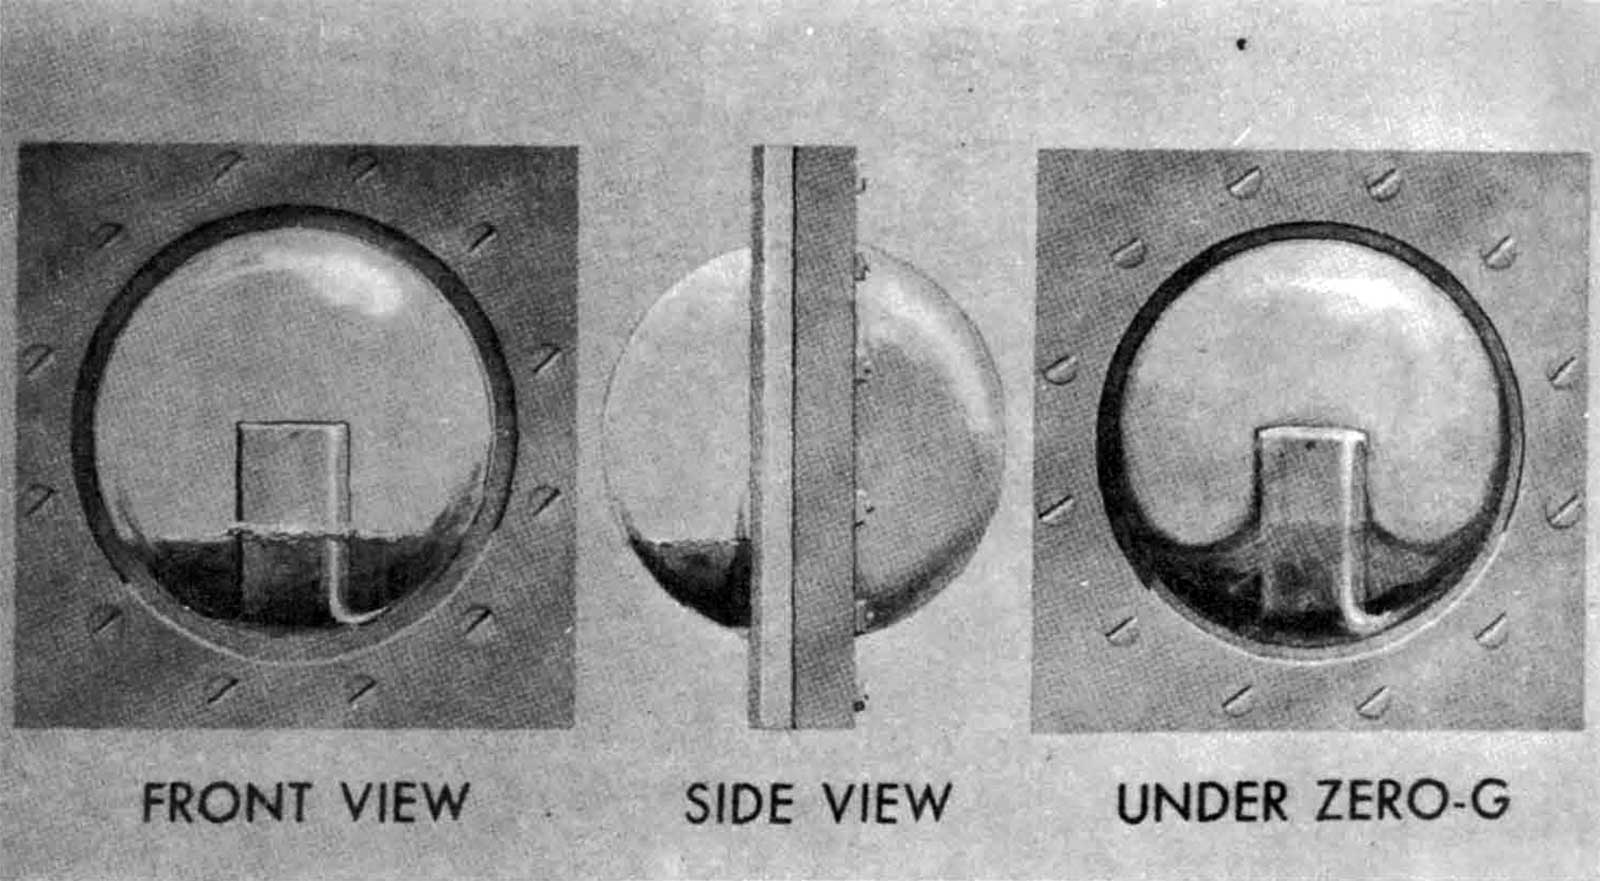
- Figure 62: Zero-gravity experiment
- Figure 63: Astronaut couch modifications
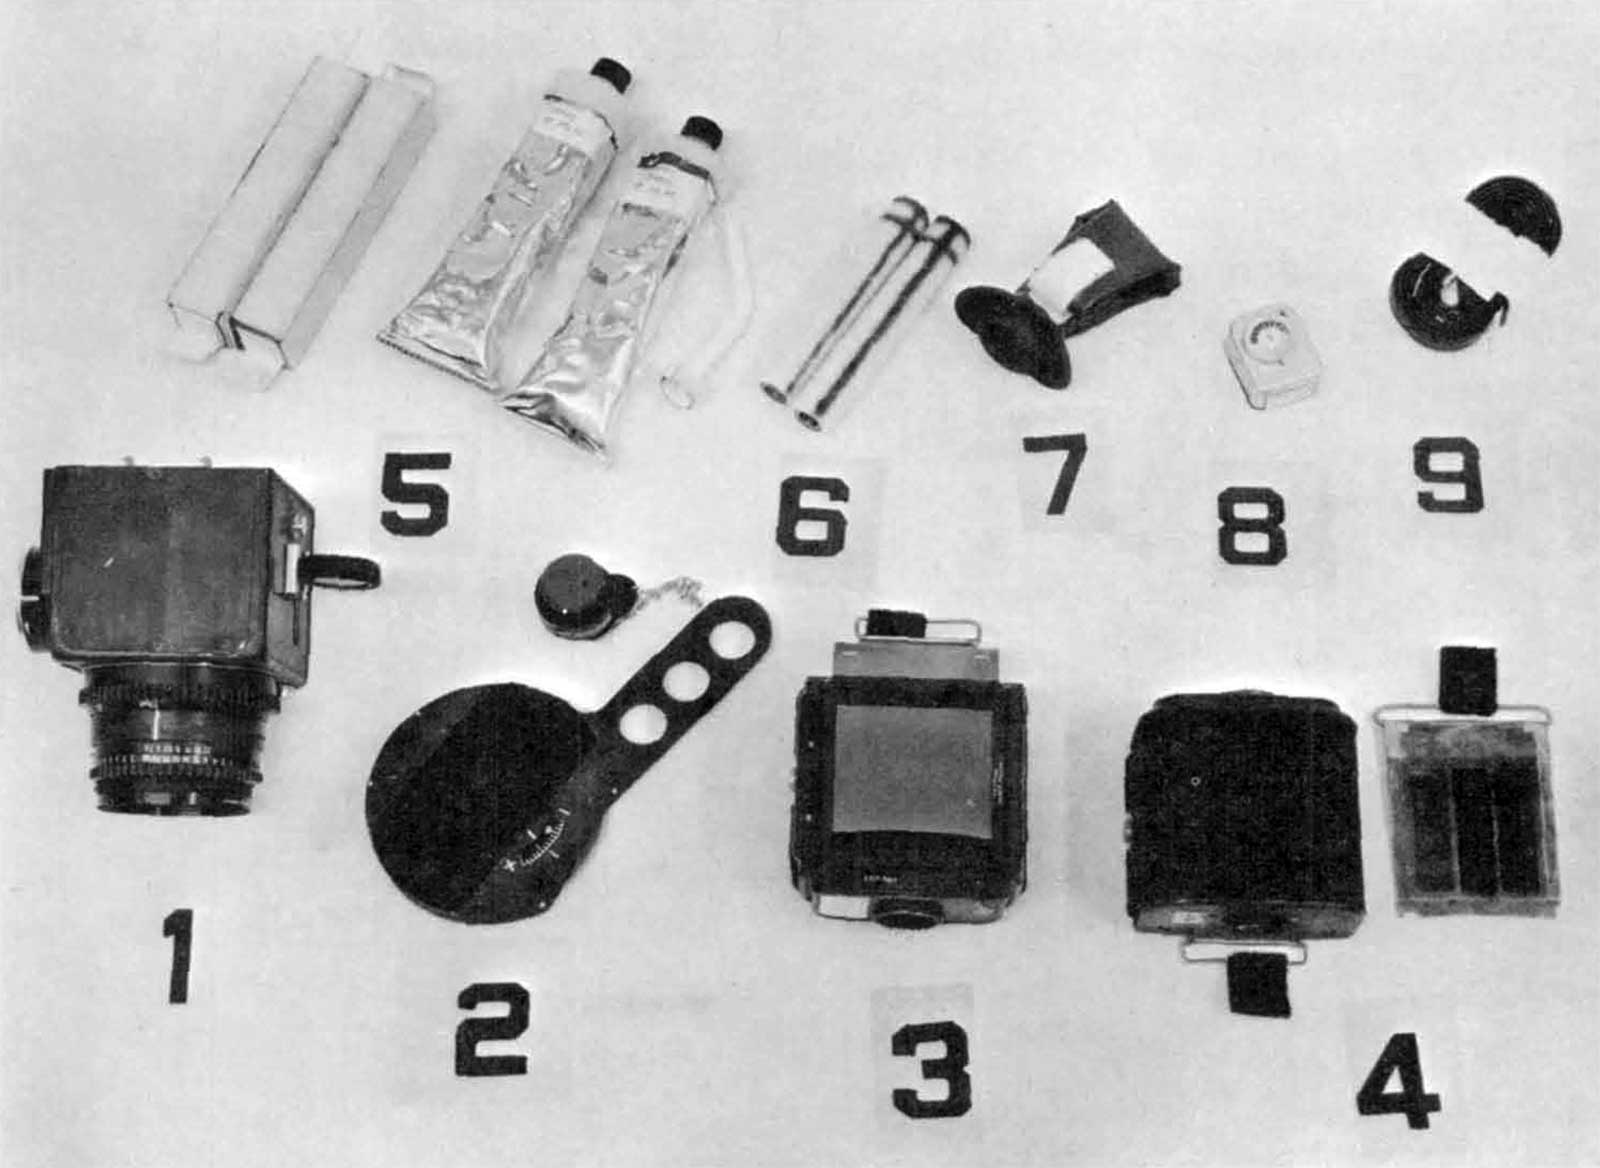
- Figure 64: MA-8 ditty bag contents
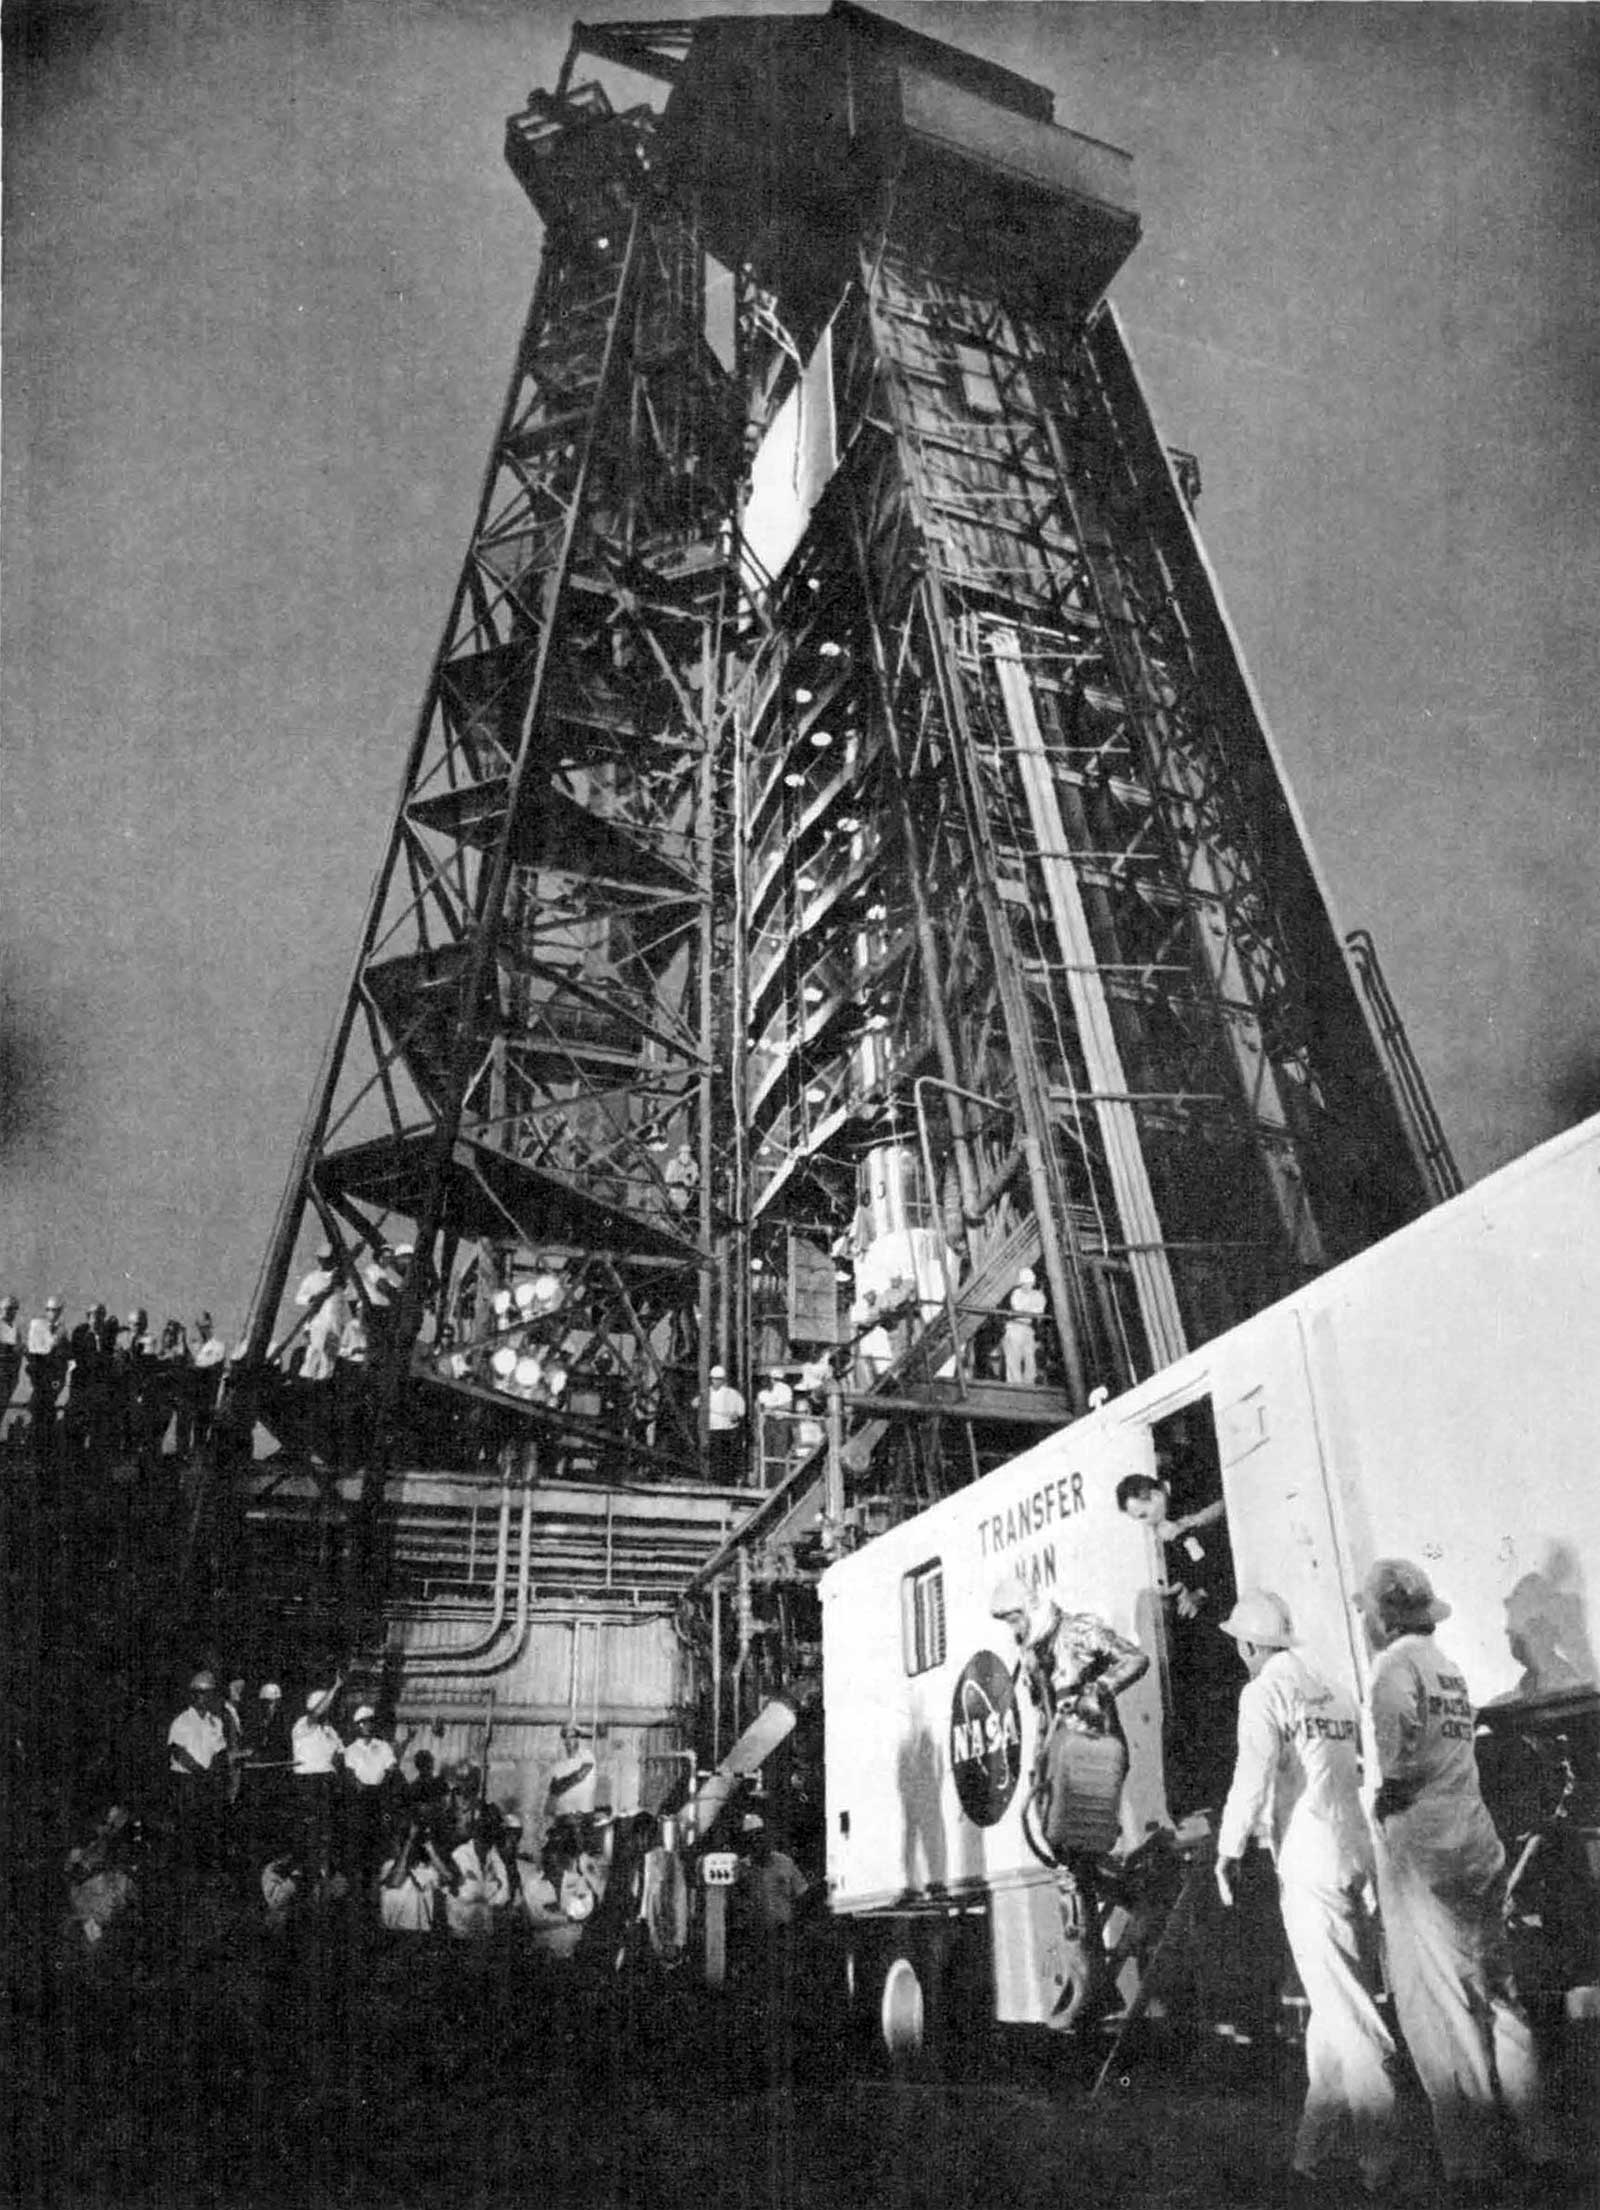
- Figure 65: Astronaut departs transfer van for Mercury-Atlas gantry
- Figure 66: Atlas launch vehicle 130-D (MA-9) undergoing inspection at Cape Canaveral
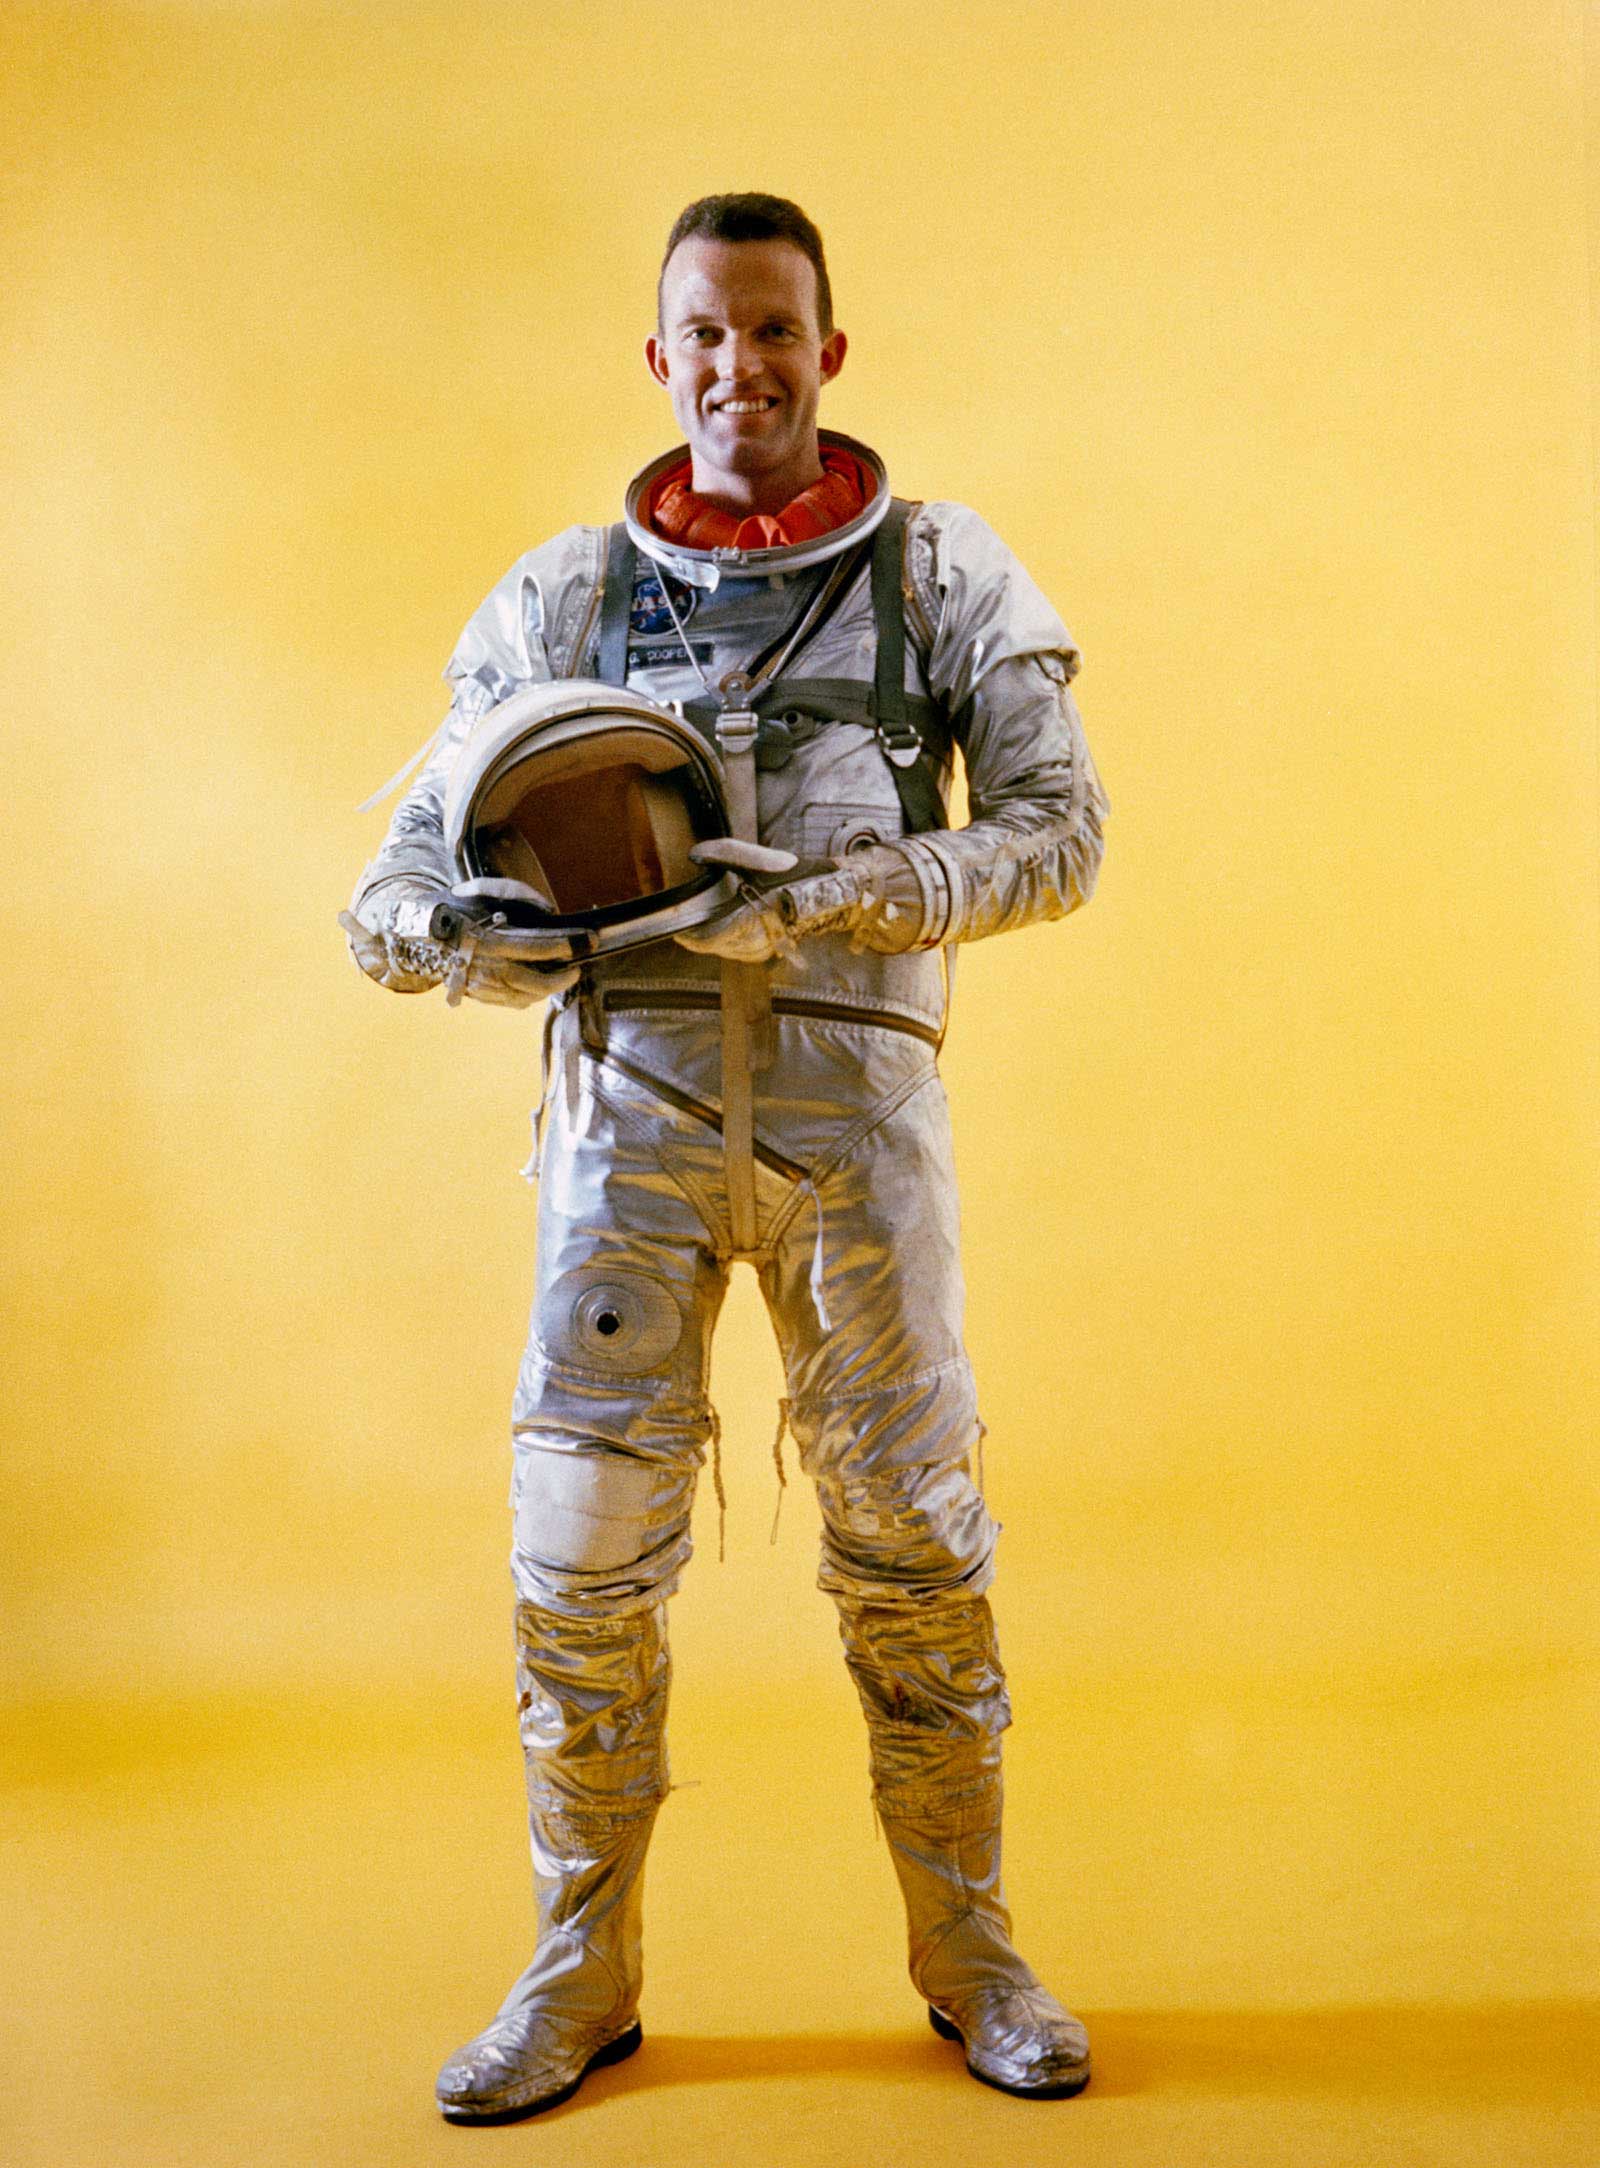
- Figure 67: Flight pressure suit of astronaut L. Gordon Cooper used in MA-9, 22-obit mission
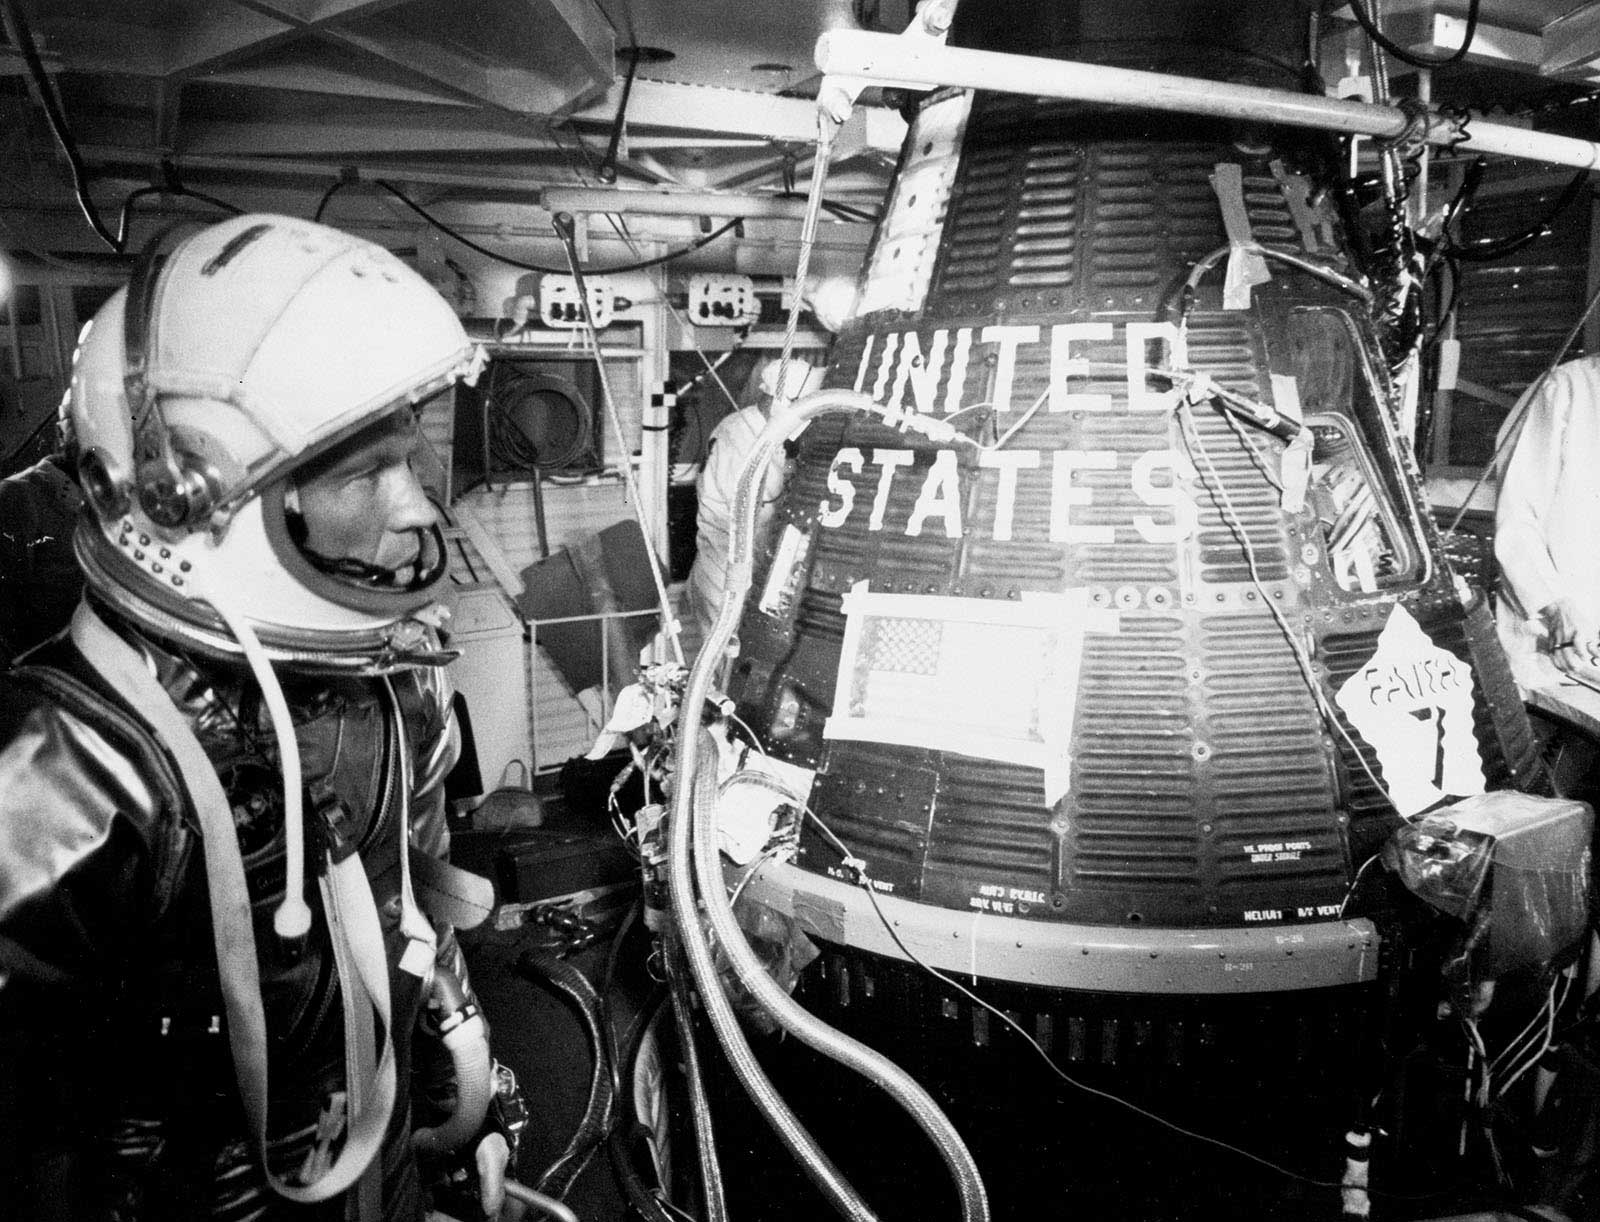
- Figure 68: Astronaut L. Gordon Cooper prepares for insertion in Faith 7 (MA-9)